Unload firearm, Activation, Laser sight in – LaserLyte CK-AMF9 - Large Rez Size User Manual
Page 2: Kel-tec, Ruger, 9mm side mount laser
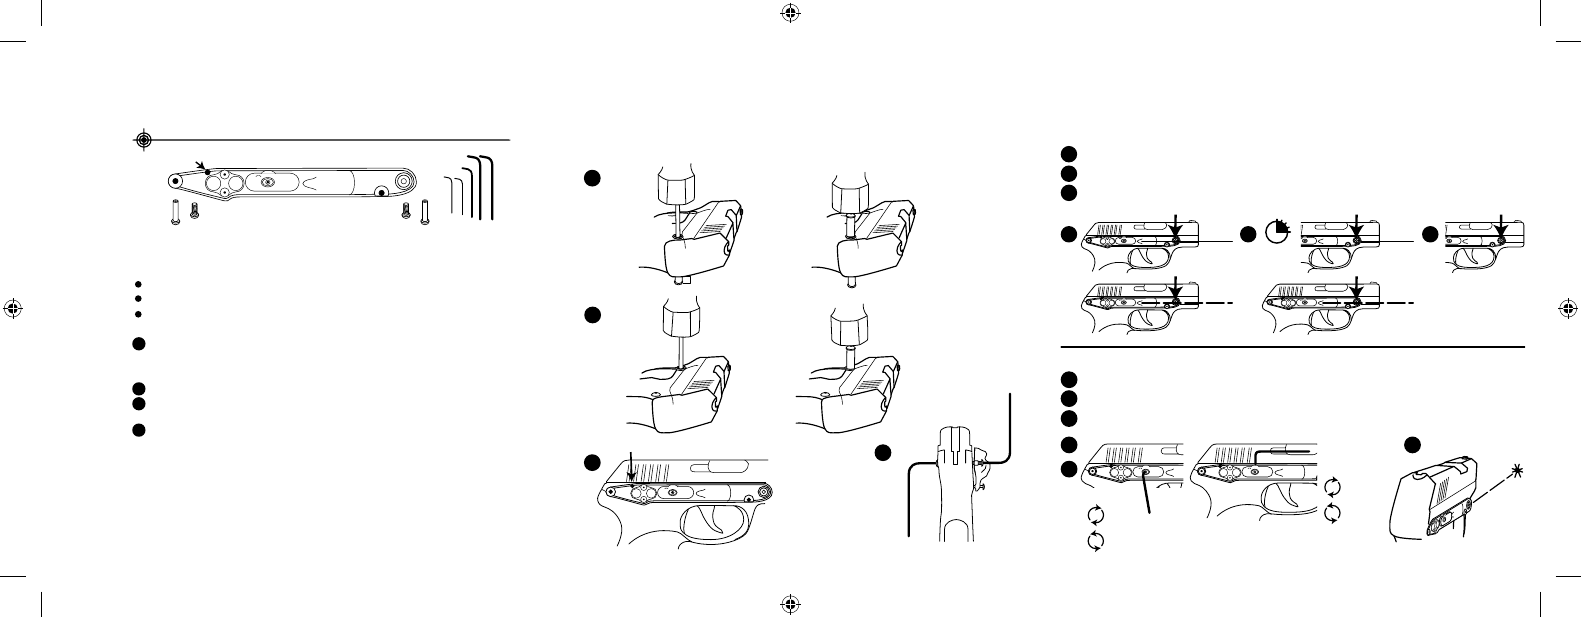
Unload firearm.
1
3
4
#1
2
#2
L
ASER
L
YTE
Attach danger label to side of gun near laser with
arrow pointing toward front sight.
1/4”
#1
#2
INTERNAL LOCK HOLE
5 sec.
1
1
2
3
2
3
Activation:
Press once turns laser on: constant or pulse
Press and hold for 5 seconds to change mode.
Second press turns laser off.
1
1
3
2
2
3
Laser Sight In:
Use the provided .035 Allen wrench to adjust the sight.
Always end adjustments on a clockwise turn.
Make final adjustments at shooting range.
Moving
Laser
Dot
L
ASER
L
YTE
or
LASERLYTE
ON/OFF
LASERLYTE
or
LASERLYTE
LASERLYTE
LASERLYTE
L
ASER
L
YTE
L
ASER
L
YTE
right
left
Windage
up
down
Elevation
Kel-Tec
®
/Ruger
®
9mm Side Mount Laser
1
2
3
4
CK-AMF9
Installation:
L
ASER
L
YTE
UNLOAD FIREARM.
Place on a raised surface.
Attach danger label to side of gun near laser with arrow
pointing toward front sight.
Using punch and small hammer, drift pin #1 out no more
than 1/4”. Immediately insert LaserLyte
®
mounting pin and
tap into place, completely replacing pin #1.
Follow the steps for pin #2 exactly as pin #1
Place laser on gun, align holes and insert screws.
Do not block internal lock hole (N/A for Keltec
®
).
Use both .062 Allen wrenches to tighten screws until snug.
Do not over tighten! Tighten down the battery cover, and
check periodically.
Read instructions completely before installing your laser. Failure to do so may result in
damage to your laser or firearm.
The two LaserLyte
®
frame pin screws are pre-loaded with a self-locking nylon patch.
If you un-install the CK-AMF9, re-apply a self-locking material such as Lock-tite
®
Threadlocker Blue 242
®
to the LaserLyte
®
frame pin screws before re-installing the laser.
INTERNAL LOCK HOLE
CK-AMF9 pdf 1.pdf 1 4/24/12 1:20 PM
CK_AMF 9.indd 2
5/16/12 11:36 AM