Oven light, Storage – La Cornue CornuFé 44 User Manual
Page 13
11
ArtNo.320-0023
Oven light USA
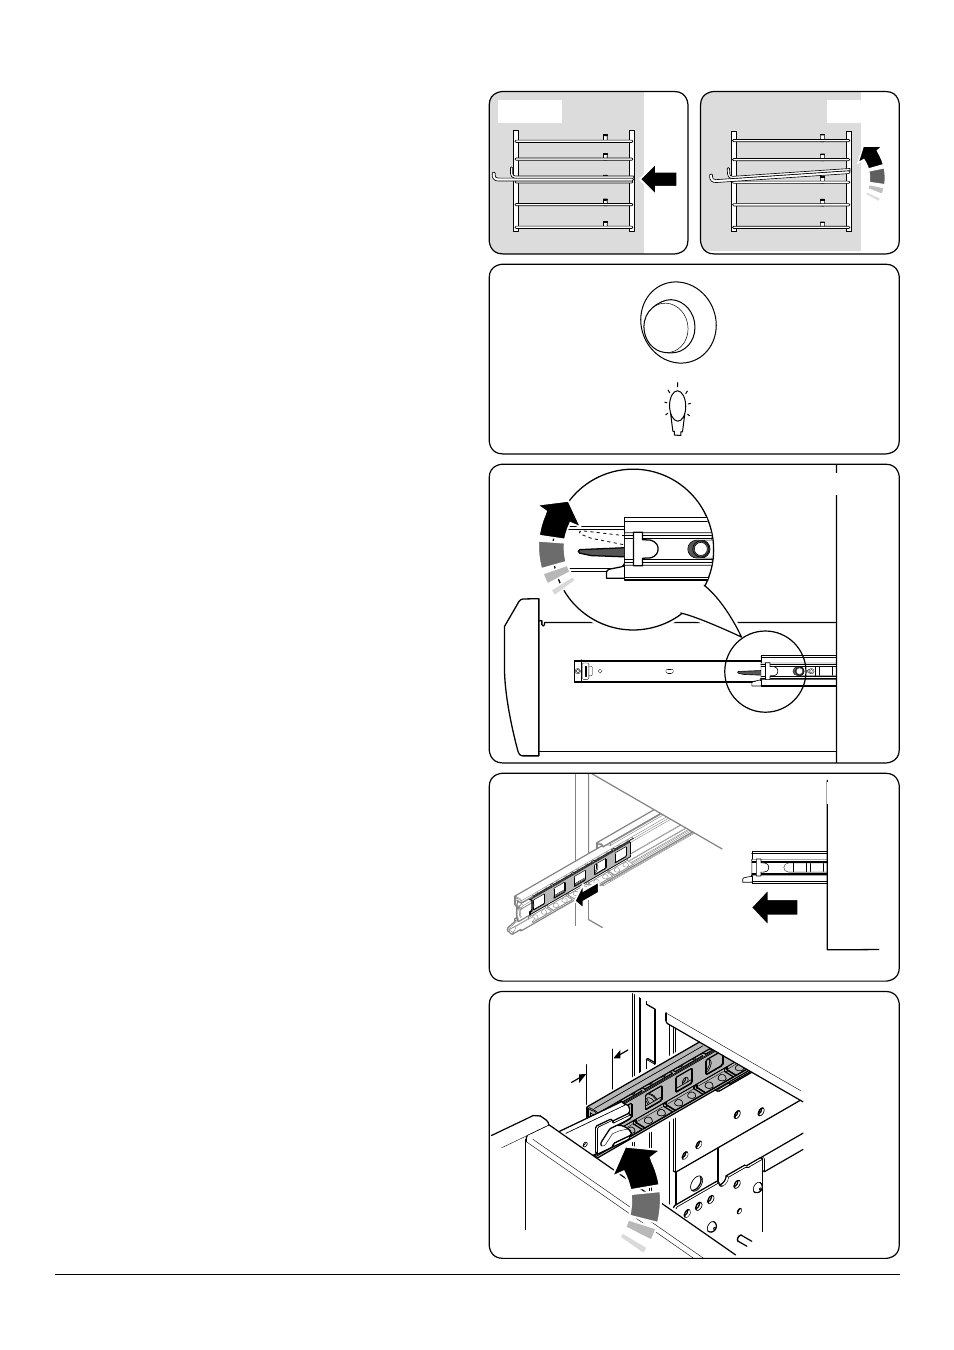
To Remove and Refit the Racks
The rack has a small kink on either side (Fig.2-21). To remove
the rack, line these up with the stops in the rack support
(Fig.2-22). Lift the rack upwards so that it will pass over the
rack stop and then pull it forwards (Fig.2-23).
Refit in the reverse order, making sure to push it fully back.
Oven Light
Press the appropriate button to turn on the oven lights.
If one of the oven lights fail, turn off the range circuit breaker
before you change the bulb. See the ‘Troubleshooting’ section
for details on how to change an oven light bulb (Fig.2-24).
Storage
The bottom drawer is for storing oven trays and other
cooking utensils.
It can get very warm, don’t store anything in it, which may
melt or catch fire. Never store flammable materials in the
drawer. This includes paper, plastic and cloth items, such as
cookbooks, plastic ware and towels, as well as flammable
liquids. Do not store explosives, such as aerosol cans, on or
near the appliance.
Flammable materials may explode and result in fire or
property damage.
The drawer can be removed completely for cleaning, etc.
To Remove the Storage Drawer
Pull the drawer right out.
Push the ends of the plastic clips – down of the left-hand side,
up on the right-hand side – to release the catches holding the
drawer to the side rails (Fig.2-25). At the same time pull the
drawer forwards and away from the side rails.
For safety reasons slide the inner side rails back into the
cavity.
To Fit the Storage Drawer
Slide the inner side rails out until fully extended (Fig.2-26).
Lift the drawer at its sides and locate one of the drawer rails
(approximately 15 mm) onto an inner side rail (Fig.2-27).
Rotate the drawer to locate the remaining drawer rail onto
the opposite inner side rail.
Carefully slide the drawer back into the cavity. Some
resistance will be felt as the drawer rails locate fully onto the
inner side rails.
Fig.2-25
Make sure the inner
rail is forwards
Fig.2-26
Fig.2-22
Fig.2-23
Fig.2-24
15 mm
Approx.
Fig.2-27