Service of power components, Disassembly, Assembly – E-flite UMX MiG 15 DF BNF User Manual
Page 13
13
EN
Service of Power Components
Disassembly
CAUTION: DO NOT handle the rotor or motor
while the fl ight battery is connected. Personal
injury could result
.
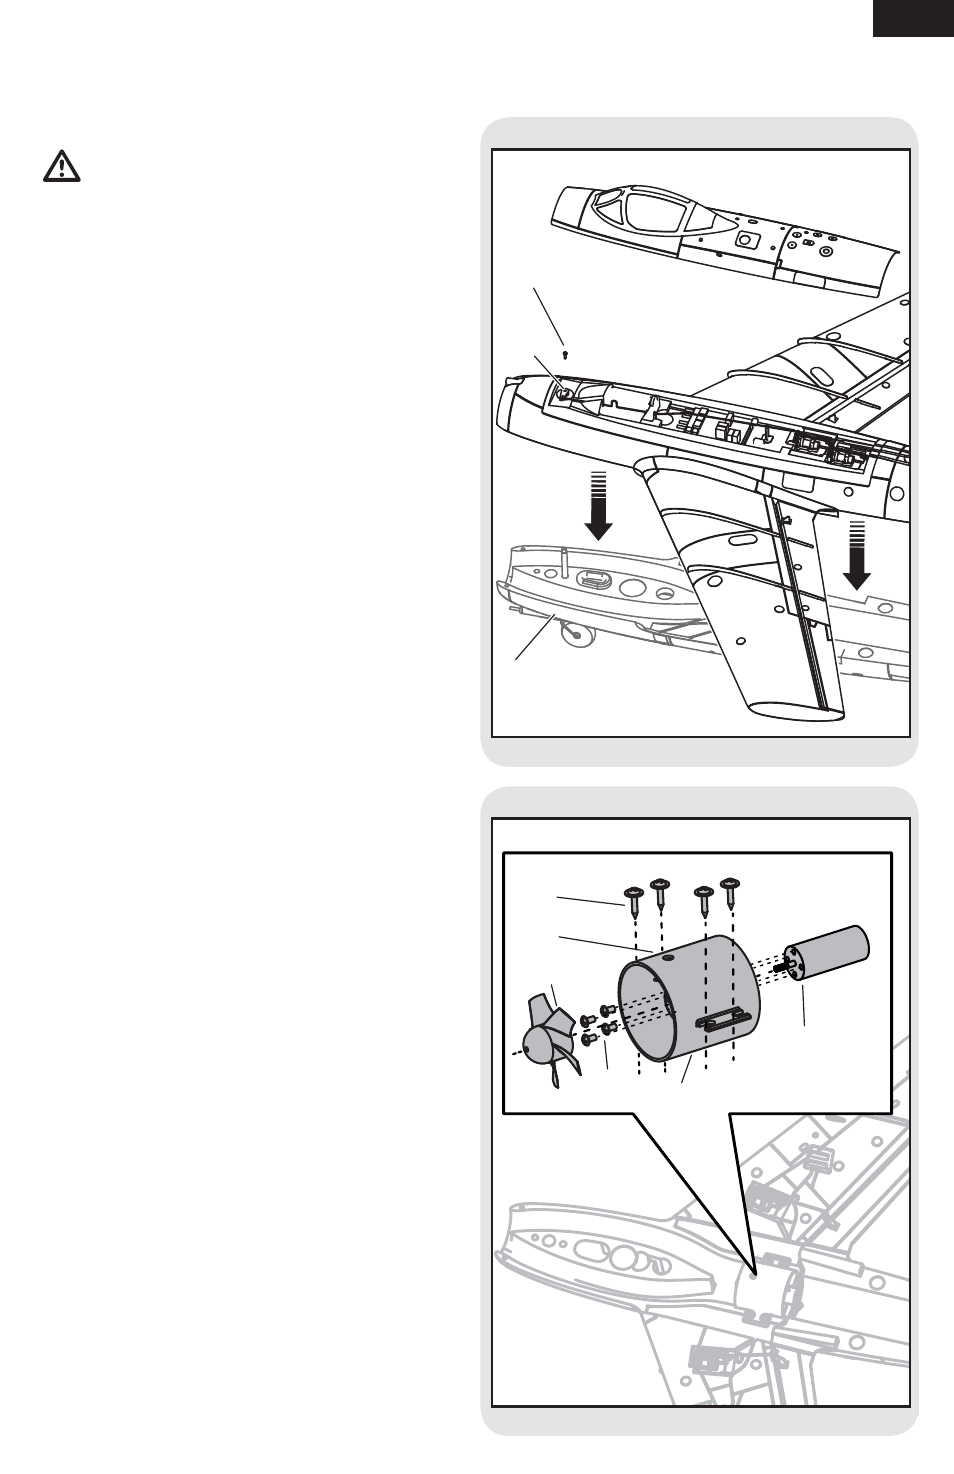
1. The canopy hatch is secured to the fuselage
using double-sided tape under the outside
edge. Carefully remove the canopy hatch, the
screw (A) and nose gear arm (B); replacing the
double-sided tape as needed.
NOTICE: Removing tape or decals can damage
paint on your aircraft. Avoid pinching or otherwise
damaging any wires when opening or closing the
fuselage.
2. Disconnect the motor connector from the
receiver.
3. Turn over the aircraft so that the landing gear
faces up.
4. Cut the tape and decals on the fuselage and
carefully remove the lower fuselage (C).
5. Remove the 4 screws (D) and fan unit (E) from
the upper fuselage.
6. Put a small flat blade screwdriver in the motor
mount hole (F) and carefully push the rotor (G)
away from the motor shaft. Rotate the rotor
while prying it away from the motor to avoid
bending the motor shaft.
7. Remove the 4 screws (H) and motor (I) from
the motor mount.
Assembly
Assemble in reverse order, connecting the top and
bottom half of the fuselage with clear tape and the
canopy hatch with double stick tape.
NOTICE: Always install the motor mount so that the
rotor faces the front of the fuselage and the hole in
the unit faces the bottom of the fuselage.
Removing tape or decals may remove paint from
the fuselage.
A
B
C
D
E
F
G
H
I