Briggs & Stratton 204730GS User Manual
Page 8
8
BRIGGSandSTRATTON.COM
7. Tip generator so that engine end is up.
8. Attach clamps (E) to brackets (F) on both sides of
generator with 1/4 - 20 hex screws (G).
9. Repeat steps 2 through 5 to secure the third and fourth
wheels.
10. Attach handles (H) to brackets on generator frame as
shown, with 45 mm capscrews (J), flat washers (K),
nylon washers (L), and M8 lock nuts (M).
NOTE: DO NOT overtighten. Handles must be able to move
up and down freely.
11. Return generator to normal operating position (resting
on wheels).
12. To apply brakes, push down firmly on handle of both
clamps until it locks in the down position and engages
the wheels.
IMPORTANT: The generator is designed to be used on level
surfaces.
13. Loop handle pins (N) on generator frame just above
handle brackets.
14. Raise handles and insert handle pins to move
generator.
15. To release brakes, pull up on handle of both clamps
until it locks in the up position.
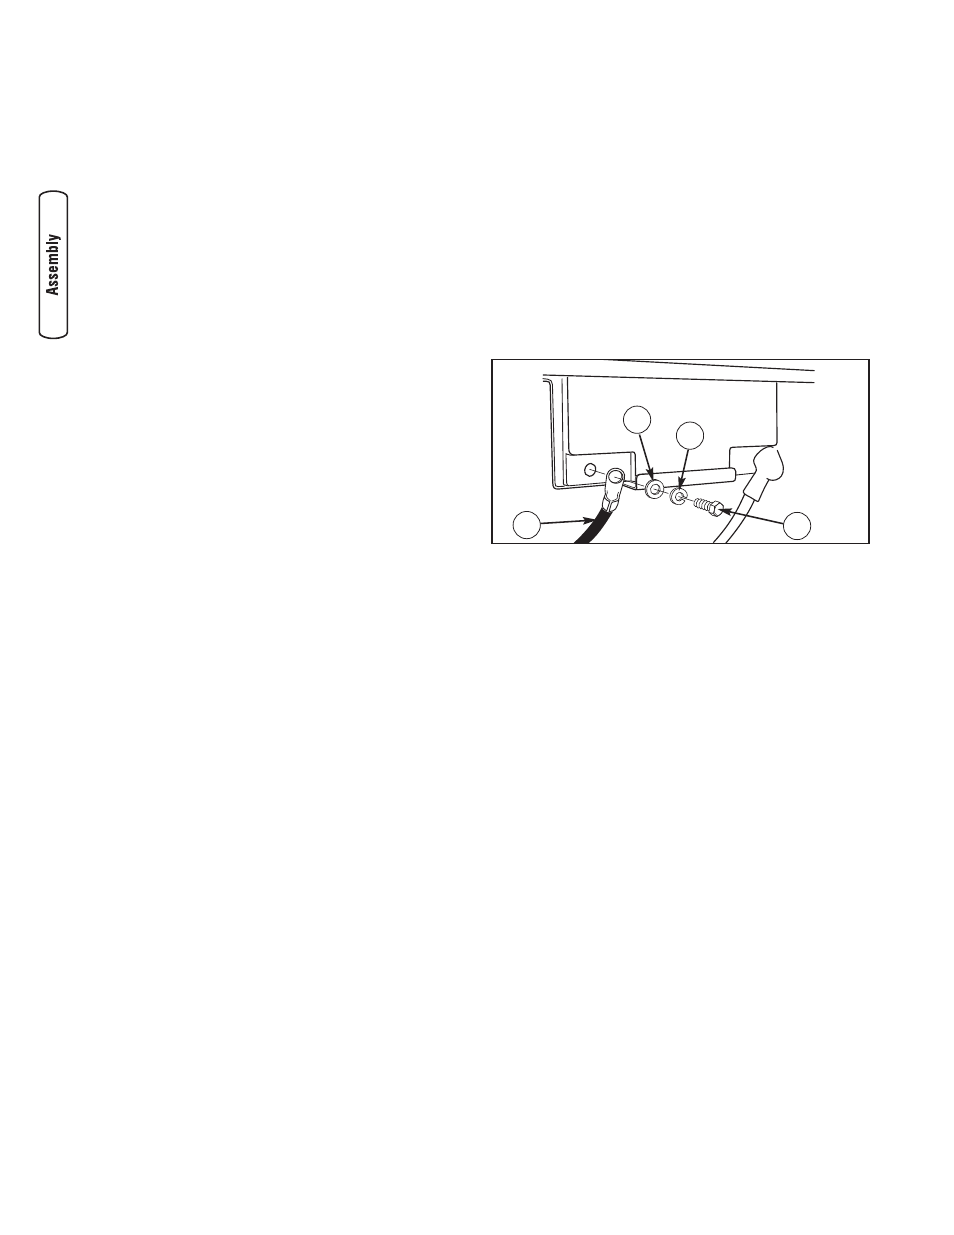
Attach Negative Battery Cable
Your unit is equipped with electric start capability but can be
started manually. If you choose not to use the electric start
feature, you do not need to connect the negative battery
cable.
The sealed battery on the generator pre–installed except for
the negative (black) battery cable.
To install:
1. Cut off tie wrap securing loose end of negative (black)
cable.
2. Using an 8 mm or 5/16” socket wrench, remove
screw (A), lock washer (B) and flat washer (C) on
negative battery terminal.
3. Slide lock washer, flat washer and negative battery cable
(D) over screw as shown.
4. Reattach screw to negative battery terminal and tighten.
5. Verify that connections to battery and generator are
tight and secure.
NOTE: If your battery is discharged, charge prior to use
following the instructions in the section Battery Charger.
A
D
C
B