Innovation compact – Clearaudio INNOVATION COMPACT User Manual
Page 10
Innovation Compact
User manual
Page 9
Clearaudio electronic GmbH 2014
7.)
To install the tonearm and / or to mount and adjust a cartridge, please follow the user
manual of the manufacturer.
8.)
The following final adjustment is very important:
Please ensure that your turntable rack is in a levelled position.
Please check with the delivered level gauge, if your
Innovation Compact
turntable is in a
levelled position.
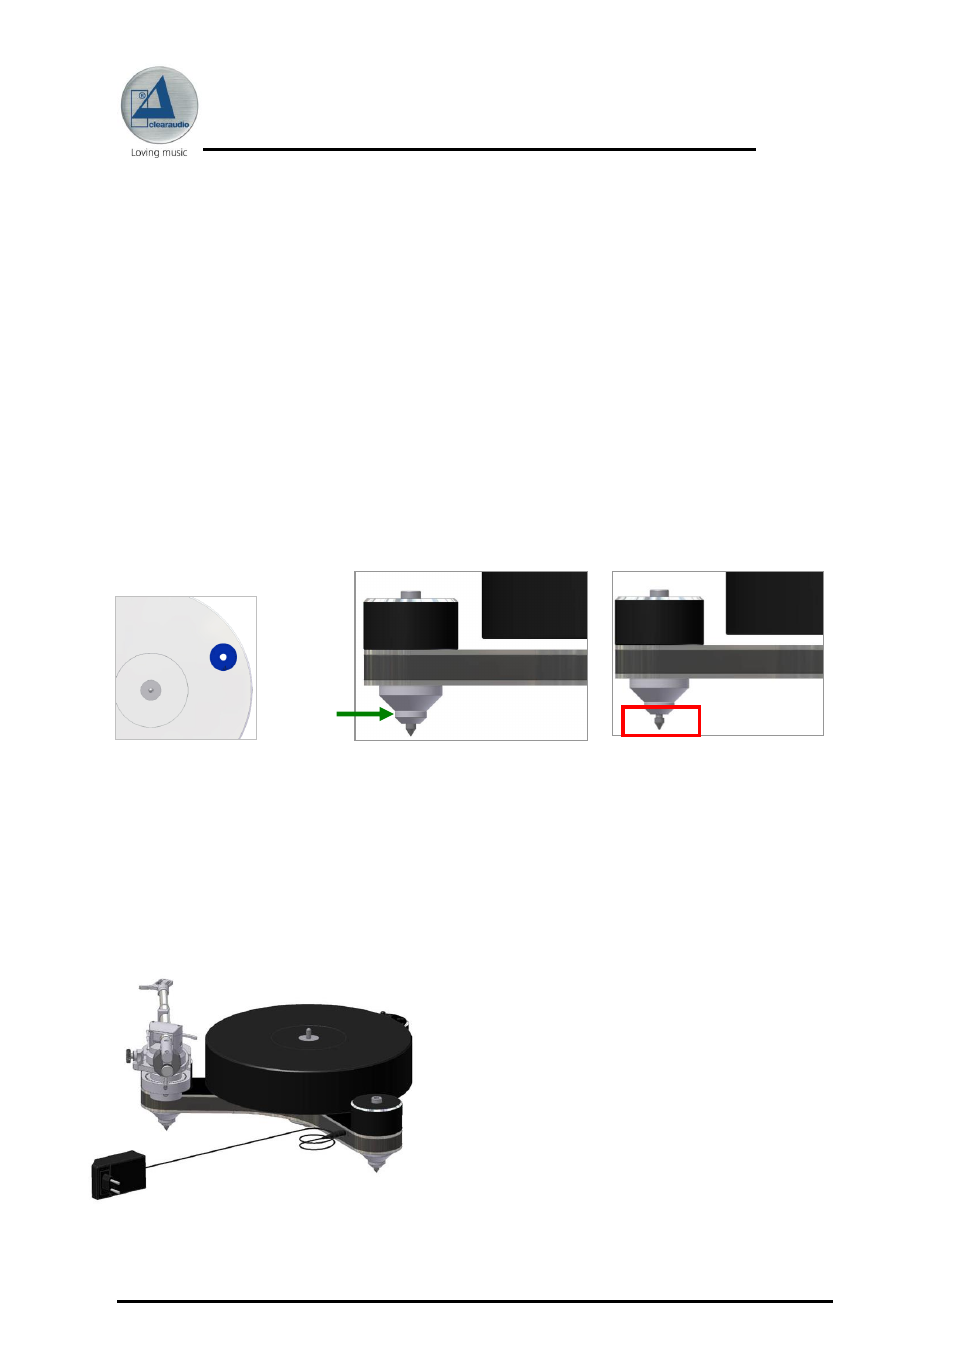
You can adjust each of the turntables`feet to get the turntable levelled.
To adjust the height, first turn the middle part of the feet (Pic. 8 a; green arrow), then you
can twist the end part (Pic 8 b, red frame) to the desired height.
After the adjustment, please make sure, to turn the middle part again to fix the selected
position.
Only if the turntable is in a levelled position you will get the best results with your
Innovation Compact
turntable.
9.)
Please connect the plug of the power supply with the linkage of the turntable.
After that connect the power supply with the electric power supply.
10.)
Place the drive belt around the platter and around
the motor pulley.
By pushing the sensor-switch, marked with “33
1/3” on the motor, the turntable starts to spin until
33 1/3 rpm is reached.
After the initial set-up we recommend to let the
turntable spin for at least 15 to 30 minutes.
This ensures a smoother break in.
Pic. 8: Alignment of the turntable
Pic. 9 a: Middle part
Pic. 9 b: End part
Pic. 10: Connection of power supply and motor