Clay Paky PIPER I.C.C. (HTI 150) User Manual
Page 3
238
(9.4”)
280
(11”)
10
11
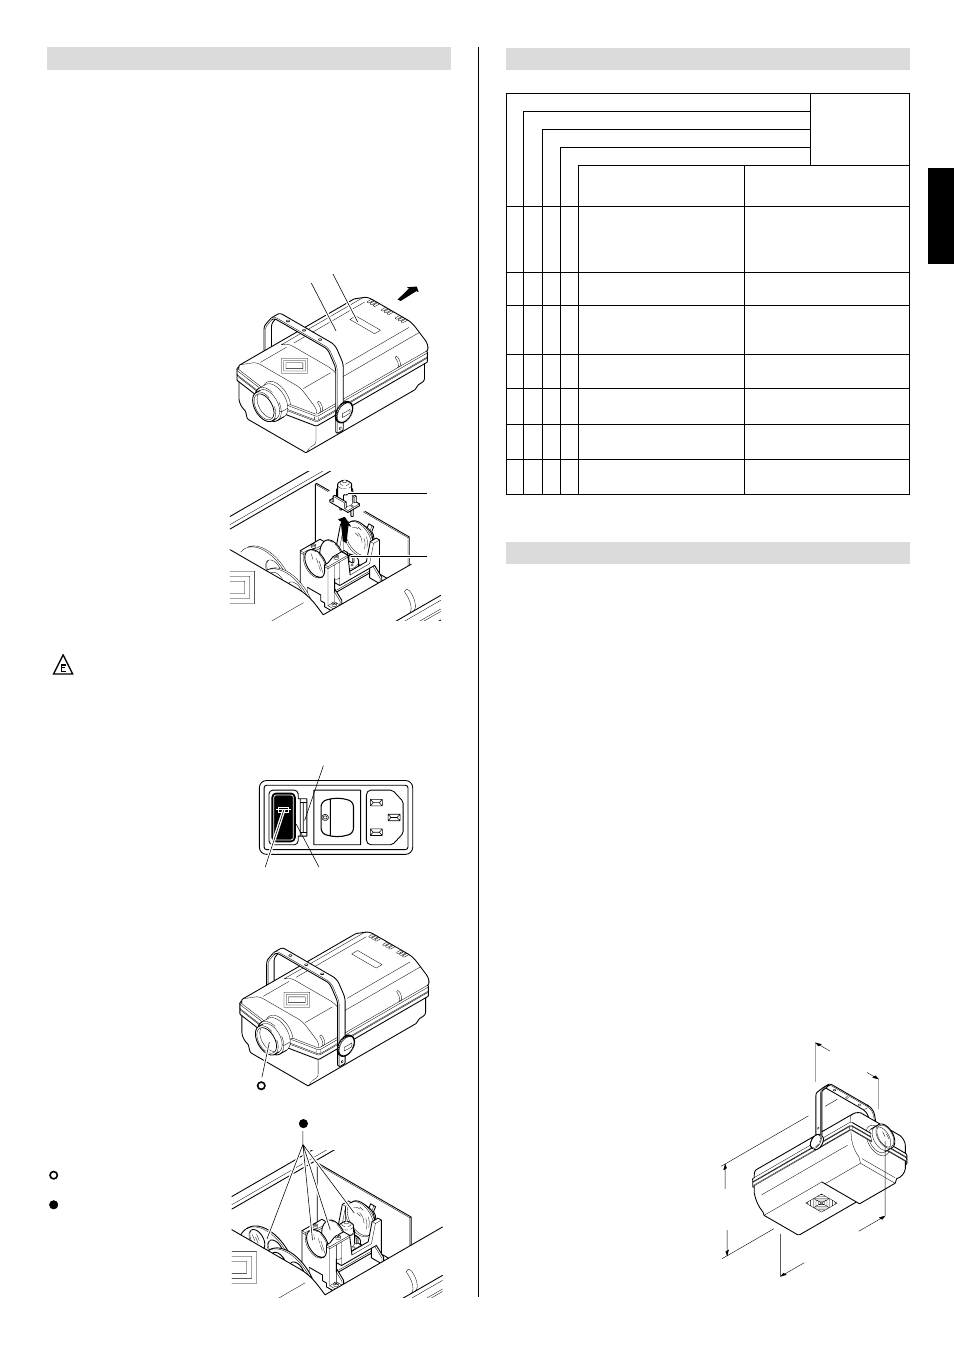
• Opening the projector
Remove the lamp access cover (9)
from the projector by pushing in
the direction of the arrow.
Once the necessary work
has been completed, refit the
cover (9).
• Changing the lamp
Remove the lamp (10) from its
fitting (11) withdrawing in the verti-
cal direction. Locate the new lamp
in the fitting, ensuring that the pins
are positioned correctly.
• Replacing fuses
To change the fuses, press the tab
(12) and pull out the fuse holder
(13). Replace any blown fuse with
one of the same type and rating as
indicated on the label (14) atta-
ched to the holder (13).
Insert the fuse holder and push in
to engage the tab (12).
• Routine cleaning
To maintain the light output of the
projector undiminished, parts that
tend to accumulate dust and grea-
se must be cleaned periodically.
The projector will give long and
trouble-free service if these simple
guidelines are followed.
To remove dirt from the lenses and
filters, use a soft cloth moistened
with any liquid detergent suitable
for cleaning glass.
IMPORTANT: do not use solvents
or alcohol.
Parts that need cleaning fre-
quently.
Parts that need cleaning
monthly.
Internal components should be
cleaned once a year by dislodging
dust and dirt with a brush and
removing it simultaneously with a
vacuum cleaner.
CAUTION: The projector uses a high pressure lamp with external starter.
- When fitting a new lamp, read the manufacturer's instructions carefully.
- The lamp must always be changed without delay if damaged or deformed by
heat.
250 V
5A T
5 x 20
FUSE
12
13
14
IMPORTANT: isolate the projector from the electrical power supply before
commencing maintenance work of any description.
The maximum temperature on the outer surface of the projector under normal ope-
rating conditions is 60°C (140° F).
After switching off, do not remove any part of the projector for at least 2 minutes,
as indicated on the lamp change label (1). Once this time has elapsed, the risk of
a lamp exploding is practically zero. If the lamp needs changing, wait a further 15
minutes to avoid the risk of burns.
In the event of a lamp exploding, the projector is designed to prevent fragments of
glass from being scattered. The lenses supplied with the projector must be fitted at
all times, and if visibly damaged, must be replaced with genuine spares.
MAINTENANCE
6
ENGLISH
9
1
370
(14.6”)
7
TECHNICAL DATA
CONSTRUCTION
FEATURES
Safety devices
Power supply shuts off automatically in
the event of overheating or cooling
system failure.
Cooling
Forced ventilation cooling system using
axial flow fan.
Housing
In extruded diecast aluminium with
epoxy powder coated finish.
Mounting
• Steel bracket with epoxy powder
coated finish.
• Two installation positions 50 mm (2”)
apart.
• Bracket adjustable through 110°.
Operating position
Will function in any position.
Weights and dimensions
Weight: 5.4 kg (11 lbs 14 ozs)
ELECTRICAL / MECHANICAL
SPECIFICATIONS
Power supplies available
• 220 - 240V 50Hz
• 200V 50 Hz - 230V 60 Hz
• 200V 60 Hz
The projector is designed to operate at
the mains frequency and voltage given
on the electrical data label on the base
of the appliance.
Lamp
Metal halide type with special built-in
power supply unit:
• Type HTI 150
– Cap GY 9.5
– Colour temperature 6900 K
– Luminous flux 9500 lm
– Average life 750 h
Power consumption
500 VA at 230V 50Hz
Motors
N. 1 microstepping motor with full micro-
processor control.
OPTICAL SYSTEM
Optical unit
• Base in diecast aluminium.
• Twin lens condenser.
• High luminous efficiency spherical
reflector.
Lens units
• Standard: 1:2,5 / 165mm
• Optional: 1:2,2 / 100mm
CONTROL SYSTEM
Channels
N. 1 control channel.
Inputs
PIPER I.C.C. is set up to accept analog
and digital signals from controllers or
computers.
• Digital serial input RS232/423(PMX)
or DMX 512
• 0-10V analog input
8
TROUBLESHOOTING
7
No electrical power supply.
Check that the power supply is
available at the mains socket
and/or that the fuses are intact.
THE PROJECTOR DOES NOT LIGHT UP
ELECTRONICS NOT WORKING
FAULTS
PROJECTION FAULTY
REDUCED BRIGHTNESS
POSSIBLE CAUSES
CHECKS AND REMEDIES
•
•
•
•
•
•
•
•
•
Lamp expended or faulty.
Change lamp (see instructions).
Signal transmission cable
short-circuiting or disconnec-
ted.
Change cables.
Address codes incorrect.
See projector coding
instructions.
Defect in electronic circuits.
Contact an authorized
technician.
Lenses broken.
Contact an authorized
technician.
Deposit of dust or grease.
Clean (see instructions).