Fig. 1 – Bell'O WMFC503 User Manual
Page 4
4
Assembly InstructIons / InstructIons D'AssemblAGe
InstruccIones De ensAmblAJe / ИНСТРУКЦИЯ ПО СБОРКЕ
note: 2 PeoPLe Are reCoMMenDeD To AsseMBLe THIs FurnITure. To AvoID DAMAGe DurInG AsseMBLy, IT sHouLD Be AsseMBLeD on A
soFT surFACe.
remArQue : IL esT ConseILLé D’ÊTre À DeuX Pour AsseMBLer Ce MeuBLe. Pour évITer Les DoMMAGes, eFFeCTuer L'AsseMBLAGe sur
une surFACe DouCe.
notA: es reCoMenDABLe ensAMBLAr esTe MueBLe enTre Dos PersonAs. PArA evITAr DAÑos DurAnTe eL ensAMBLAJe, ésTe DeBerÁ
reALIZArse soBre unA suPerFICIe suAve.
ПРИМЕЧАНИЕ: РЕКОМЕНДУЕТСЯ, ЧТОБЫ СБОРКУ ВЫПОЛНЯЛИ 2 ЧЕЛОВЕКА. ОСУЩЕСТВЛЯТЬ СБОРКУ СЛЕДУЕТ НА МЯГКОЙ ПОВЕРХНОСТИ,
ЧТОБЫ ИЗБЕЖАТЬ ПОВРЕЖДЕНИЙ ВО ВРЕМЯ СБОРКИ.
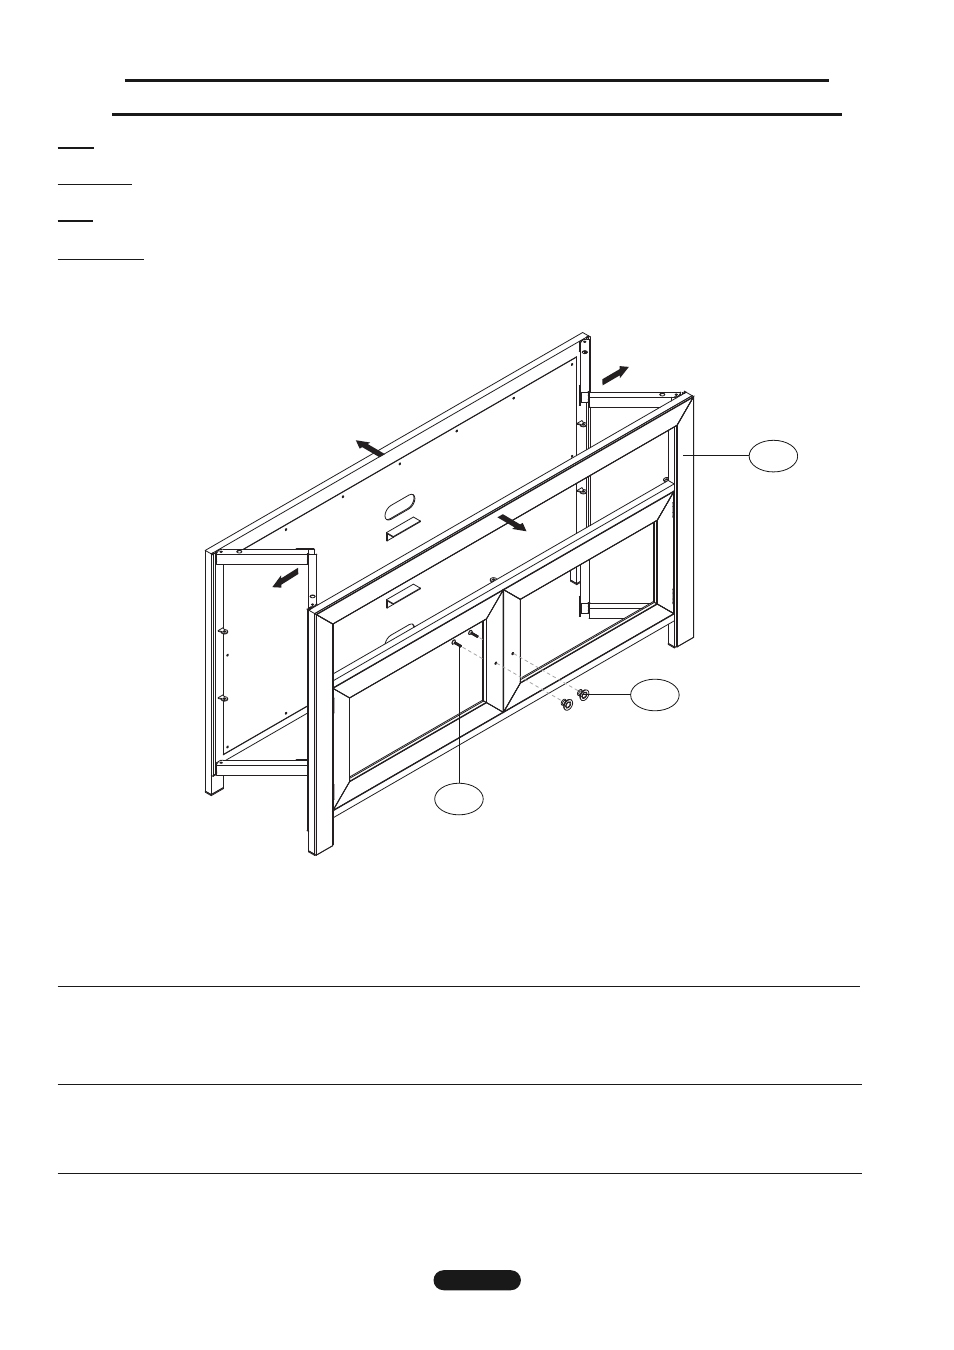
Fig. 1
m1
1. stAnD the Cabinet Frame (M1) upright and eXPAnD the Cabinet Frame into an open position.
2. AttAch the Door Knobs (M9) to the Left and right Doors using screws (M8) as shown.
1. coloQue el marco del armario (M1) en posición vertical y eXtIenDA el marco del armario a una posición abierta.
2. FIJe las perillas (M9) a las puertas izquierda y derecha utilizando los tornillos (M8), tal como se muestra.
1. ПОСТАВЬТЕ раму (M1) тумбочки вертикально и РАЗДВИНЬТЕ ее полностью.
2. ПРИКРЕПИТЕ дверные ручки (M9) к левой и правой дверцам, используя шурупы (M8), как показано на рисунке.
1. PlAcer le cadre du meuble (M1) en position verticale et DÉPloyer le cadre jusqu'en position ouverte.
2. AttAcher les boutons de porte (M9) aux portes gauche et droite à l’aide des vis (M8) comme sur l’illustration.
m9
m8