Fig. 4 – Bell'O WAVS99163-Oct13 User Manual
Page 8
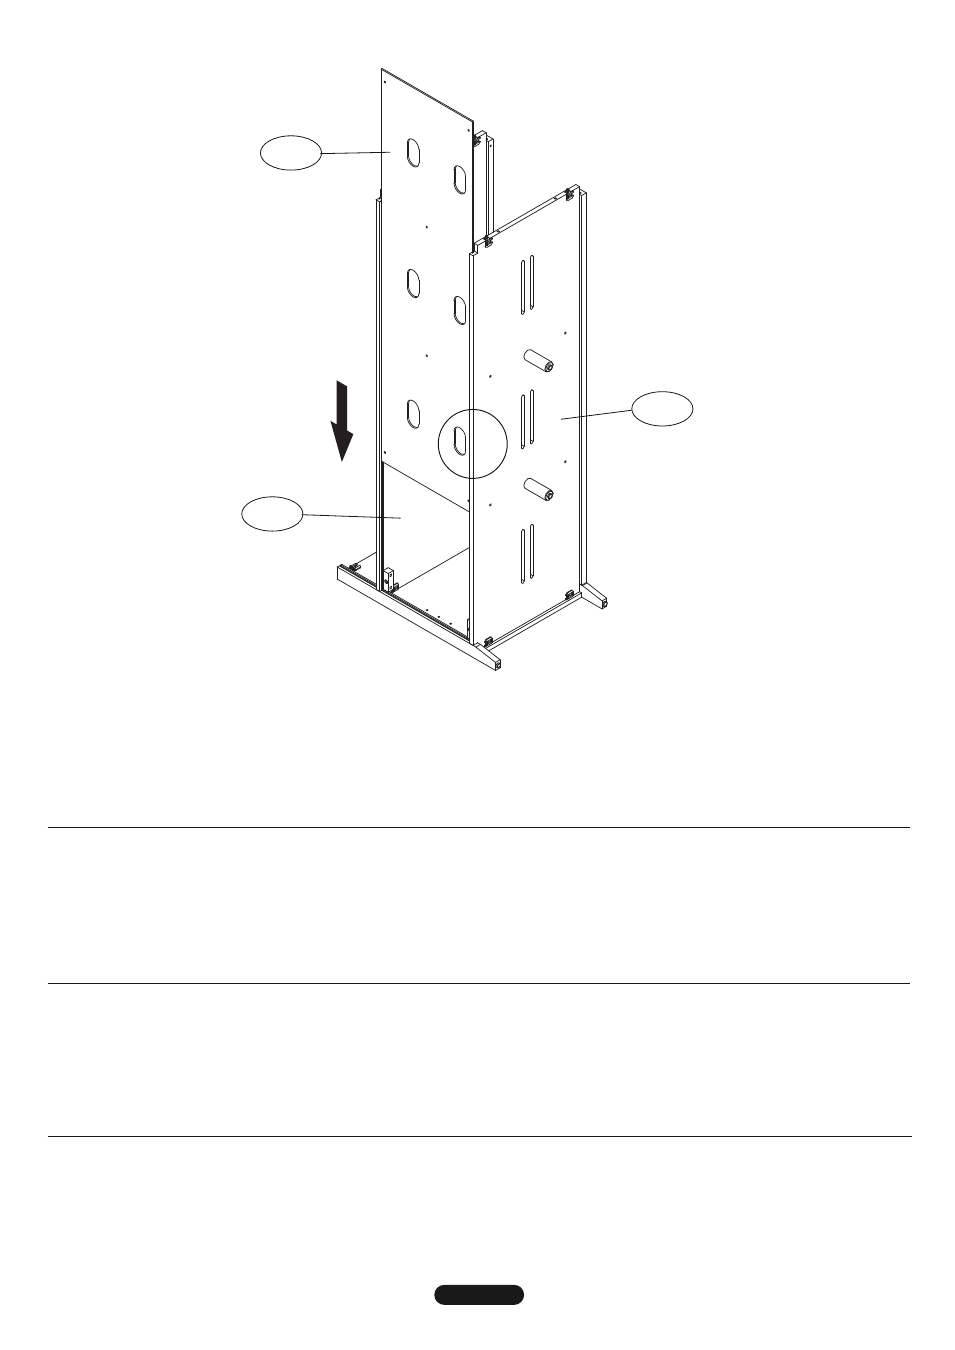
Fig. 4
8
ACML2
ACML3
ACML5
6. TURN the cabinet upright with the help of an assistant. Carefully SLIDE the Lower Back Panel (ACML5) into the grooves in the
Bottom Panel (ACML3) and the Middle Interior Shelf (ACML2). Make sure the Lower Back Panel is completely and properly in
place before continuing.
NOTE (!): Note the position of the Cable Management holes in the Lower Back Panel (ACML5) - make sure they are
positioned toward the bottom of the cabinet.
6.
TOURNER le meuble à l’endroit avec l’aide d’une autre personne.
ENFILER avec précaution le panneau arrière inférieur (ACML5)
dans les rainures du panneau inférieur (ACML3) et du plateau intérieur du milieu (ACML2). S’assurer que le panneau arrière
inférieur est correctement et complètement en place avant de poursuivre.
REMARQUE (!) : Noter la position des trous passe-fil dans le panneau arrière inférieur (ACML5) - s’assurer qu’il sont placés
vers le bas.
6.
Con la ayuda de otra persona, GIRE el armario a su posición vertical.
DESLICE con cuidado el panel trasero inferior (ACML5) en las
ranuras del panel inferior (ACML3) y del estante interior central (ACML2). Asegúrese de que el panel trasero inferior esté
insertado por completo y correctamente antes de seguir.
NOTA (¡!): Tenga en cuenta la posición de los orificios para la administración de cables en el panel trasero inferior (ACML5) y
asegúrese de que estén ubicados hacia abajo.
6. ПЕРЕВЕРНИТЕ тумбу и поставьте ее на ножки с помощью помощника. ВДВИНЬТЕ нижнюю заднюю панель (АСМL5) в
канавки на нижней панели (АСМL3) и на средней внутренней полке (АСМL2). Прежде чем продолжать, убедитесь, что
нижняя задняя панель установлена надлежащим образом.
ПРИМЕЧАНИЕ (!). Обратите внимание на положение отверстий системы укладки кабелей на нижней задней
панели (АСМL5) – убедитесь, что они «смотрят вниз».
!