Fig. 2 – Bell'O PR36 User Manual
Page 5
5
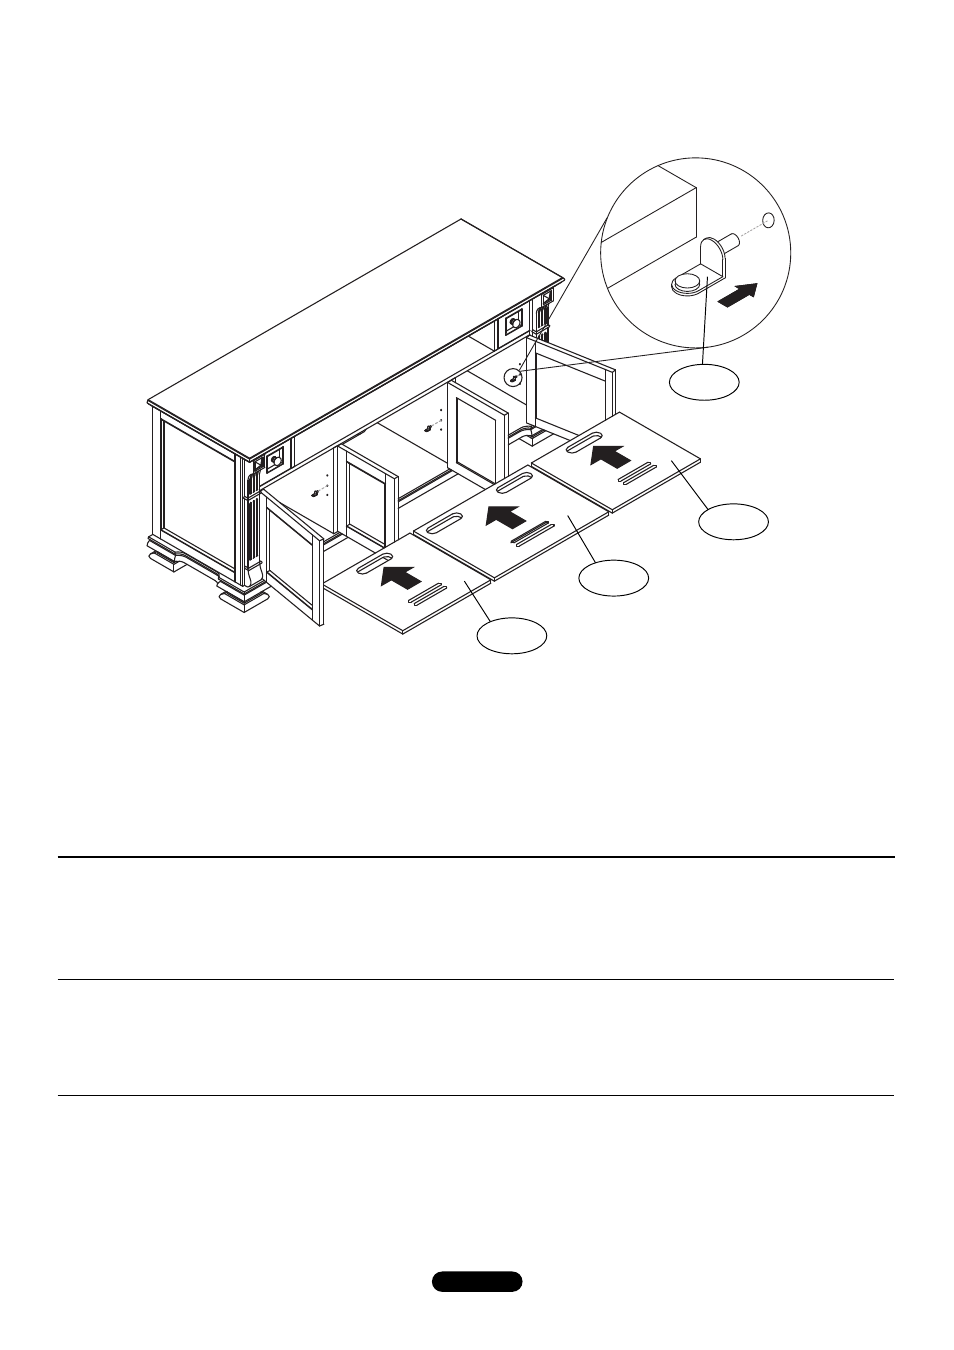
fig. 2:
3. turn the cabinet upright with the help of an assistant. Insert twelve shelf supports (unl4) into interior holes for each shelf
(unl1, unl2), and InstAll as shown. Make sure the edge with the cutout is toward the rear, and that shelf is level before
placing component.
3. Con la ayuda de otra persona, GIre el armario a su posición vertical. Inserte doce soportes para estante (unl4) en los
orificios interiores correspondientes a cada estante (unl1, unl2) y colÓquelos tal como se muestra. Antes de colocar un
componente, asegúrese de que el borde con la ranura está hacia atrás y que el estante esté nivelado.
3. tourner le meuble à l’endroit avec l’aide d’une autre personne. IntroDuIre douze supports de panneau (unl4) dans les
trous intérieurs pour chaque plateau (unl1, unl2) et Poser les plateaux comme sur l’illustration. Veiller à bien placer le bord
comportant l’évidement vers l’arrière et vérifier que le plateau est de niveau avant d’y poser un appareil.
unl4
unl1
unl2
unl1
3. ПЕРЕВЕРНИТЕ тумбу и поставьте ее на ножки с помощью помощника. ВСТАВЬТЕ двенадцать кронштейна для полок
(unl4) во внутренние отверстия для каждой полки (unl1, unl2) и установите полки, как показано на рисунке. Убедитесь
в том, что грань с вырезом расположена в задней части сборки, и перед размещением на полках каких-либо
компонентов аппаратуры убедитесь в том, что полка выровнена горизонтально.