Fig. 4 – Bell'O PR-33 User Manual
Page 8
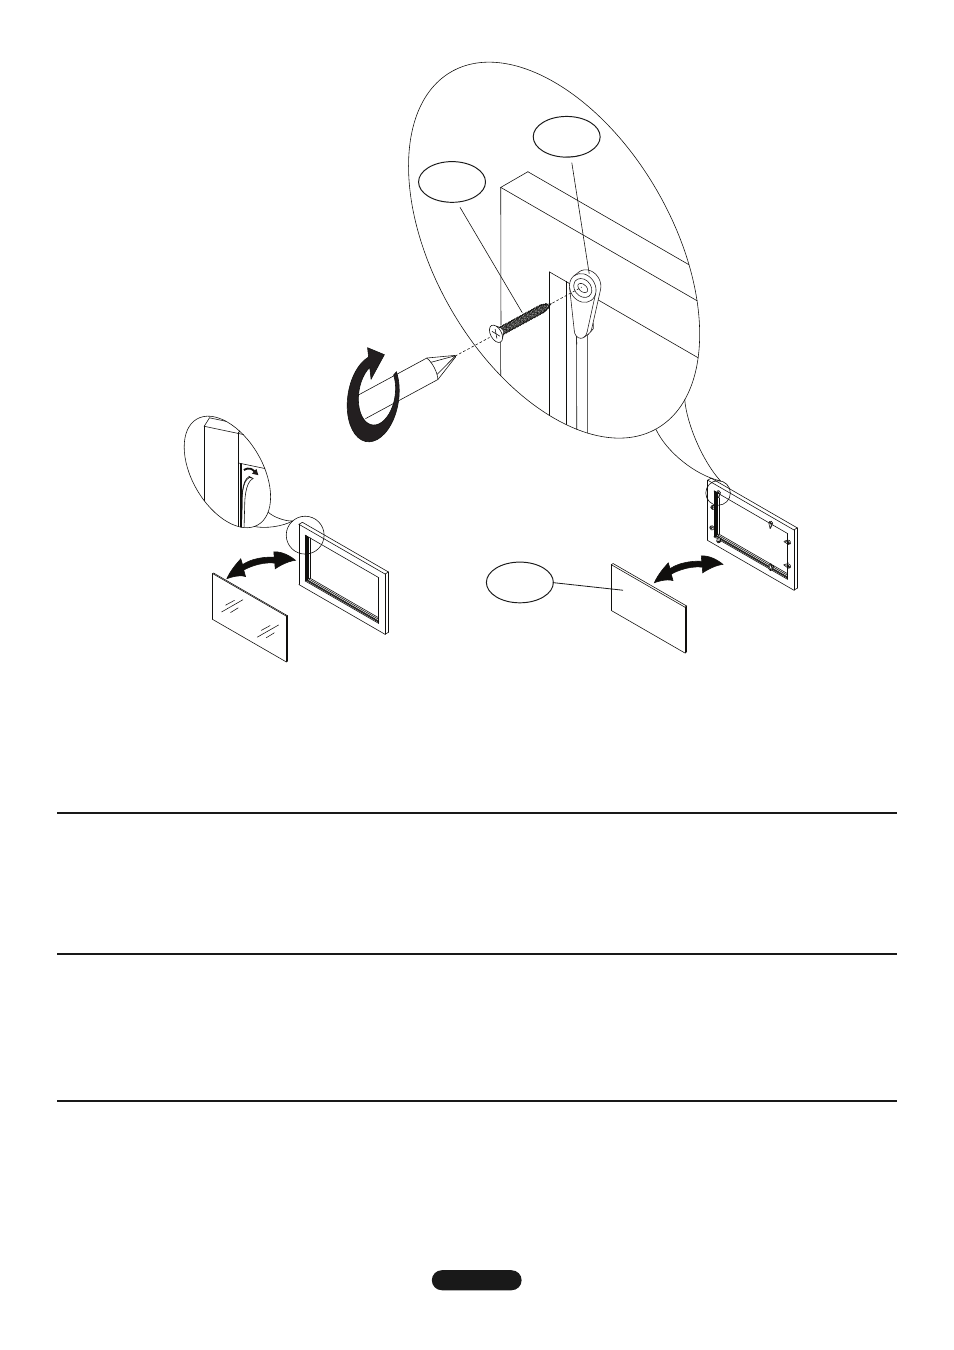
4. This cabinet comes with two sets of door panel inserts (glass & solid wood). To interchange any of the door panel inserts,
carefully remove the rubber gasket which holds the glass panel, and remove the glass panel from the door frame.
note: to AvoID DAmAGe or InJury, Do not use A shArP Instrument to Pry the rubber GAsket. Insert the
desired door panel (wood or glass) and secure using wood screws (unl2) and Clips (unl3) in the predrilled pilot holes.
note: Do not over tIGhten screws. use the rubber gasket to secure the glass door panel only.
4. este armario viene con dos juegos de insertos para los paneles de puerta (de vidrio y de madera maciza). Para interambiar
cualquiera de los insertos, quite cuidadosamente la junta de goma que sostiene al panel de vidrio y extráigalo del marco de la
puerta. notA: PArA evItAr DAÑos o lesIones, no use Instrumentos cortAntes PArA quItAr lA JuntA De
GomA. Coloque el inserto que desee (de madera o de vidrio) y asegúrelo con tornillos para madera (unl2) y sujetadores
(unl3) en los orificios guía pretaladrados. notA: no AJuste DemAsIADo los tornIllos. use las juntas de goma sólo
para asegurar el panel de vidrio de la puerta.
4. Ce meuble est fourni avec deux jeux d’inserts de panneaux de portes (verre et bois massif). Pour changer les panneaux de
porte, enlever avec précaution le joint en caoutchouc qui tient la vitre en place puis enlever la vitre du cadre de porte.
remArque : Pour évIter les DommAGes ou les blessures, ne PAs utIlIser D’outIl couPAnt Pour
Décoller le JoInt en cAoutchouc. Mettre en place le panneau de porte souhaité (bois ou verre) et fixer en posant des
vis à bois (unl2) et des attaches (unl3) dans les trous guides prépercés. remArque : ne PAs forcer sur les vIs.
utiliser le joint en caoutchouc uniquement pour fixer la vitre.
unl2
unl4
unl3
4. Данный комплект тумбы поставляется с двумя наборами вставок для дверных панелей (из стекла и из цельного
дерева). Чтобы поменять вставки для дверных панелей, аккуратно извлеките резиновую прокладку, поддерживающую
стеклянную панель, а затем извлеките стеклянную панель из дверной рамы. ПРИМЕчАНИЕ. Во избежание
повреждения и порчи резиновой прокладки не пытайтесь извлечь ее с помощью острых предметов. Вставьте
нужную вам дверную панель (деревянную или стеклянную) и закрепите ее с помощью шурупов для дерева (unl2) и
держателей (unl3), вкрутив шурупы в просверленные установочные отверстия. ПРИМЕчАНИЕ. Не затягивайте
шурупы слишком туго. Используйте резиновую прокладку только для закрепления стеклянных дверных панелей.
fig. 4:
8