Acuum, Etting, Djustment – Wood’s Powr-Grip EO3VLW User Manual
Page 10
Rev 9.0/9-13
8
EO3VLW: #35193AFT
V
ACUUM
S
ETTING
A
DJUSTMENT
Function and Conditions Requiring Adjustment
If the Vacuum Loss Warning Buzzer is functioning normally, its monitoring system is activated at
a low vacuum level, which is attained as the lifter attaches to a load. Vacuum should continue to
increase until it reaches the level required for lifting the maximum load weight (hereafter, the
“minimum lifting level”), as indicated in the lifter’s operating instructions. If vacuum fails to
increase steadily toward the minimum lifting level, the alarm sounds until a strong trend of
increasing vacuum resumes. Additionally, if vacuum reaches the minimum lifting level and
subsequently falls below it, the alarm sounds until vacuum starts a strong increasing trend again.
The monitoring system shuts off only when vacuum falls below the initial activation level, which
normally happens as the load is released. If the Warning Buzzer fails to function in these ways, it
requires adjustment or repair.
Adjustment Procedure
1) Remove the screws that secure the enclosure cover, and slide the circuit board assembly
outward, in order to access the adjustment screws.
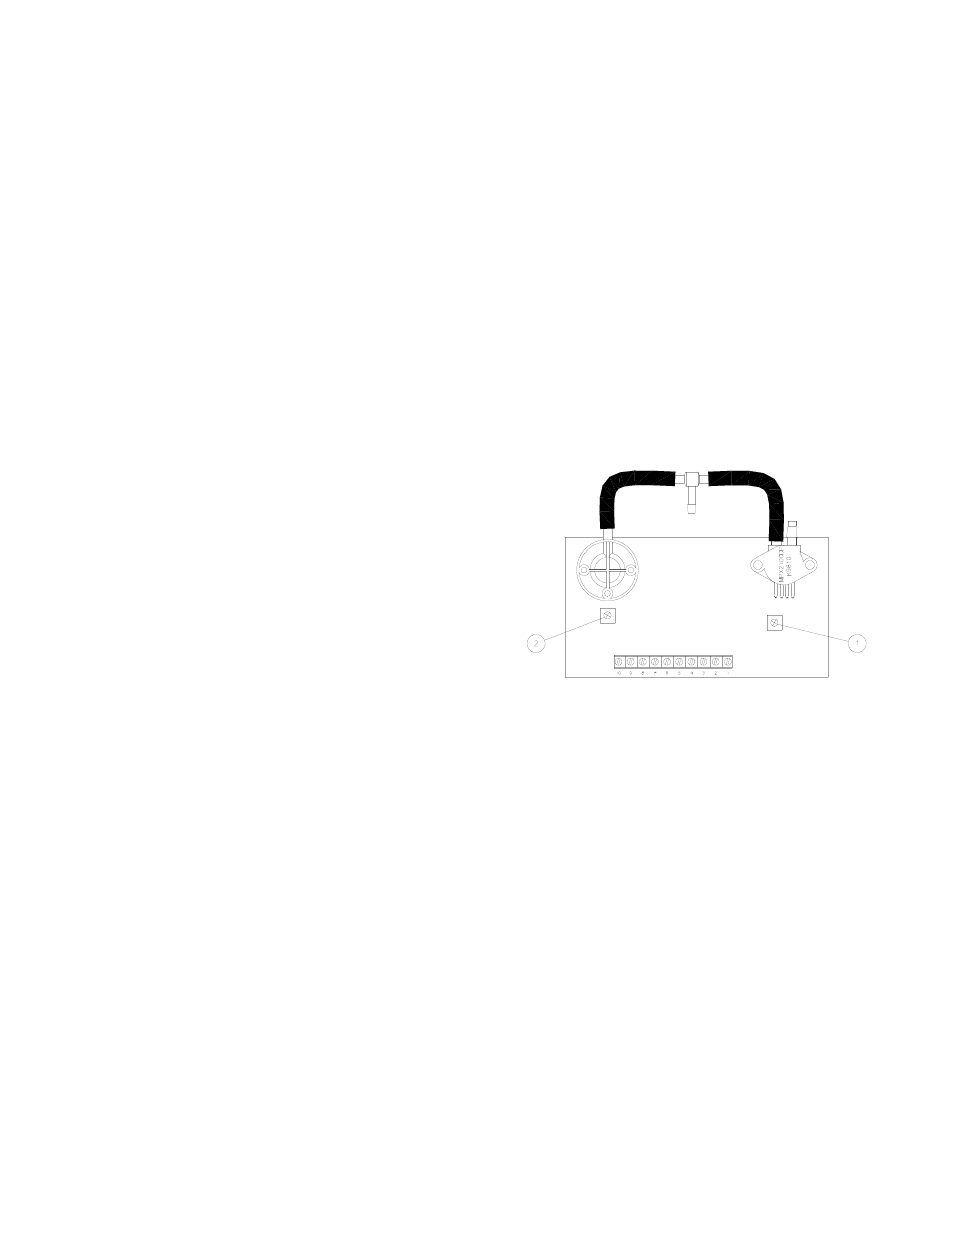
2) Make sure both adjustment screws are turned to the
maximum counter-clockwise position of their range
(about 3/4’s turn), prior to making any adjustments.
3) Apply the lifter to an appropriate test surface (see
lifter’s operating instructions).
4) While the lifter’s vacuum generating system is
activated, slowly turn adjustment screw #1 in the
clockwise direction (about 1/4 turn) until the
Warning Buzzer functions as described in the
preceding discussion. To make sure the alarm sounds
immediately after vacuum falls below the minimum lifting level, create a controlled leak and
observe the Warning Buzzer activity in relation to the vacuum level registered on the vacuum
gauge.
Note: Turn the adjustment screw gently, since downward pressure can affect the accuracy of
the set point; it may require several attempts to complete the adjustment correctly.
5) Release and reapply the lifter to the test surface several times, to verify that the buzzer is
functioning correctly.
ADJUSTMENT SCREWS #1 & #2