Hs-t – Vortex Optics VIPER HS-T 6-24X50 RIFLESCOPE User Manual
Page 8
15
14
HS-T
RIFLESCOPE
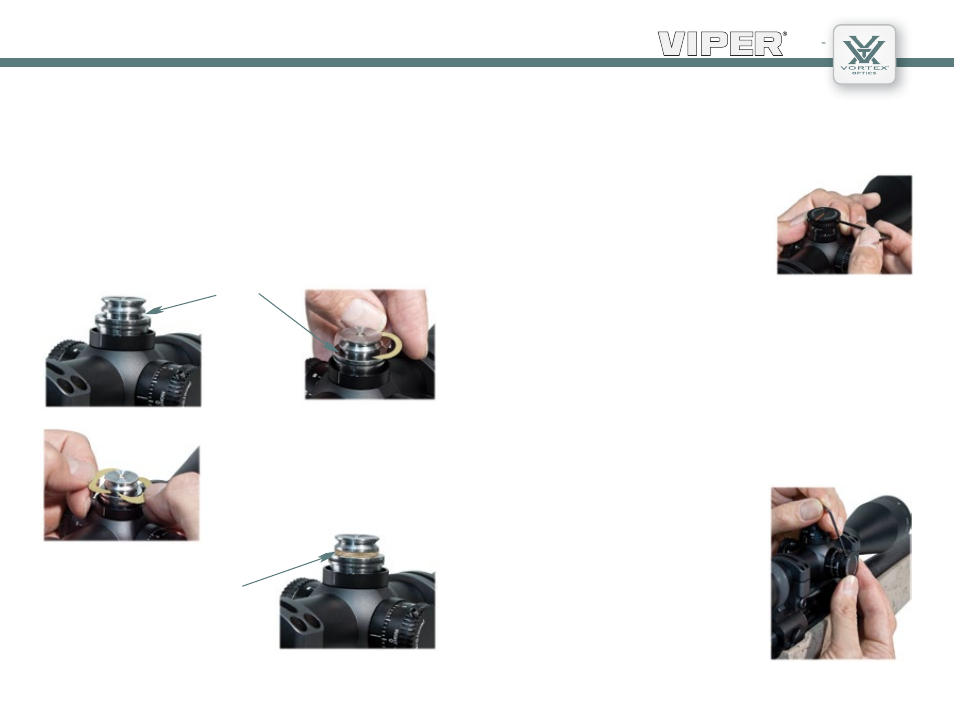
Align the elevation turret cap.
Align the windage turret cap.
3. After filling the center gap on the post with shims, replace the
elevation cap.
4. Align the turret cap so the “0” mark on the cap matches up with the
“0” reference line on the turret post. Again,
be sure not to rotate the actual turret
mechanism in the process.
5. Re-tighten the retaining screws, but
do not overtighten. Use of thumb and
forefinger on the short end of the hex
wrench will provide sufficient force.
1. Loosen the three retaining screws on windage turret cap.
2. Carefully rotate the cap until the “0” mark on the cap matches up
with the “0” reference line on the turret post. Be sure that the cap is
freely turning and that you don’t rotate the actual turret mechanism.
3. Re-tighten the windage knob retaining screws, but do not
overtighten. Use of thumb and forefinger on the short end of the hex
wrench will provide sufficient force.
Once the windage and elevation knobs
are correctly indexed to the zero mark,
temporary corrections can be safely dialed
into the scope without worry of losing the
original zero.
Indexing the Windage Knob
After obtaining a satisfactory zero, the CRS stop can be set if desired:
1. Loosen the three turret cap retaining screws on the elevation turret.
Gently pull the turret cap straight up and off of the turret post, being
careful not to rotate the turret post.
2. Slide the CRS shims on the center section of the turret post below
the V-grooved part.
Setting the CRS Stop and Indexing Elevation Knob
Alternate shim installation direction
with each shim.
Place CRS shims
in this groove.
Use as many shims as necessary to
completely fill up the space. Do not try
to force in a last shim once the clearance
is very close—a tiny remaining gap is
normal.