Sp300 premium studio in a box setup – Square Perfect 3090 SP300 Classic Kit User Manual
Page 3
3
1. First, open the case and remove all
of the components. Then remove the
components from their boxes and
bags.
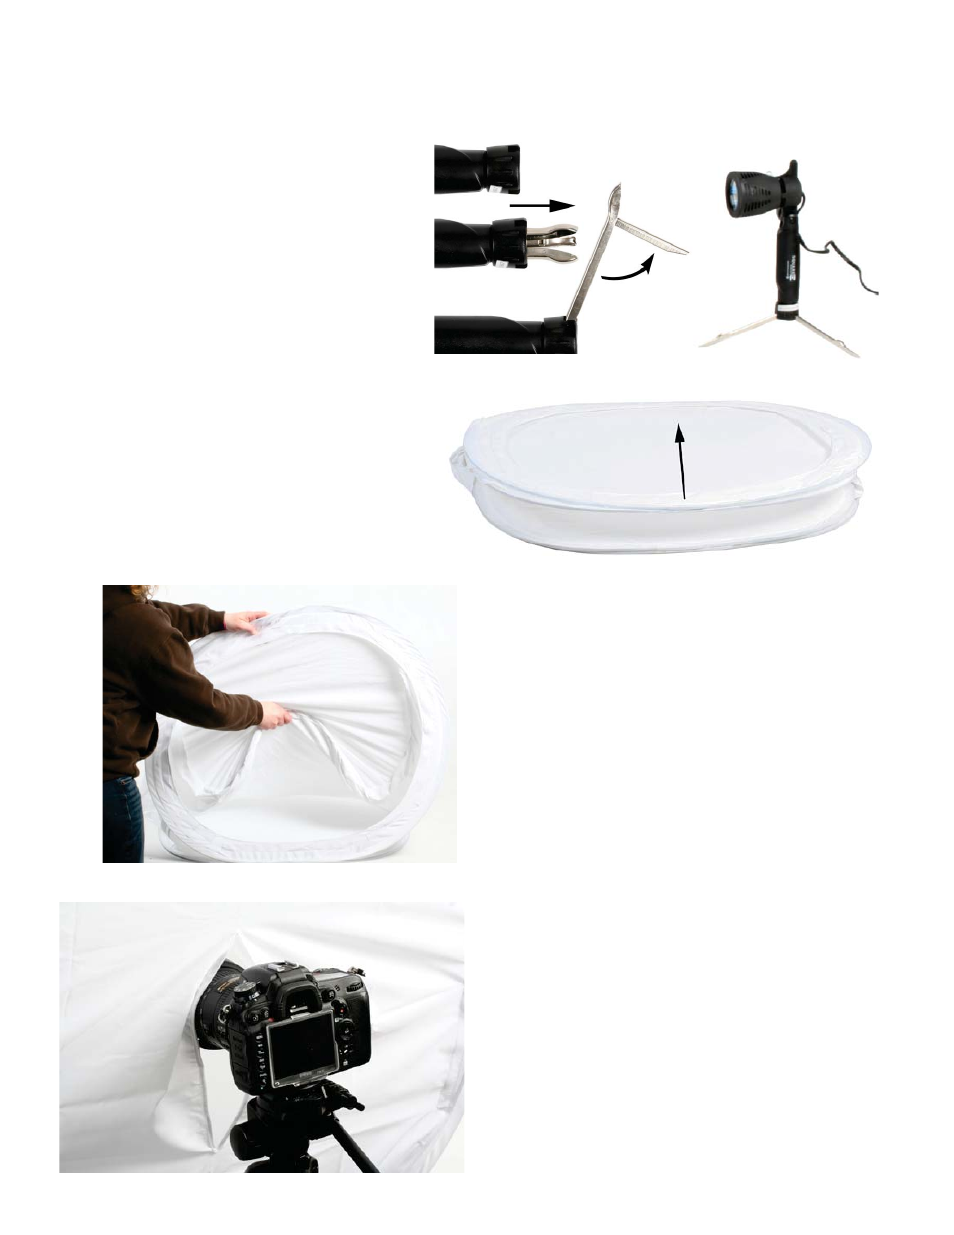
2. The Tripod is fully assembled and
ready to unfold and use.
3.
4. Remove the 30 inch cube from its bag,
taking care to hold it firmly. It is
wrapped around itself, and will spring
open if one doesn’t take care to contain
it. Grasping one of the metal bands
with one hand and holding the rest with
the other hand, let go of the bulk of the cube
and allow it to spring into shape.
5.
. You will now have a flat
sheet that opens like a clam (Figure 3).
Open the “clam” and reach into the center.
Grasping the metal bands in the center
, pull towards you to invert the
other two sides that are folded into the cube.
Your light cube should pop into shape.
This step applies to both the 12” cube
and the 30” cube
Setup the lights by pulling down on
the stands and folding out the
extensions (Figures 1 & 2). Adjust the
light heads by first loosening the knob
beside them, repositioning and then re-
tightening the knob.
(Figure 4)
6. Complete your cube(s) by inserting a colored
background of your choice onto the hook &
loop tabs in the back and base of the
cube(s).
7. For added control over your lighting you can
utilize the front cover with camera slit. This
cover attaches to the cube with hook and
loop fasteners and gives you ultimate
control over lighting.
SP300 Premium Studio In a Box Setup
Copyright 2012 DTX International
Figure 1
Figure 2
Figure 4
Figure 3
Figure 5