Operating the machine – Retsch GM 300 User Manual
Page 21
Operating the machine
21
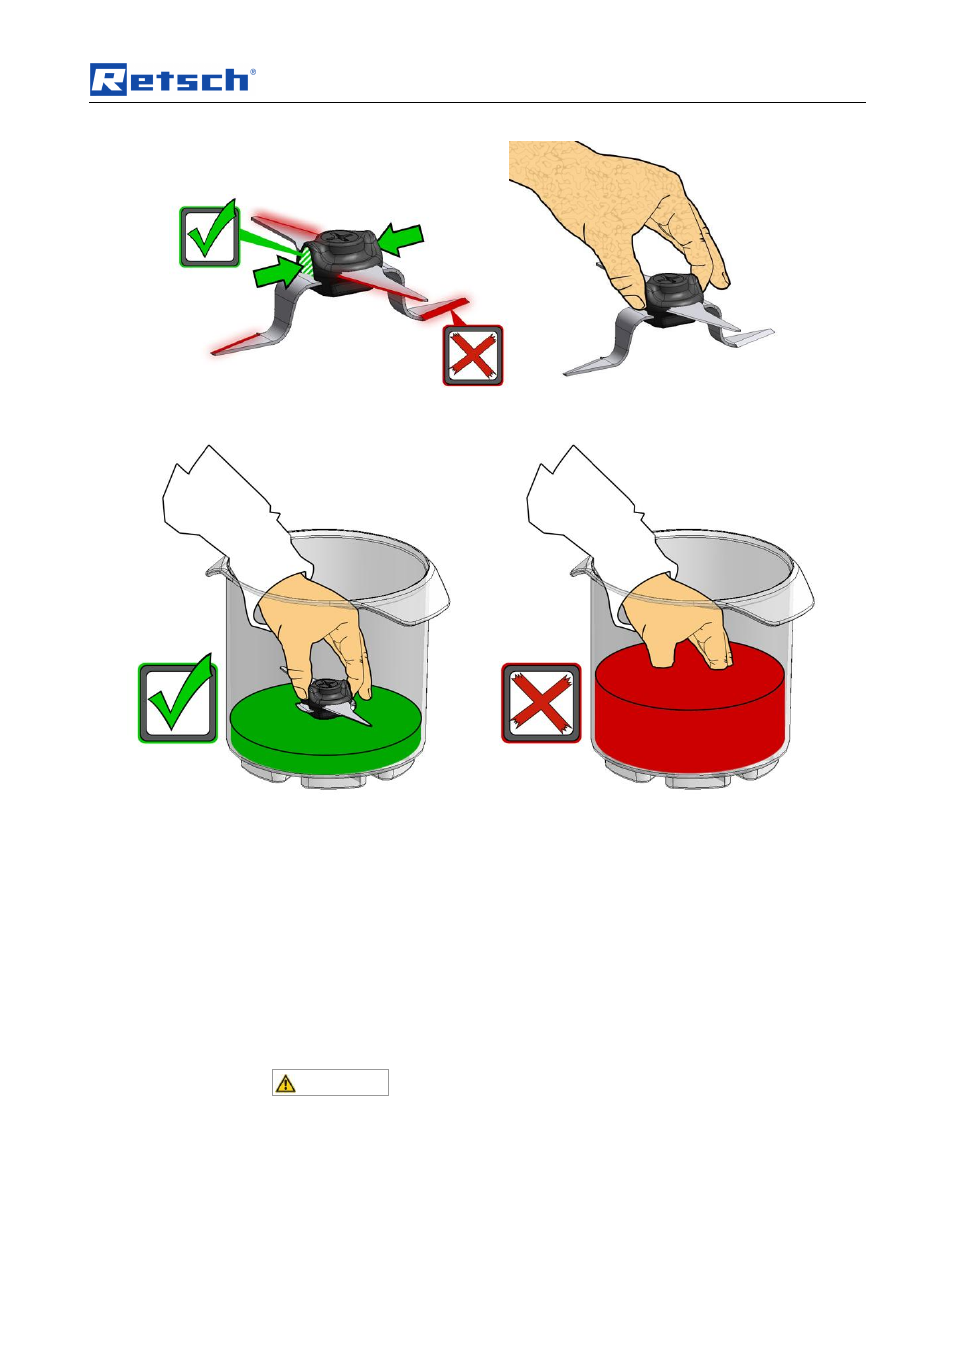
Fig. 7: Recessed grips on the knife
Fig. 8: Removing the knife
– Fill level of the grinding jar
Note that the knife must be inserted before filling the grinding jar. The knife is
placed on the shaft and held by magnetic force .
The sealing lip (DL) of the V ring seal (V) must point downwards when inserted.
(See Fig. for knife assembly)
NOTICE
•
Remove the knife after the grinding process.
•
Do not leave the knife in the sample material!
•
Clean the knife after grinding and then dry carefully.
CAUTION
If the bottom, bent blade of the knife is so deformed that it touches the inside of the
jar it must be replaced immediately.
See also other documents in the category Retsch Equipment:
- BB 50 (41 pages)
- BB 100 (24 pages)
- BB 200 (24 pages)
- BB 300 (24 pages)
- Cryomill (68 pages)
- CryoMill Autofill 50l (28 pages)
- DM 200 (20 pages)
- DM 400 (60 pages)
- Emax (67 pages)
- GM 200 (44 pages)
- MM 200 (32 pages)
- MM 400 (32 pages)
- PM 100 (44 pages)
- PM 400 (36 pages)
- PM GrindControl (48 pages)
- RM 200 (36 pages)
- RS 200 (32 pages)
- SK 100 (24 pages)
- SM 100 (48 pages)
- SM 200 (48 pages)
- SM 300 (44 pages)
- Cyclone - SM 300 (20 pages)
- SR 200 (24 pages)
- SR 300 (24 pages)
- TWISTER (44 pages)
- ZM 200 (32 pages)
- AS 200 jet - Automatic Vacuum Regulation (6 pages)
- AS 200 control - natural frequency (32 pages)
- AS 200 (36 pages)
- AS 200 jet (56 pages)
- AS 200 jet (48 pages)
- AS 200 tap 30.025.0001 (28 pages)
- AS 200 tap 30.025.1001 (28 pages)
- AS 300 (32 pages)
- AS 400 (32 pages)
- AS 400 (28 pages)
- AS 450 basic (40 pages)
- AS 450 basic (44 pages)
- AS 450 control (52 pages)
- DR 100 (40 pages)
- DR 100 (28 pages)
- PP 25 (32 pages)
- PP 40 (28 pages)
- PT 100 (36 pages)