Mayline CSII Open Shelf Overhead User Manual
Page 2
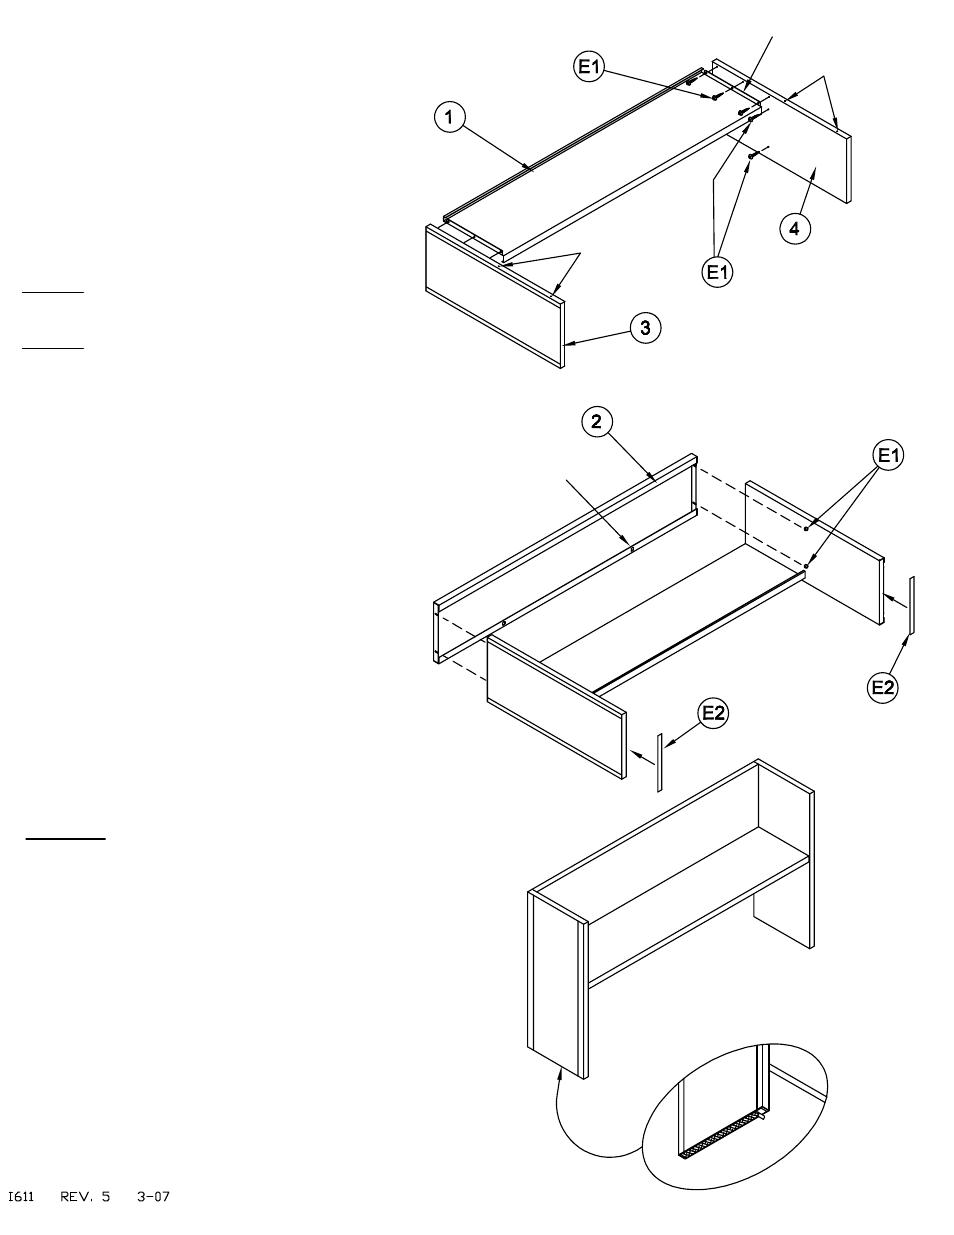
Do Not Tighten
these screws
1/8" gap - these screws
Holes 'UP'
Back Flanges 'UP'
Screws with
1/8" gap
Holes 'UP'
Lock slots and holes
'DOWN'
1. Perform this assembly on a clean protected
surface
2. Place the L.H. Side (4) in a vertical position along
side the Back (1). Locate the Side with the edge
holes 'UP'. Position the Back with side flanges "UP".
Secure the Back to the Side with three Screws (E1).
DO NOT tighten at this time.
3. Repeat this procedure with the R.H. Side (3).
DO NOT tighten at this time.
4. Start two Screws (E1) into the holes in each Side.
Leave approximately 1/8 inch gap between these
screw heads and side panels.
5. Turn the assembled parts over, placing the Back
onto the clean protected surface.
MAYLINE recommends that a minimum of two
poeple perform this task.
6. Insert the Bottom (3) vertically into the assembly
with the Lock slots and holes 'DOWN'. Align the
open slots in the Bottom with the screws in the Sides
and engage the screws. The lower Back flange
must capture the flange on the Bottom.
7. Tighten all screws in the Back and Bottom.
8. Remove the protective backing from one side of
the Tape Strip (E2) and apply a strip to the bottom of
each end panel.
9. Stand the assembled body in an upright position.
10. If your Overhead Unit is to be equipped with the
'OPTIONAL' Tack Panel, install it at this time.
Please refer to the installation instructions included
with that product.
11. Remove the protective film from the Tape
located on the bottom of each end panel. Align the
Overhead with the edge of the work surface it is to
be placed on and set it in position.
MAYLINE recommends that a minimum of two
people perform this task.