Mayline CSII "P Table & "P" Table w/Conference End" User Manual
Page 2
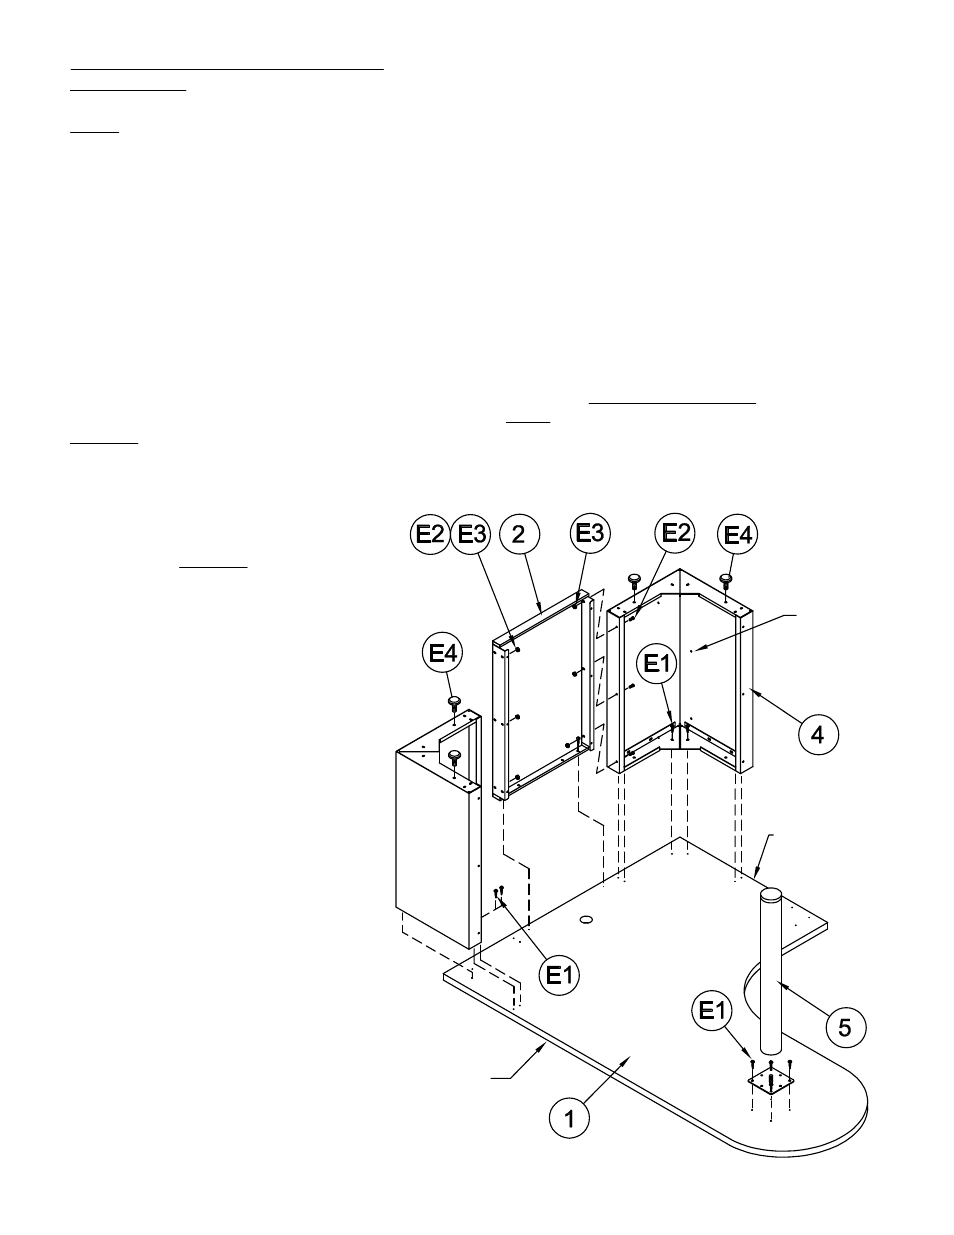
"P" Desk Assembly:
NOTE: Shape and size may vary but assembly
procedure remains the same. Legs are
universal and may be placed on Right or Left
side.
"P" Table and "P" Table with Conference
End Assembly:
NOTE: Shape and size may vary but
assembly procedure remains the same.
1. Place the Work Surface (1) face down
onto a clean, protected surface.
2. Place Leg (3) along the 'LONG' edge
of the Work Surface. Place Leg (4) along
the 'SHORT' edge of the Work Surface,
extra holes toward outside. Position
Legs (3 & 4) approximately 3/16 from
their respective edges and align the
holes in the Leg with the pre-drilled holes
in the Work Surface. Attach each Leg
to Work Surface with six Screws (E1).
DO NOT tighten screws at this time.
3. Position the Modesty Panel (2)
between the Legs (3). Align the holes in
the Panel with the pre-drilled holes in the
Work Surface. Secure Panel with
Screws (E1). DO NOT tighten screws at
this time.
4. Attach the Modesty Panel (2) to each
Leg (3) with three Screws (E2) and three
KEPS Nuts (E3) at each end.
5. Tighten all screws at this time.
6. Install two Glides (E4) into each Leg.
7. Align the holes in the Post Leg (5)
mounting plate with the pre-drilled holes
in the Work Surface. Secure the
mounting plate with four Screws (E1).
Thread the Post Leg onto the mounting
plate stud.
SHORT SIDE OF
WORK SURFACE
LONG SIDE OF
WORK SURFACE
EXTRA HOLES
TO THIS SIDE
(2)