KV2 Audio COMPEX User Manual
Page 6
Unpacking
Unpack the COMPEX and check to see if there
is any damage to it. If you find any damage
notify your supplier immediately.
Only the consignee may institute a claim with
the carrier for any damage incurred during
shipping. Be sure to save the carton and all
packaging materials for the carrier’s inspection.
Should you ever need to ship the unit, only use
the original factory packaging. If the shipping
carton is unavailable, contact your supplier to
obtain a replacement.
The COMPEX carton should contain:
s
Rack mounting
The COMPEX will mount in a standard 19”
rack system. Use four screws and washers to
mount the COMPEX to the rack rails. We
recommend using a shock-mounted rack for
touring use to prolong the life of your
COMPEX.
To prevent accidental adjustment of settings,
or unwanted tampering in a fixed installation,
+6
AC Power requirements
The COMPEX
USES
connector. The device must be connected to a
mains socket outlet with protective earthing
connection. The COMPEX operates in either
115V or 230V mode. This setup is preconfigu-
red at the factory. The mains plug of the power
supply cord shall remain readily operable.
Getting started
AUTION
!
Voltage requirements
The COMPEX operates safely and without
AUDIO
115V mode or 180V-260V when working in
230V mode at 50 or 60Hz.
Input
Output
1
2
3
2
1
3
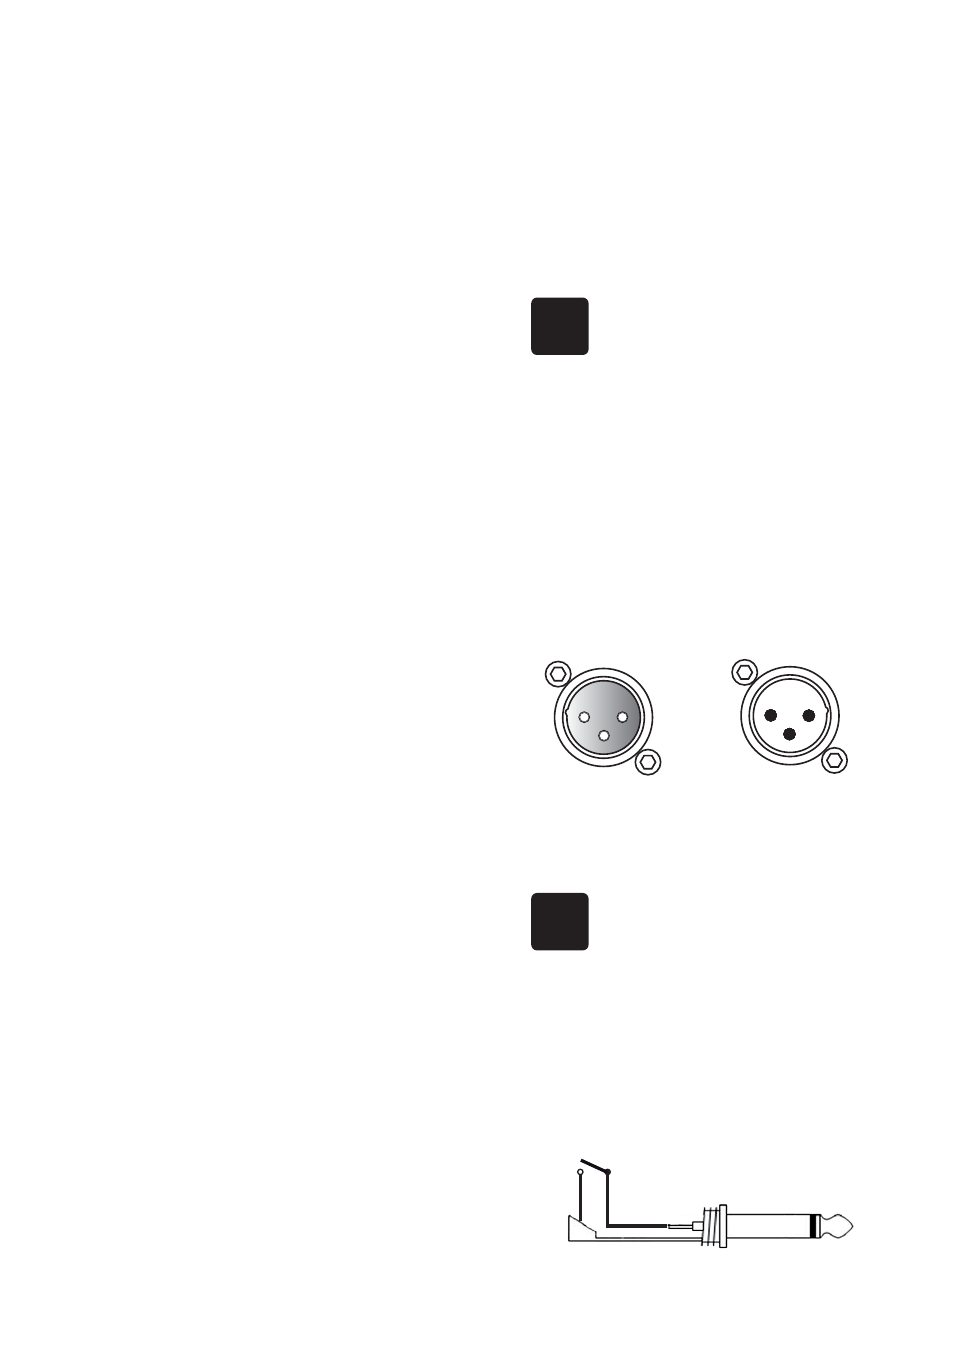
1 = Ground
2 = Hot (+)
3 = Cold (-)
Connector wiring
XLR Balanced Input and Output connectors
CAUTION:
)F
!
CAUTION
CAUTION:
If it is necessary to convert balan-
ced output to unbalanced, it is
IMPOSSIBLE
!
CAUTION
Page | 6
Jack 1/4” mono
switch
Remote bypass control wiring