I.R.I.S. 402 User Manual
Page 36
Troubleshooting:
Check Firmware Version:
In the event of a problem occurring with the functionality of the camera, it’s always best to ensure the latest
version of firmware is installed as the issue may have already been addressed by a new firmware release.
Therefore the first step of troubleshooting functionality issues is always to check the firmware version
number and establish whether a subsequent release is available.
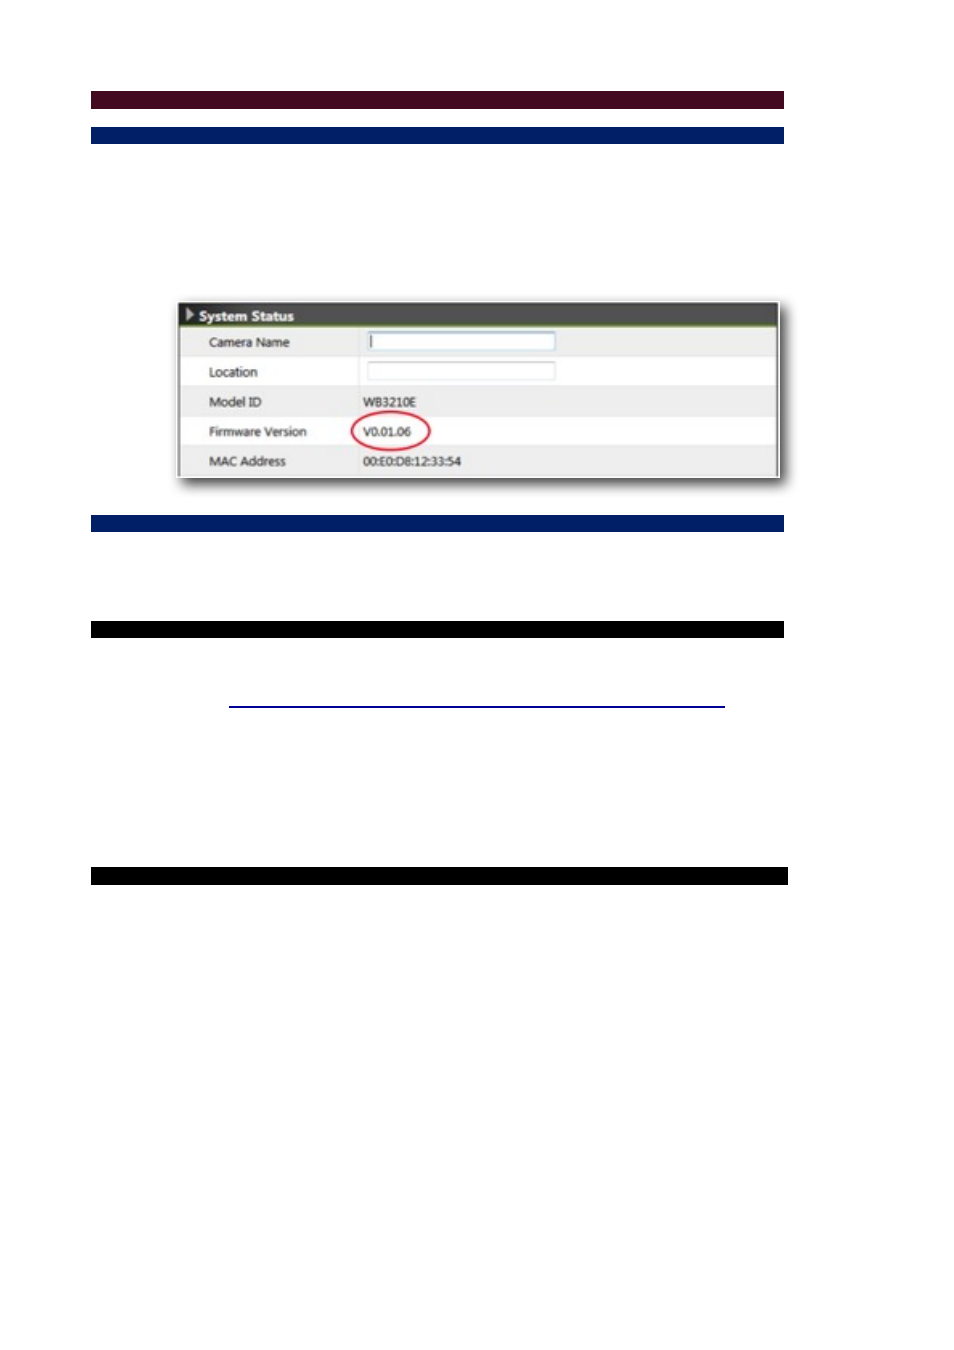
The firmware version number can be found in Setup -> System -> System Information. See screen-grab
below:
Upgrade Device Firmware:
Firmware upgrade process should be done via the cameras web connection (as opposed to the SD card for
example): Setup -> System -> Maintenance -> Firmware Upgrade. Before the process, read the
instructions and release notes coming with each new released version.
Read Prior to Upgrading:
1. The latest firmware image is available on Iris’ official website:
2. Make sure all other client connections are disconnected and current jobs such as recording are finished.
3. During the upgrading period, DO NOT disconnect the power to the camera, otherwise the cameras
memory might become damaged necessitating ‘outside warranty’ repair.
4. The front LED indicator will flash red slowly during the upgrading procedure. When the LED changes to
steady green, the upgrading process is completed.
Firmware Upgrading Procedure:
1. Go to firmware upgrade page on the cameras web interface. Figure 1
2. Click “Firmware” button to open browser pane to navigate to and select the firmware image. Figure 1
3. Click “Upgrade” to begin (the upgrade progress bar will pop up). Figure 2
4. Once the upload is complete, the system will reboot automatically. The new firmware will load in at this
point.
5. Go back to firmware upgrade page and confirm if the “current version” is up-to-date. Figure 3