GAM Twinspin TS5574 User Manual
GAM Hardware
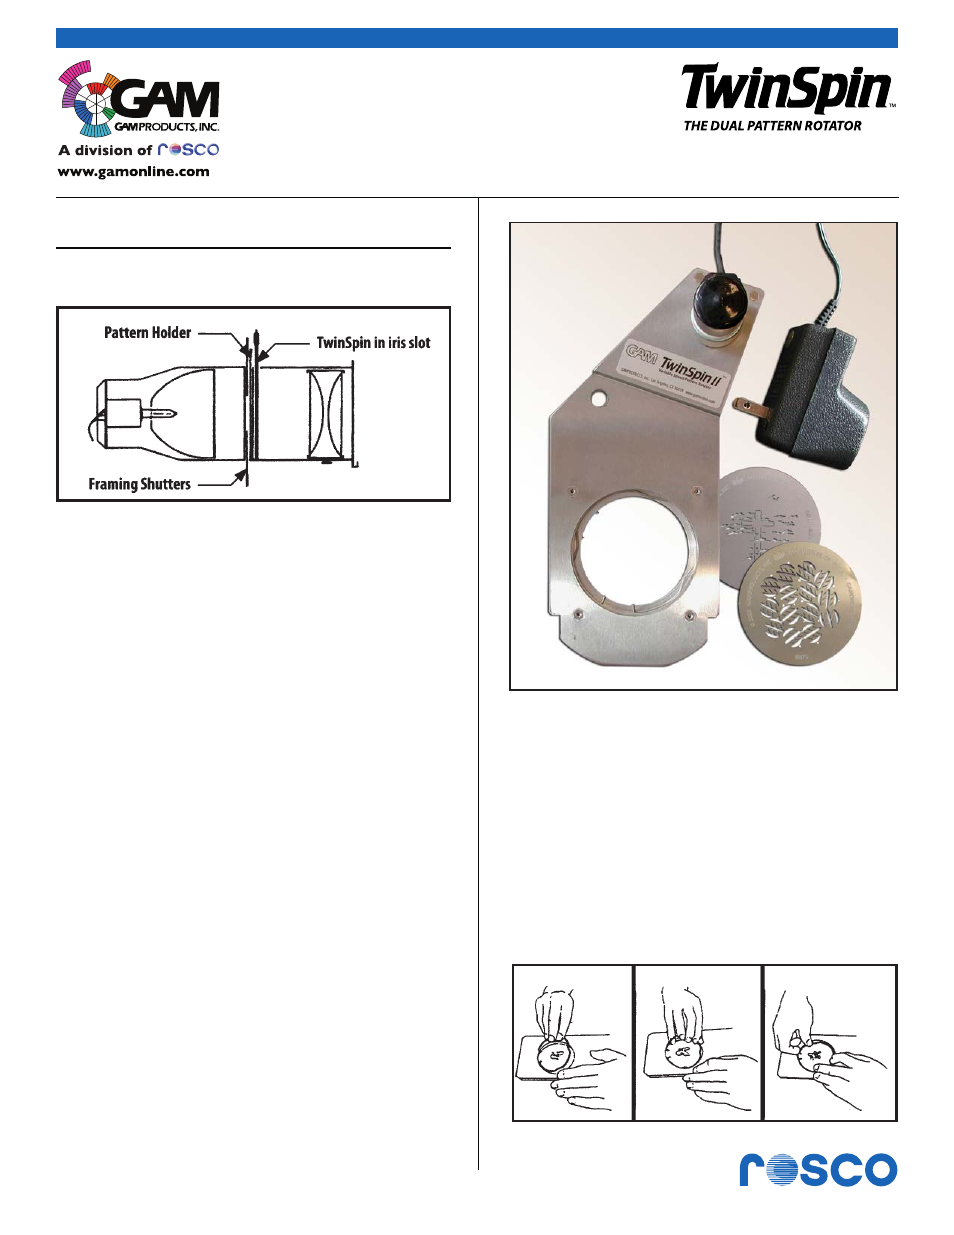
Fig 1. Ellipsoidal spotlight cross section
Congratulations on your new TwinSpin™. It will add an ex-
citing new dimension to your pattern projections... motion!
PREPARING THE TWINSPIN™
Before inserting patterns or a TwinSpin™ in your fixture,
it is important to align the lamp. Position it in the reflector
so that the circle of light is as smooth and even as pos-
sible. When the field of light is truly flat, it will appear to
be slightly darker in the center for a few moments (this is
an optical illusion).
When the lamp is positioned too far into the reflector,
the center of the field will look ‘hot’. When the lamp is
positioned too far back out of the reflector, the center will
be dull and shadowed and the outer rim will look bright.
Hot spots can cause warping of the patterns and may
damage delicate designs.
INSERTING A PATTERN IN THE TWINSPIN™ (See Fig. 2)
With the TwinSpin™ lying on a flat surface, center a pat-
tern in the shallow well on the lip of the circular opening,
then secure with a retaining ring.
1. Begin by pushing one end of the spring ring into the
groove. Hold firmly in place with finger, pressing the ring
against the pattern.
2. Holding the ring firmly, work the ring around until it is
completely in place.
3. Finally, allow the hooked end to snap into place.
Press the ring down gently with your finger to make sure
it is tightly inserted all the way around.
Page 1 of 2
www.rosco.com
PRODUCT INSTRUCTIONS
INSERTING A TWINSPIN™ INTO THE FIXTURE
First, be sure that the lamp is properly aligned when
preparing the fixture. Next slide the TwinSpin™ straight
down into the iris slot in front of the pattern holder. Be
sure it is seated straight and as far down as it will go.
Secure the TwinSpin™ power cord so it does not con-
tact the fixture housing. There is a safety cable mount
hole in the TwinSpin™ near the motor. Use safety cable
when mounting overhead.
Fig 2. Inserting retaining Ring
GAM Product #TS5574
Rosco Product # 205 66705 0120