FastenMaster Tiger Claw Pneumatic User Manual
Inst all ation pr ocess, Getting started / installation tips
GettinG Started / inStallation tipS
IMPORTANT! read all instructions
carefully and completely to ensure
proper installation.
WARNING! parts have sharp
points & edges. Use extreme
caution when handling & installing.
Wear safety glasses at all times.
®
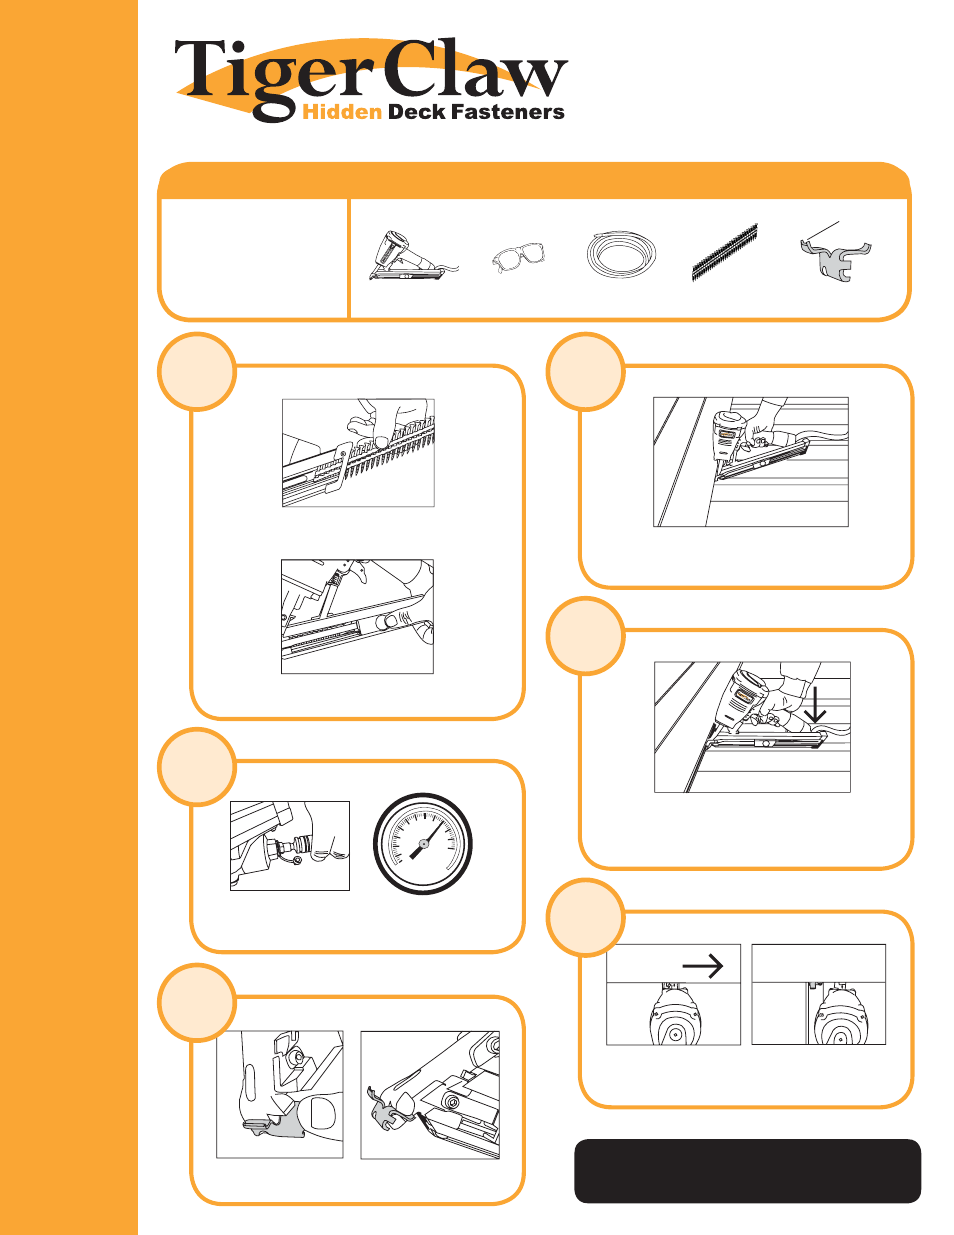
Tools & Materials Needed
Compressed
air Supply
Safety Glasses
tiger Claw
installation Gun
Email: [email protected]
Tech Support: 800-518-3569 toll free
Customer Service: 800-518-3569 toll free
Fax: 413-786-1760
153 Bowles Road • Agawam, MA 01001
INST
ALL
ATION PR
OCESS
For
Tiger Cla
w I
nstalla
tion Gun
Collated
pneumatic Screws
tC-G Clip
Horned tab
0
20
40
60
80
100
120
®
JOIST
®
JOIST
BOARD
BOARD
JOIST
always keep fingers clear of barrel.
never let gun point at body while connected to air supply.
do not pull trigger while safety is deactivated.
Step
1
Step
3
Step
2
Step
4
Step
5
Step
6
inSert pneUmatiC SCreWS
inSert in GrooVe
poSition/anGle
remoVe
moUnt FaStener in GUn
air/preSSUre
insert a sleeve of collated pneumatic
screws into the rear of the magazine.
pull back the spring coil until it locks
onto the back of the sleeve.
insert a sleeve of collated pneumatic screws into
the rear of the magazine.
attach air hose. Be sure line pressure is
80-100 pSi. (pressure adjustment may be
needed depending on framing material density)
Holding the gun upright, insert the horned tab
into the groove of the deck board directly over
the support joist.
once fastener is fully inserted, apply pressure to
disengage the safety. then lower the back of the
gun allowing themagazine to sit on the support
joist to assure correct angle,and pull the trigger.
With the magazine still resting on the joist, slide
the nose of the gun to the right removing it from
the attached fastener.
repeat until deck is complete