Assembly & installation – Danuser Pallet Forks User Manual
Page 7
7
Prepare the Vehicle
Read and understand the manual for your vehicle before assembling or installing the pallet
fork. The use of the pallet fork may require the addition of counterweights to ensure the
combined weight of the attachment and load does not exceed the rated capacity of your
vehicle.
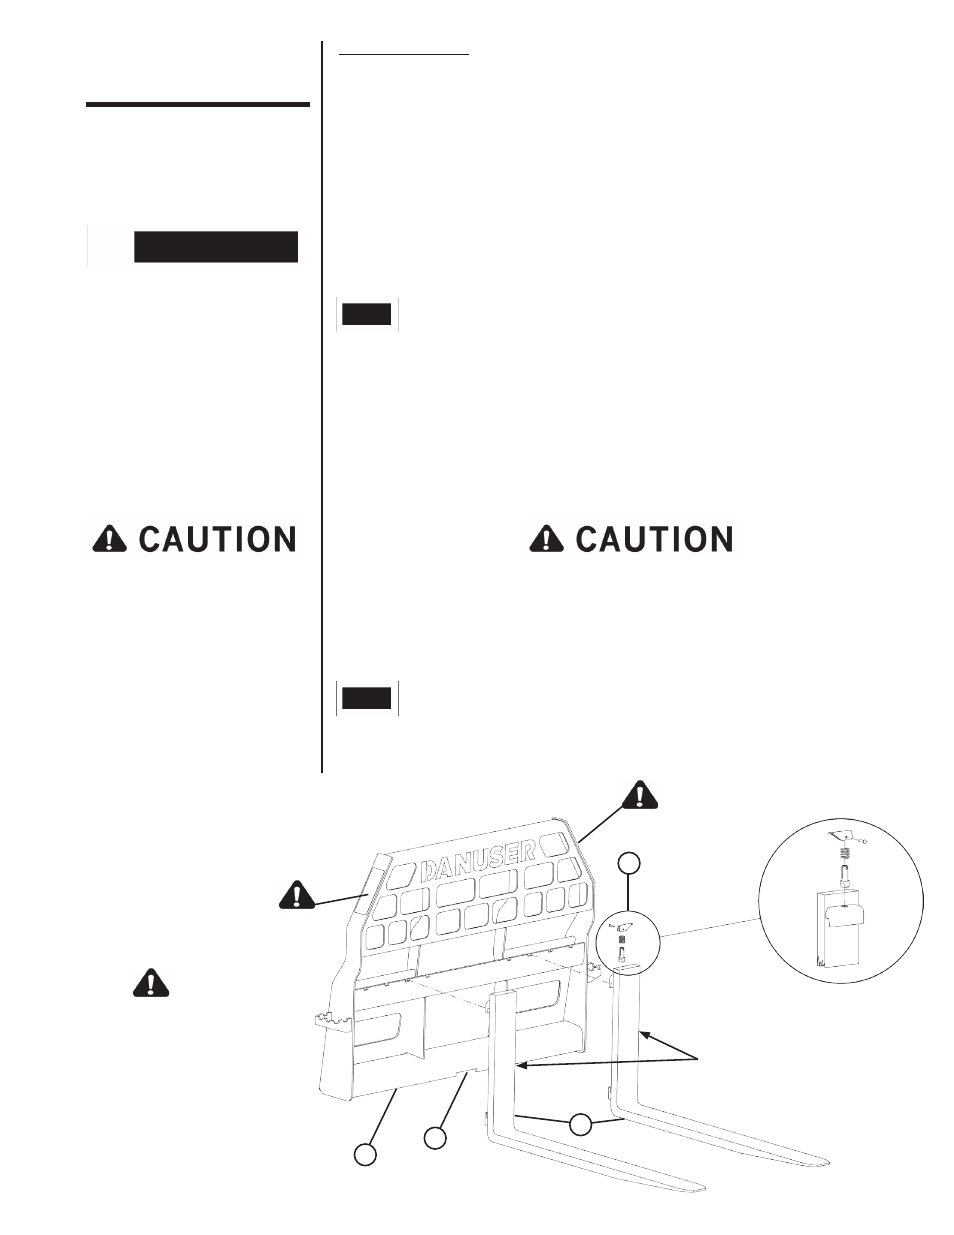
STEP 1: Park the vehicle on level ground, and install the frame (1) by following your
vehicle operator’s manual for installing an attachment. Be sure to securely latch
the frame (1) to the vehicle.
STEP 2: Completely lower the vehicle loader arms and fully roll the dump cylinders back.
If the bottom rail of the frame (1) is in contact with the ground, then slightly raise
the vehicle loader arms.
STEP 3: Shut off the vehicle engine and remove the key.
STEP 4: Grease the frame (1) rails to reduce wear and make adjusting the tines (2) easier.
STEP 5: Position the first tine (2) in the center notch (3) of the frame. Place the top tine
tab on the top rail first, so that the bottom tine tab goes into the notch (3) on the
bottom rail. Lift the lever (4) and slide the tine (2) to the right. Repeat this
process for the second tine (2), and slide it to the left.
STEP 6: Flip up the levers (4), and slide the fork tines (2) to the desired width. Each tine
(2) must be the same distance from the center of the frame (1).
STEP 7: Flip down the levers (4), and secure fork tines (2) by sliding the latches into the
frame rail notches.
Assembly &
Installation
The bottom rail of the frame should be slightly off the ground to allow
installation of the fork tines.
Personal protection
equipment including
hard hat, safety glasses,
safety shoes, and gloves
are recommended during
assembly, installation,
operation, maintenance,
removal, or movement of
the pallet fork.
Always use two
people to handle
heavy, unwieldy
components during
assembly, installation,
maintenance, removal,
or movement of the
pallet fork.
Never place your hands or fingers between the frame and
the fork tine, especially when adjusting tines.
Keep the fork tines adjusted to the maximum width for better load stability.
= Safety Sign
Location
1
4
3
2
fork tine
capacity