chiliGREEN TWJ User Manual
Page 21
GETTING STARTED
21
Memory Module Upgrade
To increase your notebook's memory capacity (up to 8 GB maximum), additional memory mod-
ules may be installed. The memory upgrade must be a dual-in-line (DIMM) SDRAM module.
Installing a Memory Module
The following steps describe how to install a memory upgrade module. We do not recommend
that you do this yourself.
1. Turn off power to your notebook using the power switch, disconnect the power adapter, and/
or remove the battery pack.
2. Place your notebook upside-down on a clean work surface.
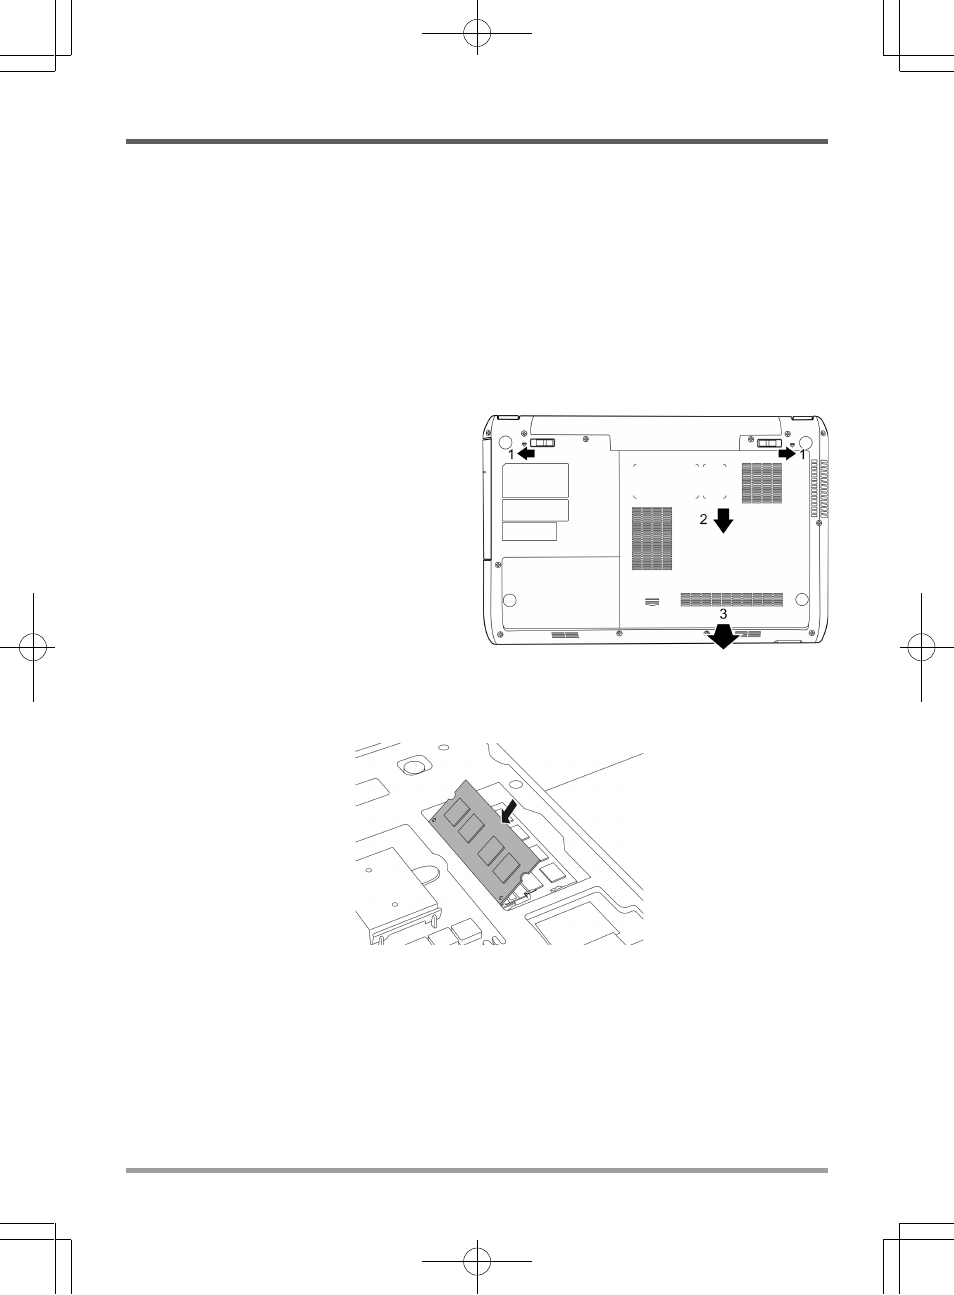
3. Slide open the battery lock. Slide and hold
the battery release latch in the open
position and use the other hand to slide
the memory compartment cover toward
the front of the system. Once the cover
is released from the securing tabs, lift it
away from the system.
4. The memory upgrade module can be
severely damaged by electrostatic
discharge (ESD). Be sure you are
properly grounded when handling and
installing the module.
5. Align the connector edge of the memory upgrade module, chip side up, with the connector slot
in the compartment.
6. Insert the memory upgrade module at a 45
o
angle and press it firmly onto the connector.
7. Press the memory upgrade module down into the compartment until it locks into the retaining
clips on either side. You will hear a click when it is properly in place.
8. Replace the cover and slide toward the back of the system until it clicks into place. Installation
of the new memory module is now complete.
The memory upgrade module is not something you routinely remove from your notebook PC. Once
it is installed, you should leave it in place unless you want to increase system memory capacity.