Installation, Operation, Installation for decorative fountain rainxchange – Aquascape Booster Pump (30084 & 30085) User Manual
Page 3: Systems
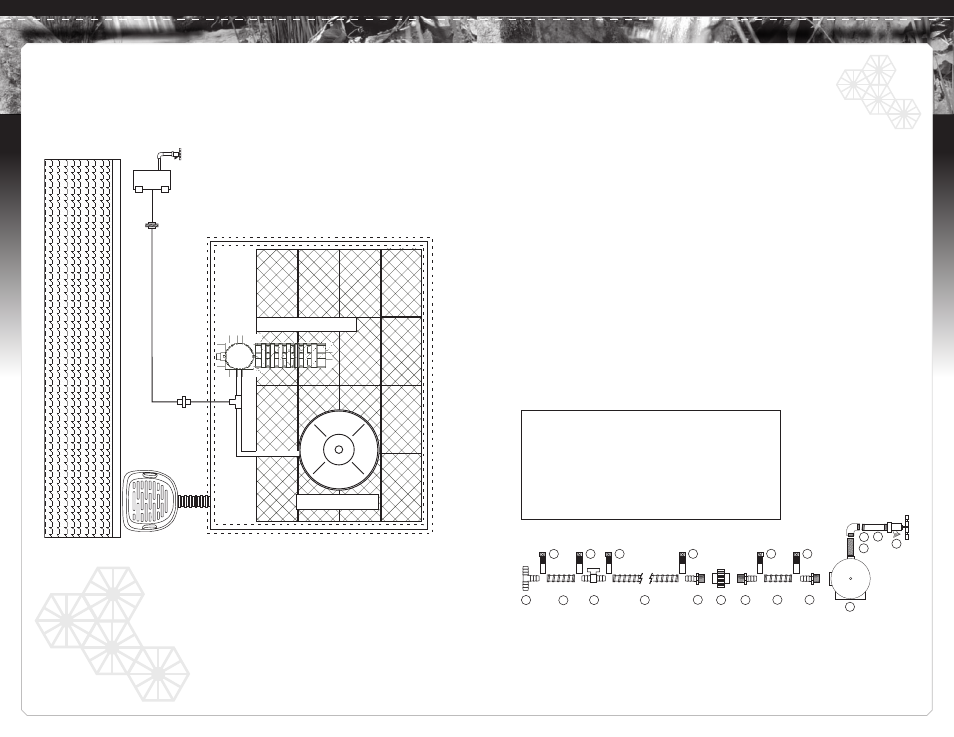
House
Ball Valve
Booster
Pump
Downspout
Filter
Snorkel and Centipede
Decorative Urn
Union
H
I
J
A
G
B
C
D
E
D
D
B
B
F
K
*
K
K
K
K
K
*
Bill of Materials for Item #30170, RainXchange
®
Booster Deco Fitting Kit
(A) #99118 - 3/4" Barbed Tee - qty.1 (Included with Kit #30173)
(B) 3/4" Kink-Free Tubing (not included)
(C) #98148 - 3/4" Barbed Ball Valve qty.1
(D) #98180 - 1" mpt x 3/4" barbed - qty.3
(E) #98636 - 1" Threaded Union - qty.1
(F) #30084/30085 - Booster Pump (not included)
(G) #30091 - 1" mpt x mpt nipple galvanized 1" long - qty.1
(H) #30090 - 1" FPT x 3/4" FPT elbow galvanized - qty.1
(I) #30092 - 3/4" mpt x mpt nipple galvanized 4" long - qty.1
(J) #30093 - 3/4" FPT Spigot - qty.1
(K) #99106 - Fitting 7/16" to 1" SS Hose Clamp - qty. 4
*Included with Kit #30173
c a p t u r e > f i lt e r > r e u s e
a q u a s c a p e r a i n x c h a n g e ™
4
5
Installation
• Use the plumbing diagram below to see the complete assembly order of the components.
• Cut into the ¾” kink-free decorative fountain plumbing line and install the barbed tee fitting
included with your Decorative Booster Pump kit (item# 30170). Secure the fittings with the
supplied hose clamps. Follow the plumbing installation diagram for proper configuration.
• A ball valve is included with the plumbing kit to allow the water supply to be shut-off to the
Booster Pump when removing for service.
Note: It is recommended to install the ball valve
as close as possible to the plumbing tee off the main water feature line if the project is
located in regions that experience freeze/thaw.
• A union is included to allow easy removal of Booster Pump for service or winter storage
and should be positioned as close as possible to the Booster Pump.
Operation
• Before using your RainXchange
®
Booster Pump, you must prime the pump first. To do this,
simply make sure that your Aquascape water feature pump is running. Next, rotate the
red knob on top of the Booster Pump counterclockwise until water begins to trickle out.
Then simply tighten the knob back down by turning it clockwise and you are ready
to use the Booster Pump.
Installation for Decorative Fountain RainXchange
®
Systems
Top View