Nstalling the, Onsole – Allen&Heath WZ14-4-2 MK2 User Manual
Page 9
WZ14:4:2+
U
SER
G
UIDE
9
I
NSTALLING THE
C
ONSOLE
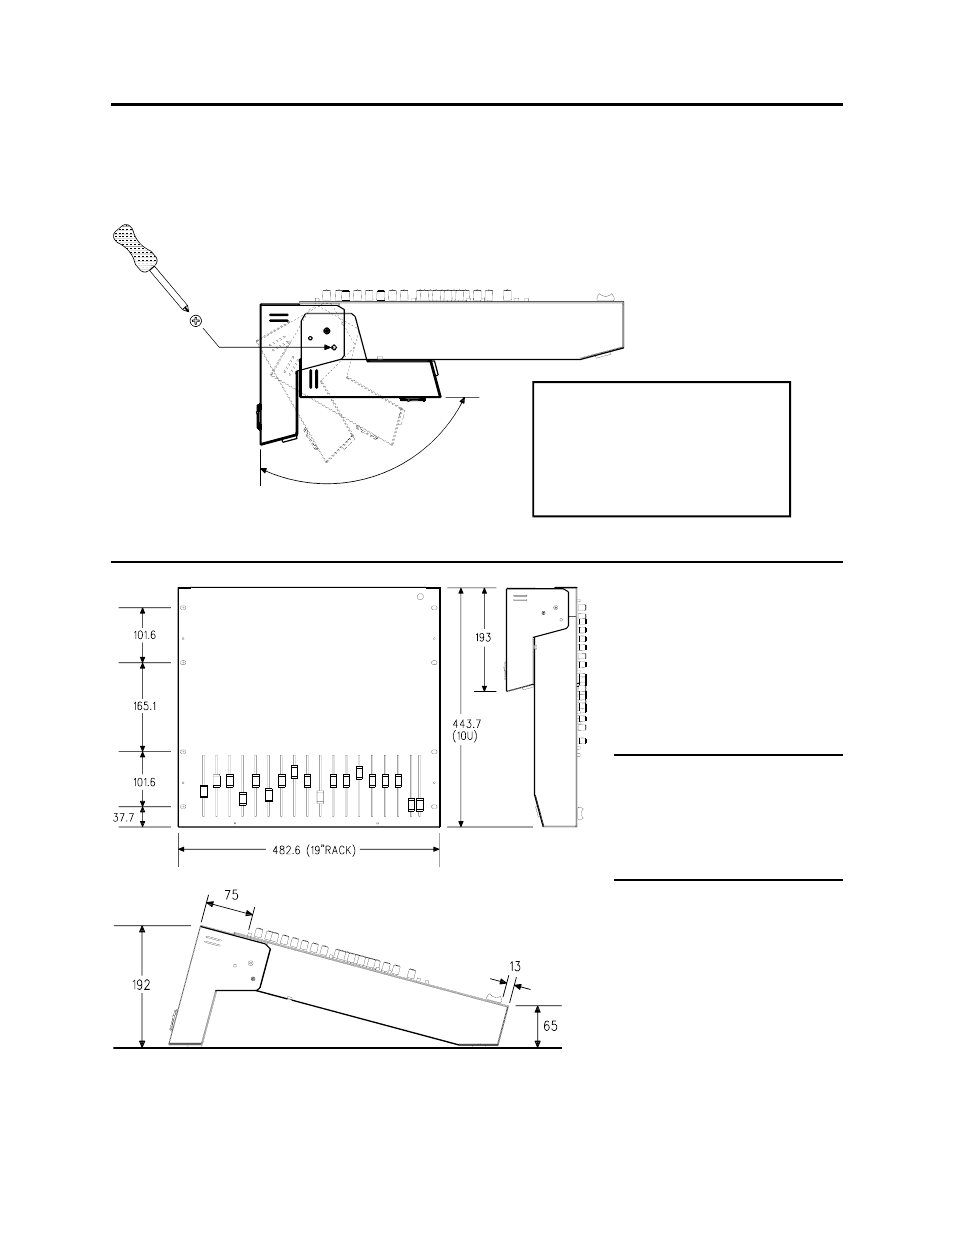
The Mix Wizard Series features the ALLEN & HEATH Quick Change Connector (QCC) system.
The rear connector pod may be hinged and locked into either of two positions: Rear connectors for
desktop operation with the control panel sloped at a convenient 15 degrees, or underside
connectors for 19" rack mounting in a compact 10U space. The connector position can be easily
changed at any time to fit your application.
To
change
the
position remove the
crosshead
locking
screw on each side,
swing the connector
pod into position, and
refit the two screws
PRECAUTION :
Do not transport or carry the
console with the locking screws
removed.
Do not attempt to remove the
connector pod from the console.
19”
R
ACK
M
OUNTING
Mount the console in the rack
using 4x M6 bolts each side for
maximum strength. We
recommend you fit the bolts with
plastic cup washers to protect the
panel, and they look good...
These should be available from
the supplier of the rack unit or a
good hardware store.
F
LIGHTCASING
The console can be easily
flightcased in either connector
mode. Provide the dimensions
shown here to your flightcase
supplier.
D
ESKTOP
O
PERATION
The console is fitted with rubber feet
to ensure it does not slip or scratch
the work surface. The control panel is
angled at 15 degrees for operating
convenience.