Step 1, Step 2, Step 3 – Aladdin Light Lift ALL1000-CM User Manual
Page 3: Step 4
STEP 1
Determine where ALL1000 will mount on ceiling joists. ALL1000 must be installed level, in an accessible
location directly above chandelier.
Never mount the ALL1000 off plane or unlevel in a standard installation. This could cause the
chandelier to fall, which could cause death, personal injury, and/or property damage. The winch cable
must hang plumb through the center of the top contact plate on the ceiling box.
Never install the ALL1000 where the ceiling height exceeds five feet less than the exact length of winch
cable. For example, if the ALL1000 is equipped with a 35ft. cable, do not install the ALL1000 in a
ceiling that is greater than 30ft. This could cause the cable to become reverse wrapped on the winch. An
ALL1000 installed with a reverse wrapped cable could cause the chandelier to fall, which could cause
death, personal injury, and/or property damage. Winch cable length can be found on the ALL1000
product sticker, shipping box and the front page of these installation instructions.
STEP 2
After turning off power, remove and discard existing electrical box if present in ceiling. Only use ceiling box
provided with ALL1000. See Diagram A.
Never remove an existing ceiling box while the power is connected. Electricity could cause death,
personal injury, and/or property damage.
STEP 3
Cut a 4 ½” hole in ceiling for ceiling box. If you removed an existing ceiling box, existing hole may need to
be enlarged.
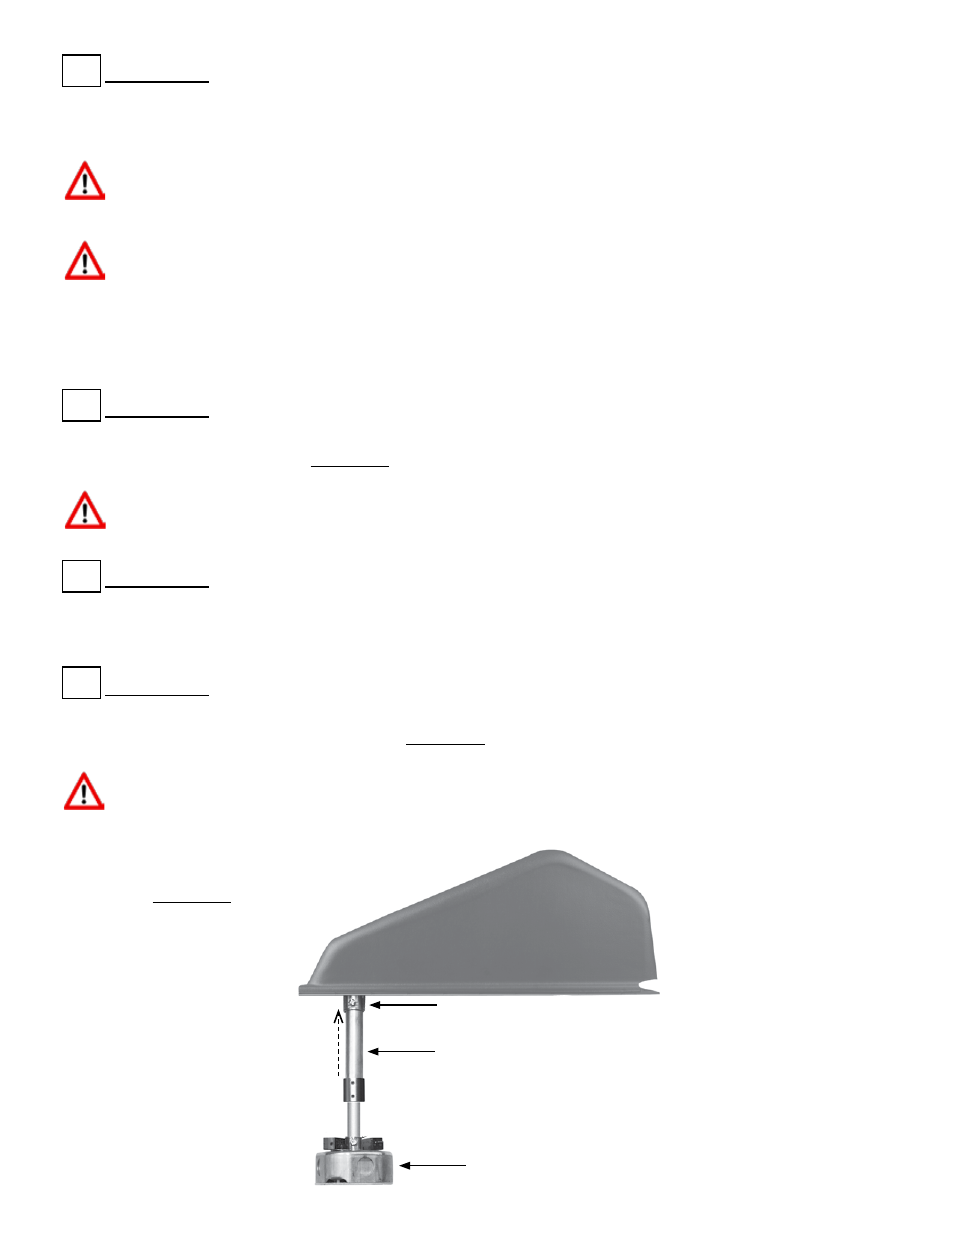
STEP 4
Attach conduit assembly to 3/4” conduit connector mounted below pulley. Once completely inserted,
tighten set screw on conduit connector. See Diagram A.
Never attach or adjust the conduit assembly improperly. This could interfere with the automatic shutoff
system and could cause the chandelier to fall, which could cause death, personal injury, and/or property
damage.
ALL1000 Ceiling Box
Telescopic Conduit Assembly
3/4” Conduit Connector
Diagram A