Srm-230 maintenance, Carburetor adjustment – Echo SRM-230 User Manual
Page 25
SRM-230
MAINTENANCE
© 2/2014 ECHO Inc.
X7532098207
25
Exhaust Port Cleaning
Level 2.
1. Remove spark plug lead.
2. Remove muffler cover.
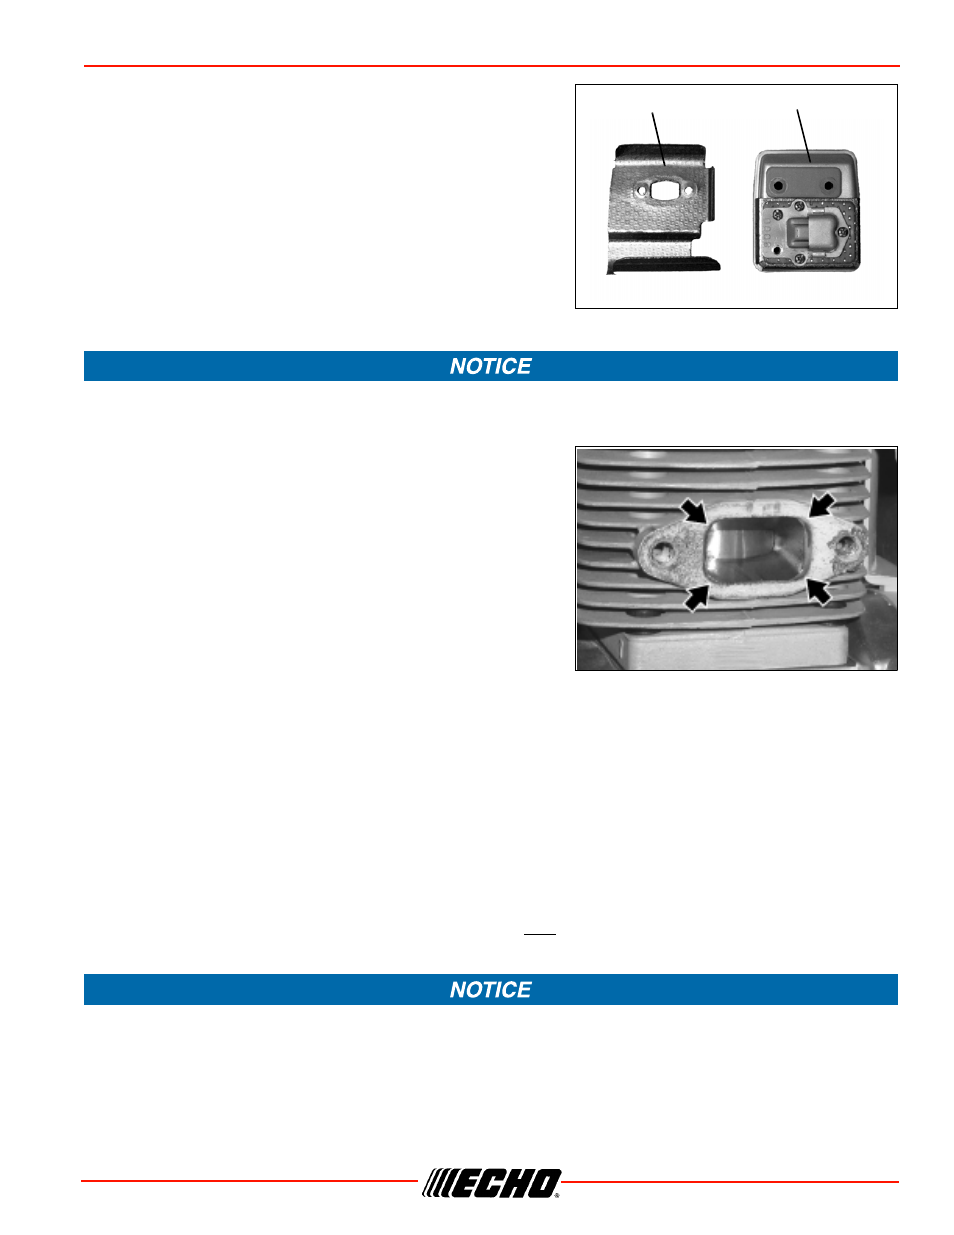
3. Place piston at top dead center. Remove muffler (A) and
heat shield (B).
4. Use a wood or plastic scraping tool to clean deposits from
cylinder exhaust port.
Never use a metal tool to scrape carbon from the exhaust port. Do not scratch the cylinder or piston when
cleaning the exhaust port. Do not allow carbon particles to enter the cylinder.
5. Inspect heat shield, and replace if damaged.
6. Install heat shield and muffler.
7. Tighten muffler mounting bolts (or nuts) to 80-95 in•lbf
(90-110 kgf•cm).
8. Install muffler cover and attach spark plug lead.
9. Start engine, and warm to operating temperature.
10. Stop engine, and re-tighten mounting bolts (or nuts) to
specifications.
Carburetor Adjustment
Level 2.
Engine Break-In
New engines must be operated a minimum duration of two tanks of fuel break-in before carburetor
adjustments can be made. During the break-in period your engine performance will increase and exhaust
emissions will stabilize. Idle speed can be adjusted as required.
High Altitude Operation
This engine has been factory adjusted to maintain satisfactory starting, emission, and durability
performance up to 1,100 feet above sea level (ASL) (96.0 kPa). To maintain proper engine operation and
emission compliance above 1,100 feet ASL the carburetor may need to be adjusted by an authorized ECHO
service dealer.
If the engine is adjusted for operation above 1,100 feet ASL, the carburetor must be re-adjusted when
operating the engine below 1,100 feet ASL, otherwise severe engine damage may result.
Note: Every unit is run at the factory and the carburetor is set in compliance with emission regulations.
Carburetor adjustments, other than idle speed, must be performed by an authorized ECHO dealer.
Parts Required:
As needed: Heat Shield
Parts Required:
None
B
A