11 trailer service tips, English – Echo CH4400 Owners Manual v.1 User Manual
Page 23
4 INCH CHIPPER
19
ENGLISH
SERVICE & MAINTENANCE
Before inspecting or servicing any part of this machine, shut off power source,
disconnect spark plug wire from spark plug and make sure all moving parts have come to a complete stop.
WARNING
InsTallInG THe new BearInGs
1. replace bearing and center in the bearing opening.
2. Tighten the two 1/2 x 1-1/2” carriage bolts and 1/2”
centerlock nuts securing the rear bearing to the chipper
housing. Torque to 75 ft-lb.
3. Slide the rotor back into the chipper housing.
4. Slide a snap ring onto the rotor shaft, making sure that
it is seated properly on the rotor.
5. Slide the bearing shim, front bearing and second snap
ring on the rotor, making sure that the second snap ring
is seated properly on the rotor.
6. Reinstall the disk cover using seven 5/16” nuts and
washers.
7. Next, the rotor must be centered vertically and
horizontally inside the chipper housing. To do this,
measure the distance from the rotor to the inside edge
of the chipper housing at four points around the disk.
Adjust the rotor until all four points are an equal distance
from the edge of the chipper housing or use Alignment
Tool 76302-12. Finish tightening the 1/2 x 3/4” bolts and
nuts securing the front bearing to the chipper housing
to a torque of 75ft-lbs.
8. Tighten the two set screws located on both the front
and rear bearings, securing the bearings to the rotor
shaft. Torque set screws to 160 inch-lbs.
9. Slide the bushing and sheave onto the shaft.
10. Tighten the two 1/2 x 3/4” bolts and nuts securing the
front bearing to the chipper housing. Torque to 75 ft-
lbs.
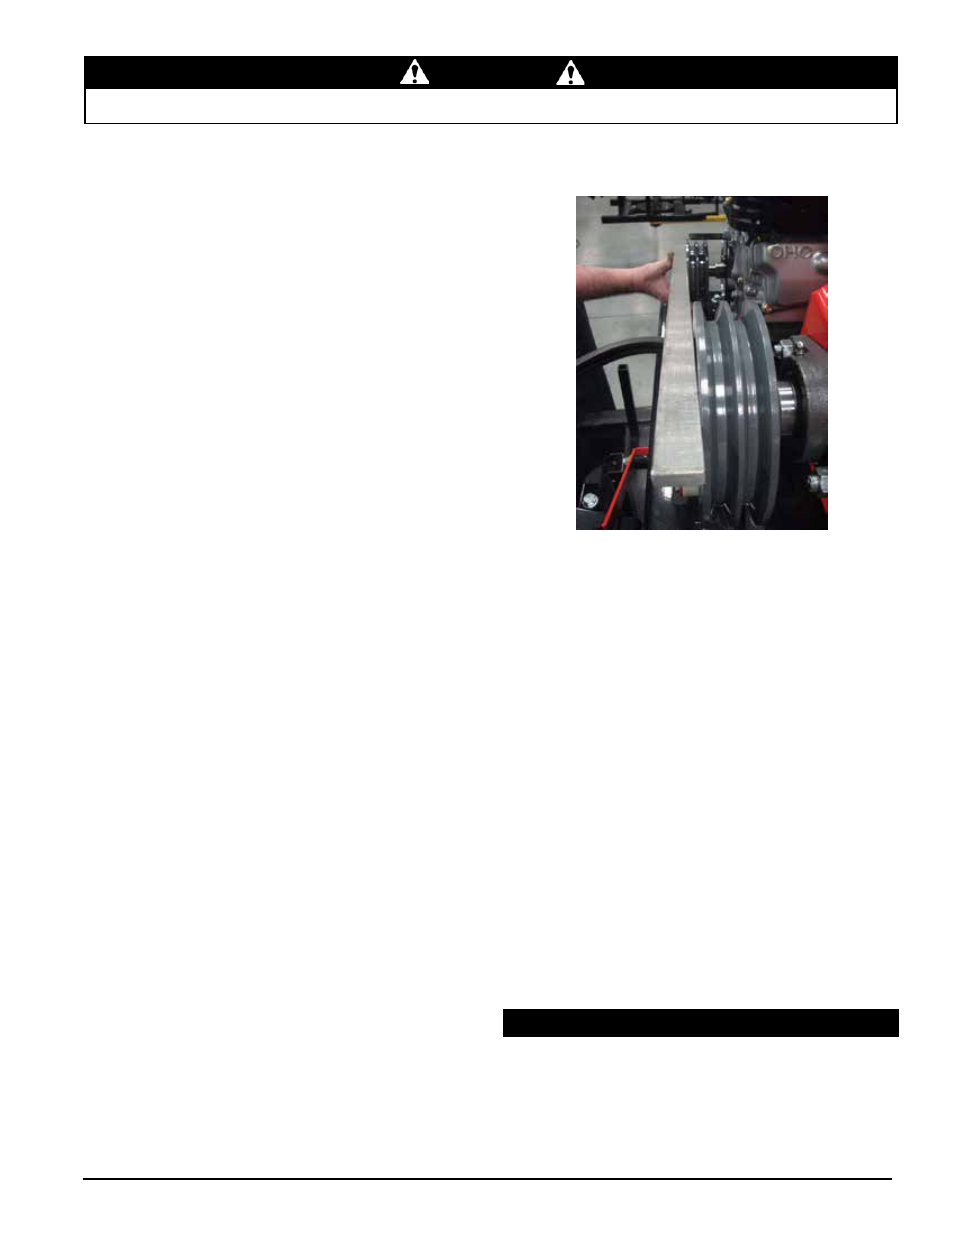
11. using a straight edge, align the sheave with the other
pulley to ±1/16”. Keep in mind that the sheave will shift
approximately 1/16” to 1/8” away from you once it is
tightened (see Figure 5.7).
12. Insure the pulley drive key is completely seated under
the pulley and tighten the set screw.
13. remove the three screws in the sheave and put them in
the other three threaded holes on the sheave. Tighten
the screws equally until the bushing tightens. Torque
to 108 inch-lbs.
5.11 TraIler servICe TIps
1. Check wheel bolt torque monthly.
2. Check air pressure in tires monthly.
3. Check and repack wheel bearings with grease every
12 months.
4. When towing, always connect the safety chains. Make
sure trailer hitch bolts are tight.
5. Check trailer lights periodically.
14. Recheck pulley alignment. Pulley faces should line
up. If not, readjust and repeat alignment check (see
Figure 5.7).
15. replace the belt.
16. Adjust the drive belt so that the belt deflection is 7/16”
when a 20 lb. load is placed against the belt (see
Figure 5.6). To do this, adjust both 5/16” adjustment
bolts equally.
17. If the bolts and nuts between the engine plate and the
trailer cannot be adjusted any further, and the tension
needs further adjustment, tighten the eyebolt until the
appropriate deflection is achieved.
18. Once correct belt deflection has been achieved, tighten
both 5/16” flange nuts to maintain it.
19. Tighten the four carriage bolts attaching the engine
plate to the trailer.
20. reinstall the belt guide.
21. The chipper engagement lever should be in the START
position (up).
22. Reinstall the idler assembly.
23. Attach the chipper chute to the disk cover.
24. attach the discharge cap.
25. replace the belt guards.
5.7 checking pulley alignment
Remove the disk cover.
9b. loosen the set screws securing the back bearing
to the rotor shaft.
9c. Remove the two 1/2 x 1-1/2" bolts and 1/2"
centerlock nuts holding the back bearing to the
chipper housing.
9d. Slide the chipper disk out from the chipper housing
until the bearing slides off the rotor shaft.