Rvh8300 – Ruvati RVH8300 User Manual
Page 3
RVH8300
®
RUVATI USA
www.ruvati.com
Installation
1. Place template on countertop. Position
it such that the sink will have proper
clearance from cabinet.
2. Trace a line around the template.
Determine what “reveal” you want
your sink to have (see previous page)
and based on that, adjust the line
accordingly. Cut along the line.
3. Turn the countertop upside down,
and mark evenly-spaced positions
for the anchors for the mounting clip.
We recommend 3 mounting clips for
the sink sides 20” and longer, and 2
mounting clips for the shorter sides.
Drill holes for the anchors (following
the countertop manufacturer’s
instructions) as shown below. Use
a drill bit with stop block to avoid
drilling through the countertop.
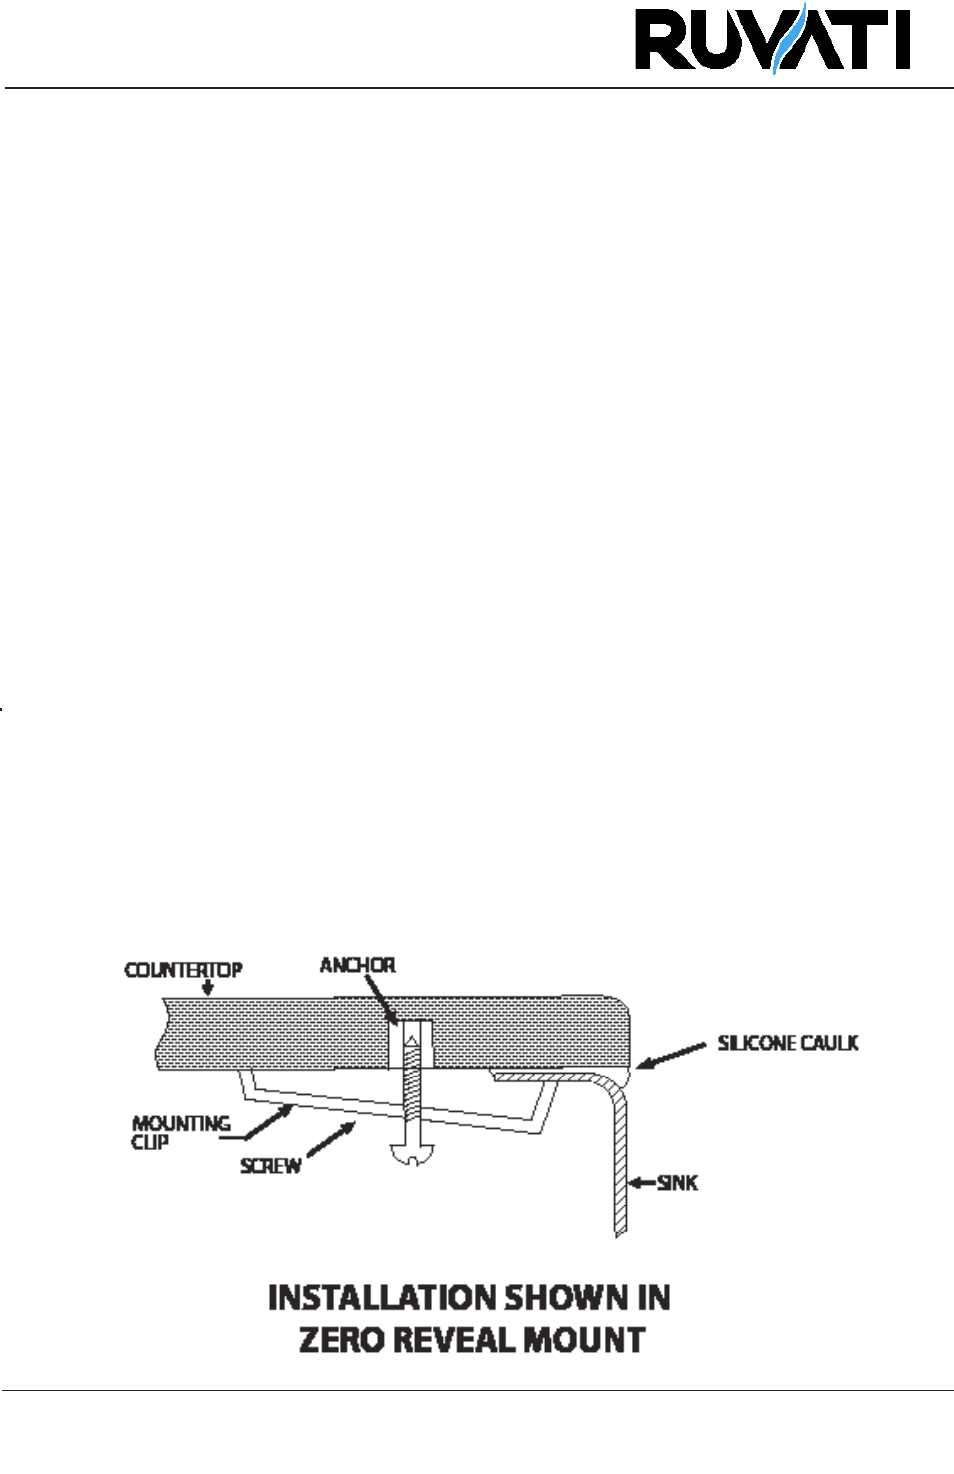
Secure anchors into the countertop
and fasten mounting clips loosely.
NOTE: For granite, marble or solid stone
countertops we recommend using lead anchors
which are glued to the countertop.
4. Clean the underside of the countertop
and the rim of the sink. Using a good
quality silicone caulk, apply silicone
caulk evenly around the rim of the
sink.
5. Place sink over the countertop
opening. Tighten the screws until
mounting clips are snug against sink.
6. Check alignment of sink to countertop
opening and move slightly if you have
to.
7. Tighten down clips evenly without
overtightening. Remove excess
silicone.
NOTE: The following instructions are for wood countertops. For granite, marble or solid
stone countertops, ask your fabricator for installation instructions.
Rev 12/11
Printed in USA
Page 3