Beginning the project, Standard eave trim installation – Mueller AP Panel User Manual
Page 16
INSIDE
CLOSURE
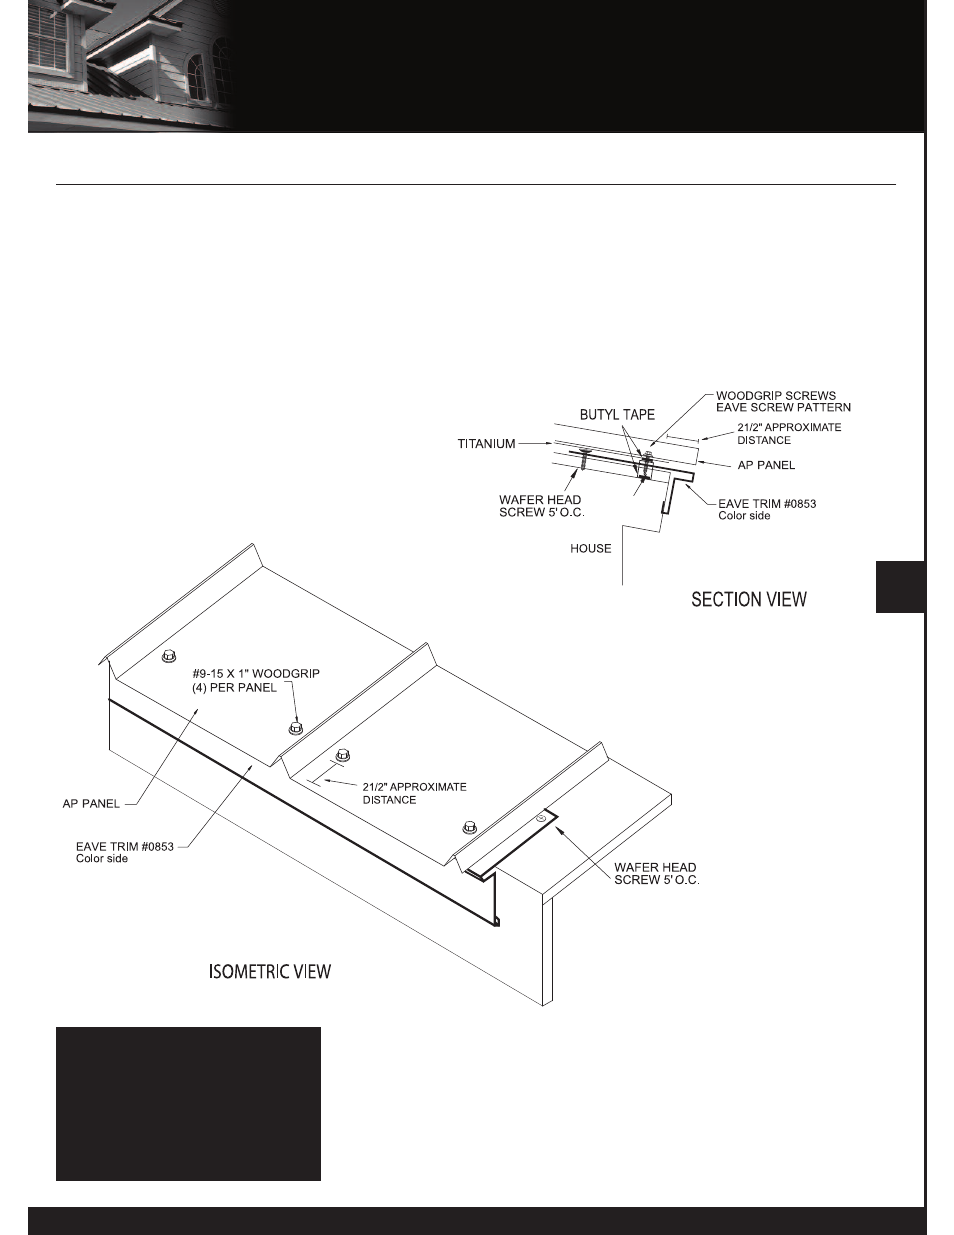
1. Install the eave trim by sliding it underneath the underlayment and securing it to the roof surface with
wafer head screws on 5’ centers.
2. There are no screws or nails to be placed in the exposed fascia of the trim.
3. At the corners, cut the eave trim 1 1/2” long and prepare the ends with tabs to receive the gable trim.
NOTE: Alternate trim profiles are acceptable using the screw pattern shown.
OPTION: The overhang illustrated below may be increased to extend up to 4” past the eave trim.
16
BEGINNING THE PROJECT
Details are subject to change without prior notice.
STANDARD EAVE TRIM INSTALLATION
NOTE: To comply with Texas
Windstorm Certification Testing,
#12x11 SDT Type A screws must
be used in place of the #9
Woodgrip screws.