Rubicon Express RE8300 User Manual
Page 4
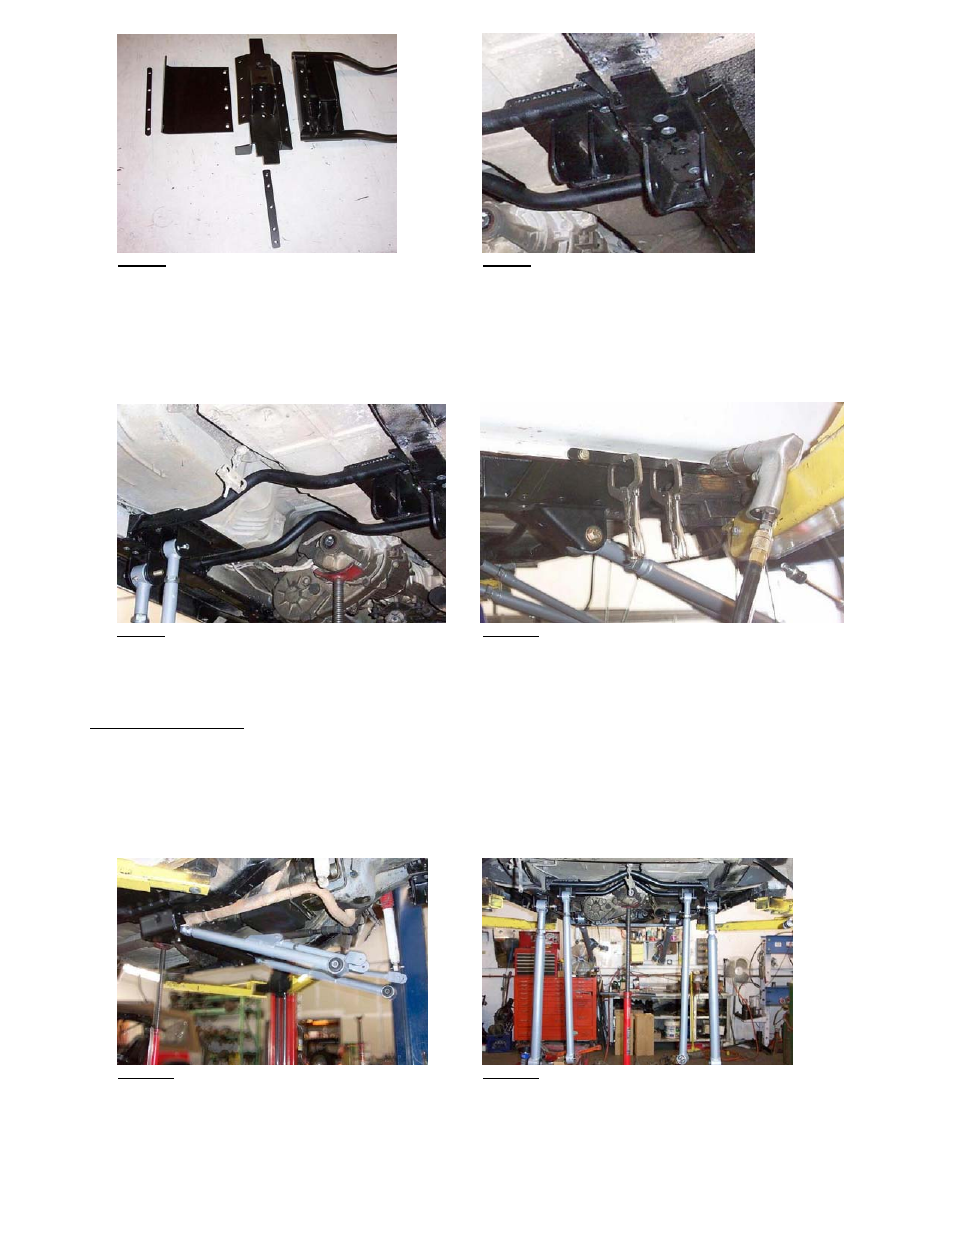
Photo 7
Photo 8
B. Position tubular cross piece up into each frame mount “pocket” (with upper control arm mounts open toward the rear) and
fasten with the six supplied 3/8” hex head bolts – refer to Photo 9.
C. Loosely bolt side braces to frame mounts so that the outer leg is up against the inside of the pinch weld. Place 3-hole bolting
strips on outside of the pinch welds and clamp into position so the holes align with the holes in the side braces. Drill through
pinch weld at front holes of bolting strips and loosely secure through the side braces with four supplied 5/16 “ hex head
bolts – refer to Photo 10. Tighten all crossmember bolts.
Photo 9
Photo 10
D. Weld the three sides of the front and rear tabs of the uniframe mounts to the uniframe. The front tab is clear at the top of
Photo 7 and the rear tab is clear in Photo 8. CAUTION - a certified welder that can weld thick metal to thin should do this
and care should be taken to protect wiring, fuel lines, brake lines, etc, and to not ignite coatings etc. on fire.
Step 4 – Control Arms
A. FRONT - Adjust front lower control arms’ length to an initial setting of 37-7/8” from bolt center to bolt center. Install adjustable
end of arm to front crossmember with supplied hardware (zerk on top). Position the arms so the welded on brackets for the front
upper arms are on top and leaning toward each other.
B. Adjust front upper control arms’ length to an initial setting of 15-7/8” from bolt center to bolt center. Install front upper arms’
rubber bushing end into the welded on bracket of the lower arms with supplied hardware– refer to Photo 11. The upper arms will
be used to adjust final caster and pinion angle.
Photo 11
Photo 12
C. Attach front lower control arms to axle with factory hardware, and attach upper arms to axle with supplied hardware.
D. REAR - Adjust rear lower control arms’ length to 32-1/2” from bolt center to bolt center. Install adjustable end of arm to rear
crossmember lower mounts with supplied hardware (zerk on top).
RI8300 Page 4 of 7