0 setup and walk testing, 0 maintenance, 0 coverage patterns – Bosch MX938I User Manual
Page 4
7.0
Setup and Walk Testing
IMPORTANT
Before walk testing, the system should be fully wired,
powered, and programmed.
• Configure LED Configuration Switch (S1) to LED ON.
•
Replace the front cover.
NOTE:
All testing must be performed with the
front cover in place.
• Wait at least 2 minutes (with no motion in the
coverage area) for the detector to setup.
• Walk test across the coverage pattern.
• The edge of the coverage is determined by
activation of the LED.
• Walk test the unit from both directions to determine the
boundaries.
IMPORTANT
On 2-wire systems, configure the LED to OFF when
finished with walk tests.
8.0
Maintenance
• The range and coverage should be checked in accordance with
the Walk Testing section (6.0) on a regular basis.
• Consult the Control Panel’s User's Guide for the procedure on
performing a zone test. Performing a zone test on a regular
basis assures an alarm output prior to arming the system.
• Excessive handling of the mirror surfaces may lead to
performance degradation.
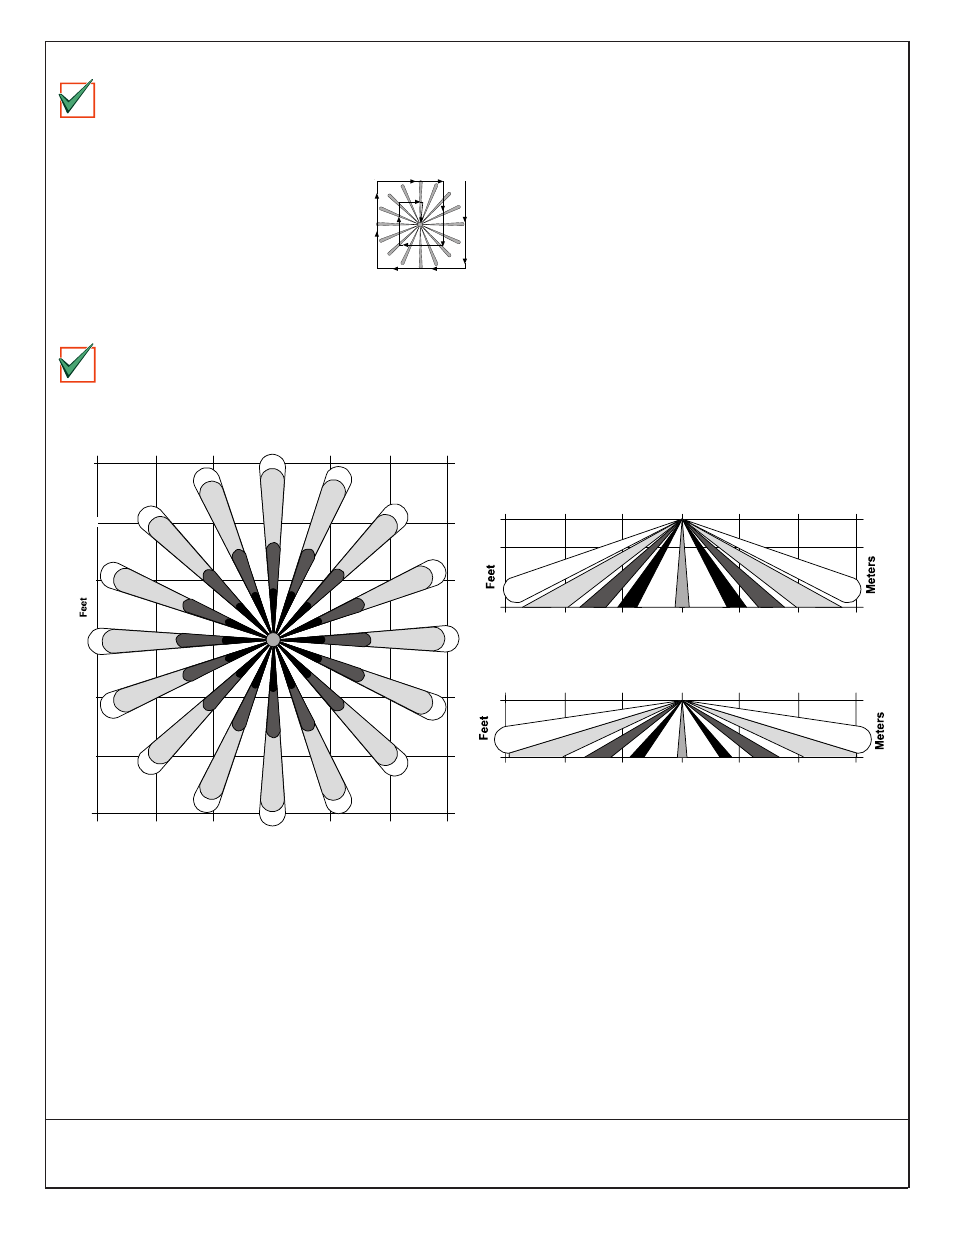
9.0
Coverage Patterns
• Refer to the mirror module and pattern drawings for masking
information.
• Before masking, be sure the chosen mirror surface is the correct
one. When removing masking, remember, many adhesives will
either destroy the mirror’s surface or leave residue behind to
reduce coverage performance.
0
3
6
9 Meters
3
6
9
0
10
20
30
10
20
30
TOP VIEW
0
10
10
20
20
30 Feet
30
0
10
AR8-13 SIDE VIEW
(Cross Section of 2 Opposite Zones)
0
3
9
6
3
0
9
6
3
Meters
0
10
10
20
20
30 Feet
30
0
10
15
AR13-18 SIDE VIEW
(Cross Section of 2 Opposite Zones)
0
Meters
3
6
9
3
6
9
3
0
4.5
0
10
20
30
10
20
30
0
3
6
9 Meters
3
6
9
© 2004 Bosch Security Systems
130 Perinton Parkway, Fairport, New York, USA 14450-9199
Customer Service: (800) 289-0096; Technical Support: (888) 886-6189
03/04
MX938i Installation Instructions
P/N: 45988F Page 4