Philips AT790-40 User Manual
Page 12
ENGLISH
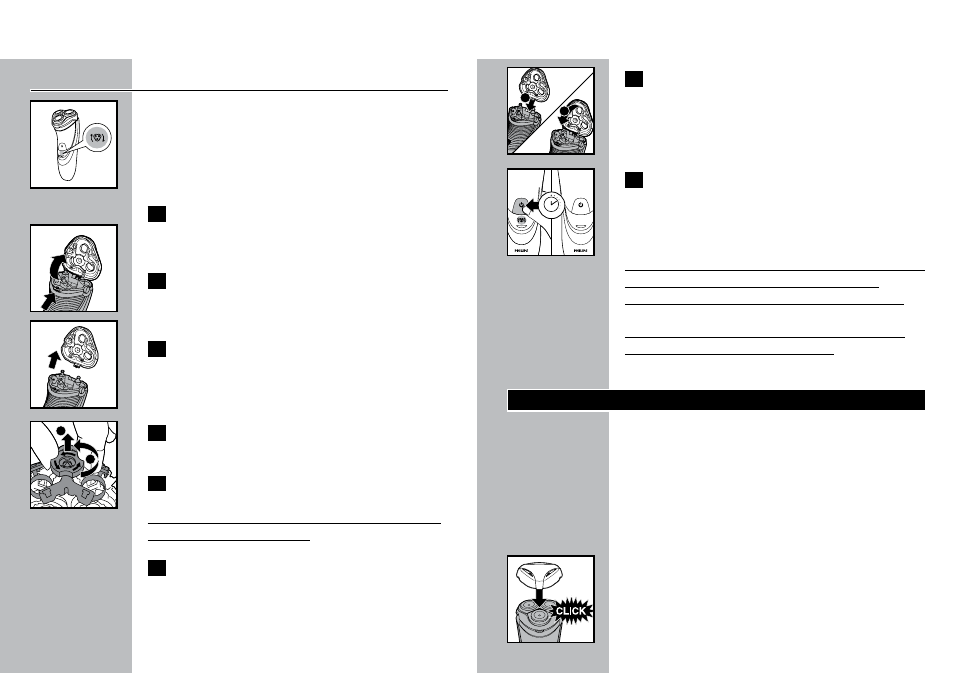
Razor Head Replacement Indicator
C
w The razor head replacement indicator symbol
will light up orange continuously to remind
you to replace your razor heads.
1
Turn razor OFF, remove the charging plug
from the outlet and power cord from the
razor.
C
2
Press the Razor Head Release Button to
open the Razor Head Assembly.
C
3
Pull the shaving unit off the razor.
C
4
Turn the lock counterclockwise to unlock
(A) and remove the retaining frame (B).
5
Remove the razor heads and place the
new razor heads in the shaving unit.
Make sure that the two pointy edges of the head
fit exactly into the recesses.
6
Replace the frame and turn the lock
clockwise until it locks into place.
22
ENGLISH
C
7
Insert the notch of the shaving unit into
the slot in the top of the razor (1) and
then close the shaving unit (2).
C
8
Press and hold the on/off button for at
least 5 seconds to reset. The orange razor
head replacement indicator symbol will go
out.
NOTE: If the shaving unit does not close smoothly,
make sure you inserted the shaving heads
properly and that the retaining frame is locked.
This razor has no other user-serviceable parts.
For assistance call 1-800-243-3050.
Storage
w
Be sure razor is turned off. Remove cord from
outlet and razor before storing in a safe, dry
location where it will not be crushed, banged,
or subject to damage.
w
Do not wrap power cord around razor when
storing.
w
Store cord in a safe location where it will not
be cut or damaged.
w
Do not place or store razor where it can fall
or be pulled into a tub or sink, water or other
liquid while plugged in.
C
w Put the Protective Cap on razor to protect
heads.
23
A
B
1
2
5 sec.
5 sec.