Dock, Troubleshooting – Philips MCM118D-37B User Manual
Page 10
18
19
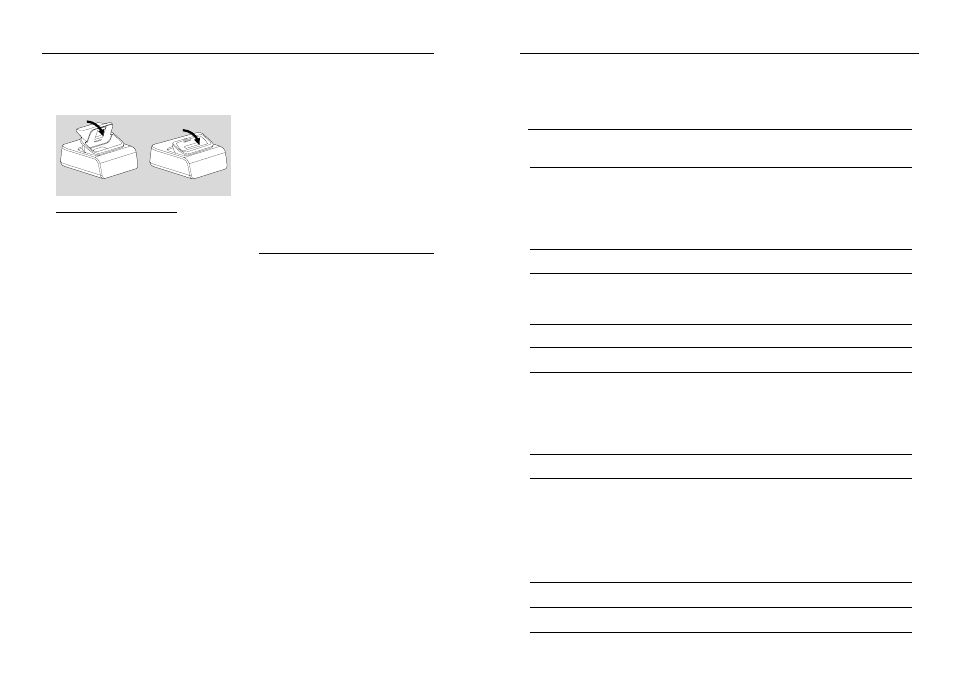
Removing the dock adaptor
Push the dock in the direction of the arrow
shown in the figure below to un-latch the
adaptor, then take it out.
Playing iPod /Philips GoGear
1
Make sure the dock type is compatibly matched
with the player to be docked, as indicated on the
bottom of the dock.
2
Snap the dock adaptor of the correct type and
size into the dock (See “ dock adaptor ”).
3
Correctly place your Philips GoGear or iPod in
the dock.
4
Using the supplied docking cable, connect the
Line-Out port (3.5 mm) and Mini-USB port on
the dock to DOCKING IN jacks (L and R) and
Mini-USB port on the main set, marked-red to
R DOCKING IN jack and marked-white to
L DOCKING IN jack.
5
Press SOURCE repeatedly or DOCK on the
set (or DOCK on the remote) to select DOCK
source.
●
Make sure that you have powered on Philips
GoGear before selecting DOCK source.
➜
On the MCM118D's display, "GoGear" is
displayed if Philips GoGear is connected, or
"iPod" is displayed if iPod is connected.
●
The connected player will play automatically.
Dock
Notes:
– By using the buttons (
2;, ¡1, 2™ and
VOLUME ) on the MCM118D and its remote
control, the following disc playback features are
available: Play/Pause, selecting next/previous track,
fast forwarding/rewinding and changing volume.
– The buttons (
2;, ¡1, 2™ and VOLUME ) on
the MCM118D and its remote control can work
only with playback of the audio contents stored on
the docked player.
– Stop (
Ç) function of disc playback is not
available to the docked player.
– For the Philips GoGear player being docked, to
prevent battery consumption, power it off if it is not
used longer.
Charging iPod battery using the
dock
Docking your iPod and connecting the dock to
MCM118D, you can charge the iPod in the
standby mode and power-on mode of
MCM18D.
Note:
– Apple iPod cannot be charged in the Eco-power
standby mode of MCM118D.
Adaptor for iPod
Adaptor for Philips GoGear
Troubleshooting
WARNING
Under no circumstances should you try to repair the system yourself, as this will invalidate the
warranty. Do not open the system as there is a risk of electric shock.
If a fault occurs, first check the points listed below before taking the system for repair. If you are
unable to remedy a problem by following these hints, consult your dealer or service centre.
Problem
Solution
CD OPERATION
“
NO cd” is displayed.
– Insert a disc.
– Check if the disc is inserted upside down.
– Wait until the moisture condensation at the lens
has cleared.
– Replace or clean the disc, see “Maintenance”.
– Use a finalised CD-RW or CD-R, or a correct
MP3-CD format disc.
RADIO RECEPTION
Radio reception is poor.
– If the signal is too weak, adjust the antenna or
connect an external antenna for better reception.
– Increase the distance between the Micro HiFi
System and your TV or VCR.
GENERAL
The system does not react when
– Remove and reconnect the AC power plug and
buttons are pressed.
switch on the system again.
Sound cannot be heard or is of poor
– Adjust the volume.
quality.
– Disconnect the headphones.
– Check that the speakers are connected correctly.
– Check if the stripped speaker wire is clamped.
– Make sure the MP3-CD was recorded within
32-256 kbps bit rate with sampling frequencies
at 48 kHz, 44.1 kHz or 32 kHz.
The left and right sound outputs are
– Check the speaker connections and location.
reversed.
The remote control does not function
– Select the source (CD or TUNER, for example)
properly.
before pressing the function button (
Й,н,л).
– Reduce the distance between the remote control
and the system.
– Insert the batteries with their polarities
(+/– signs) aligned as indicated.
– Replace the batteries.
– Point the remote control directly toward
IR sensor on the front of the system.
The timer is not working.
– Set the clock correctly.
– Press TIMER to switch on the timer.
The Clock/Timer setting is erased.
– Power has been interrupted or the power cord has
been disconnected. Reset the clock/timer.