Connecting to audio equipment, Operation, Preparation – Philips LC4031 User Manual
Page 13: Installation, English
7. INSTALLATION
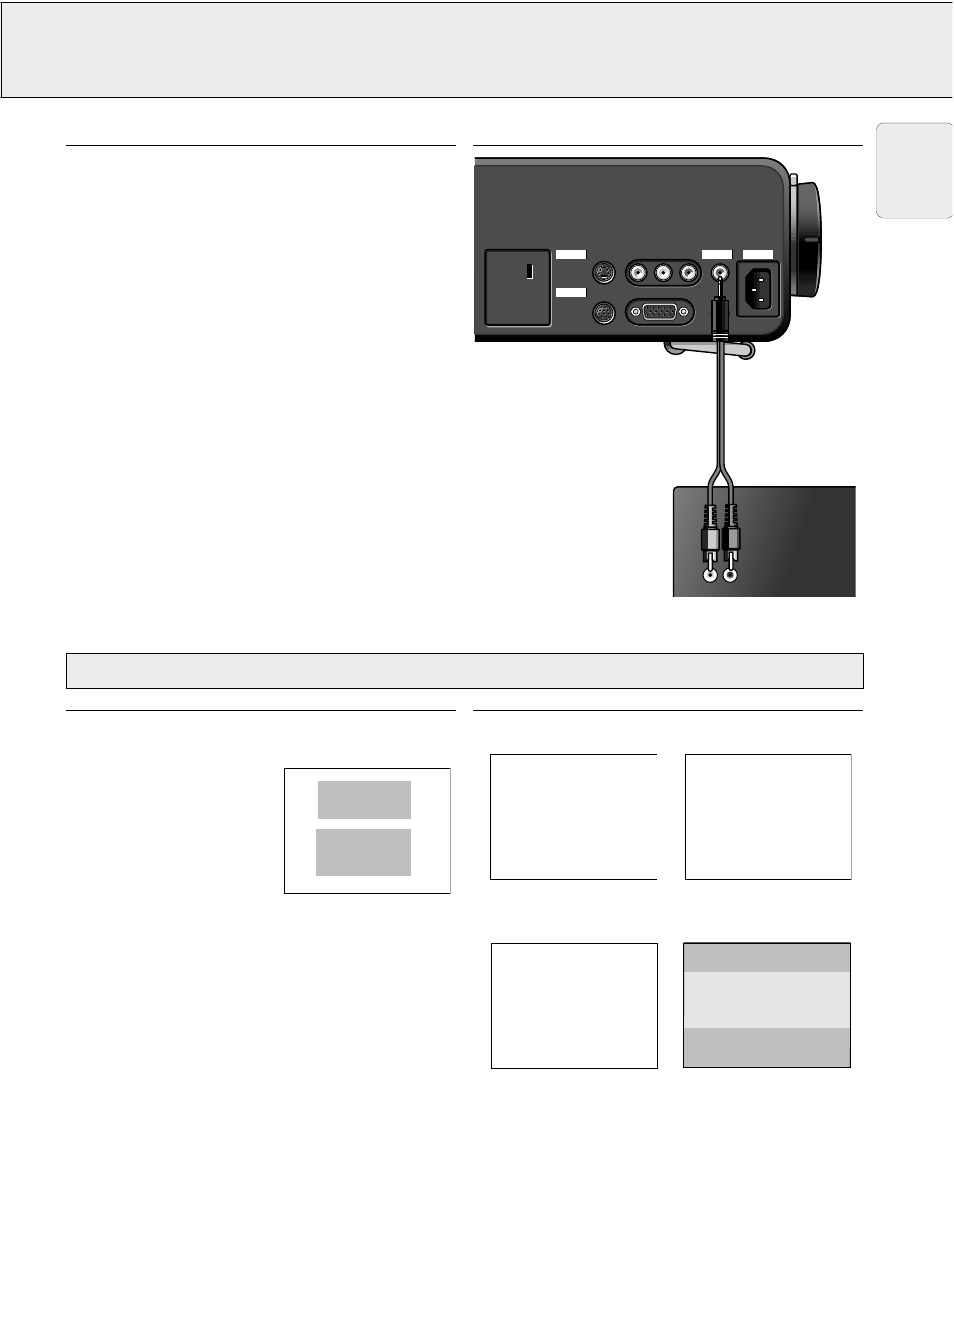
Connecting to audio equipment
CONNECTING TO AUDIO EQUIPMENT
General
– The figures in brackets
(1)
correspond to the figures in the
diagram on page 10.
The characters in brackets
(a)
correspond to characters in
fig. 2
on page 3.
–
Caution: Always switch off the projector before making any
connections.
• Connect the AUDIO IN L/R sockets of an amplifier or stereo
system to the AUDIO OUT socket
(g)
of the projector.
For this, use an
(optional)
audio connection cable.
Insert the white plug into the L socket and the red plug into
the R socket.
Note: When the projector is connected to an external audio
amplifier, you cannot control the volume via the
projector or the remote control. However, the sound
can still be muted via the projector or the remote
control.
Projector
Amplifier
Optional
ector
Mouse
Data in
S-Video in
Video in
Audio
in
Audio
out
L
R
Mouse
Data in
S-Video in
Video in
Audio
in
Audio
out
L
R
Power
Data
Audio
Video
L Audio R
in
L Audio R
in
Projector
13
English
PREPARATION
General
1.
Press the STANDBY/ON/OFF button to switch on the
projector.
– The lamp indicator flashes
green and the start up screen
appears for 5 seconds.
– When operation time reaches
3901 hours, the message
‘WARNING: Lamplife expires in
99 hours’ will be displayed on the
screen when switching the
projector on.
For this refer to the chapter ‘Lamp’ under ‘Additional
information’.
– When the lamp is on, the lamp indicator lights up green.
2.
Set the ON/OFF switch of the remote control to ON in order
to switch on the remote control.
Note: Always switch off the remote control after use.
3.
If required, press the light button of the remote control.
– When this button is pressed the button illumination is
switched on for 5 seconds. Every time one of the buttons is
pressed within these 5 seconds, the illumination time is
extended (by a further 5 seconds).
4.
Select the required source (Video, S-Video or Data) by
pressing the corresponding source selection button.
Note: The source selection button VIDEO toggles between
Video and S-video.
5.
Switch on the computer or start video playback.
– The following messages may appear on the screen when
selecting a source:
S-Video selected as source.
Video selected as source.
Data selected as source.
No input signal.
N o i n p u t s i g n a l d e t e c t e d
P l e a s e c h e c k t h e
c o n n e c t i o n s
P H I L I P S
Multimedia Projectors
D a t a
V i d e o
S - V i d e o
M u l t i m e d i a
P r o j e c t o r s
P H I L I P S
8. OPERATION
Preparation