Installation instructions, Supplies required, Step 1: assemble drench shower – Bradley E19-120A User Manual
Page 3: Step 2: connect water supply
Installation Instructions
Bradley Drench Shower Horizontal Supply
Model No.
Installation Instructions
Supplies Required:
l
Pipe sealant
l
Piping to 1” BSP water supply inlet on unit
l
Adequate supply pipe supports
l
Minimum 102 mm (4”) drain to accommodate 115 liters per minute discharge for drench
shower waste
Step 1: Assemble drench shower
NOTE: Flush the water supply line before beginning
installation.
1. Assemble drench shower components as shown
in Figure 2 on page 4.
2. Apply pipe sealant or tape (supplied by installer)
to all male-threaded pipe joints.
NOTE: Use a strap wrench around the pipes when
tightening to prevent mm-ring.
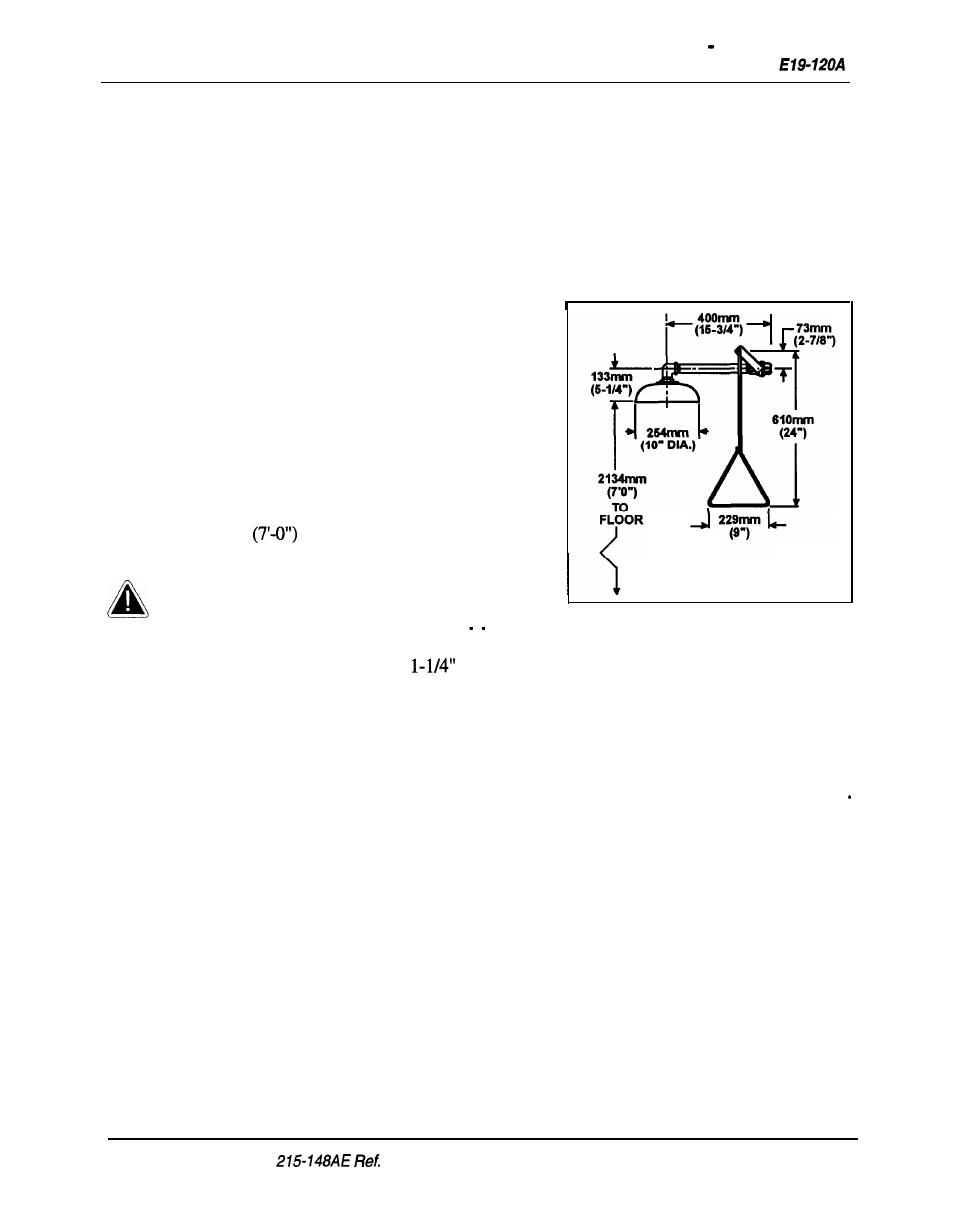
3. The
bottom edge of the showerhead should be
2134 mm
from the floor.
Step 2: Connect water supply
IMPORTANT: Do not rely on Bradley’s
Drench Shower to support
Figure 1
supply piping.
1. Connect water supply piping to
BSP inlet on unit (piping supplied by installer).
Provide adequate supports (supplied by installer) for supply pipe using pipe hangers or
other means.
2. Mount safety sign to wall or pipe using sign mounting hardware supplied.
3. Open water supply lines. Test for leaks and adequate water flow.
Installation Instructions
continued..
Bradley Corporation
l
G; EN 98-579
3