Step 3, Step 4 – Bowflex Ultimate 2 User Manual
Page 6
step
3
6
��
�
��
��
Parts:
• Base Plate assembly from Step 3
• Base assembly from Step 2
Hardware
Qty
• 2 3/4" Bolts (#13)
4
• Washers (#15)
8
• Nuts (#14)
4
Tools:
• Allen wrench (7/32”)
• Wrench/Socket (9/16”) or Open End Wrench
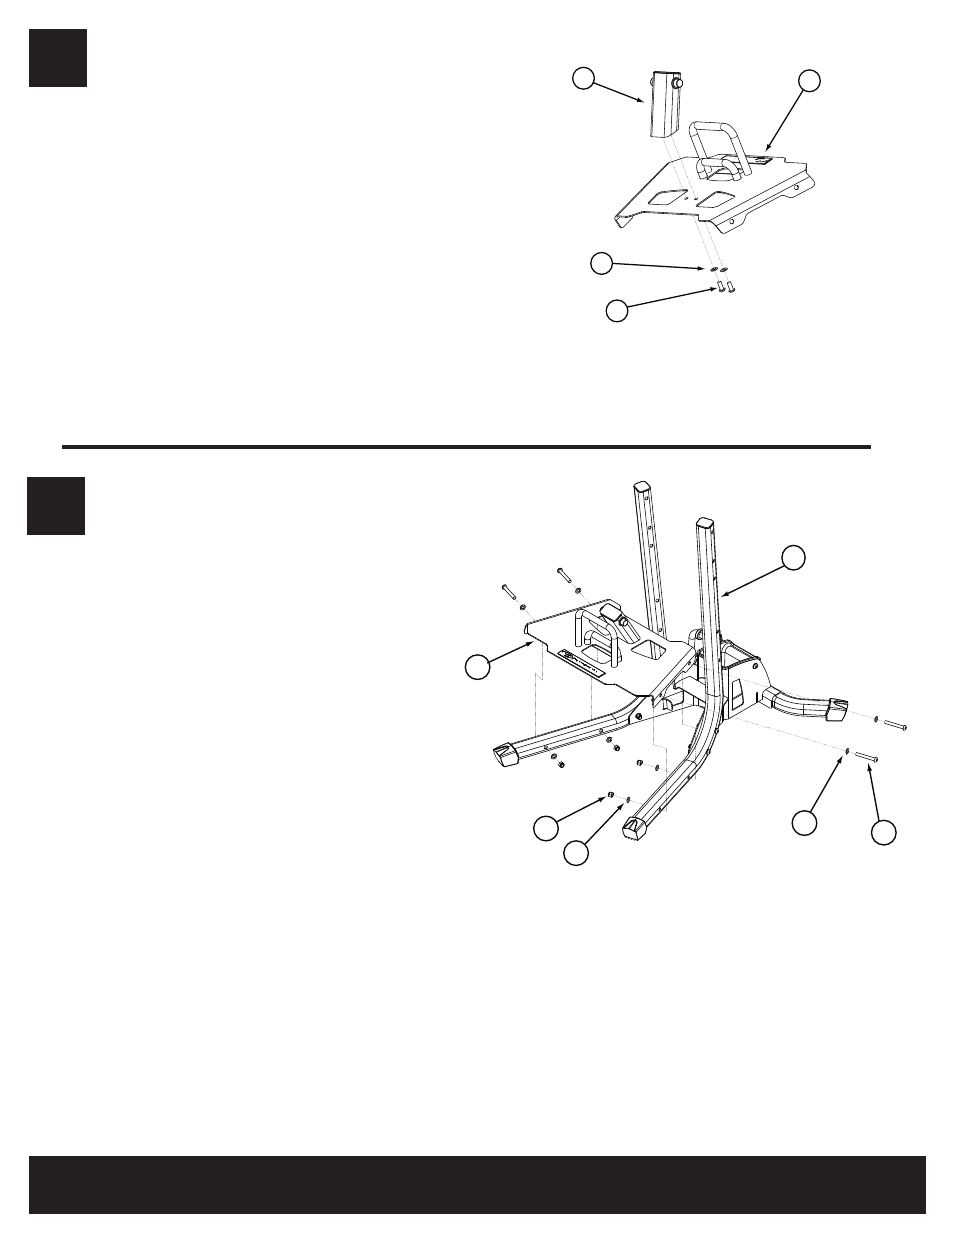
4-1 Place the Base Plate (#11) on the lower
Side Tubes (#9), narrow edge toward the
Tube uprights and the curved edges outside
the Side Tubes. Align bolt holes in the Base
Plate and Side Tubes. Install the hardware
in the two bolt holes closer to the uprights.
See Figure 4.
4-2 At the bolt holes farther from the Side Tube uprights, insert a 2 3/4" Bolt (#13) through a Washer (#15) into
each bolt hole.
4-3 Carefully tilt the base assembly forward to rest on the four Side Tube ends. Install a Washer (#19) and
Nut (#18) onto each of the Bolts from Step 3-2.
Note: Do not tighten hardware at this time.
4-4 Turn the base assembly upright to rest on all four feet.
Figure 3
Parts:
• Base Plate (#11)
• Curl Mount (#6)
Hardware
Qty
• 7/8" Bolts (#12)
2
• Washers (#15)
2
Tools:
• Allen wrench (7/32”)
3-1 Attach the Preacher Curl Mount (#6) to the Base
Plate (#11) using the hardware as shown in Figure
3. The Curl Mount should lean toward the U-shaped
bars on the Base Plate.
Tighten hardware completely.
�
��
��
��
��
��
Figure 4
step
4