Adjusting the earpiece – BodyGlove Earglove BlueVoice User Manual
Page 3
4
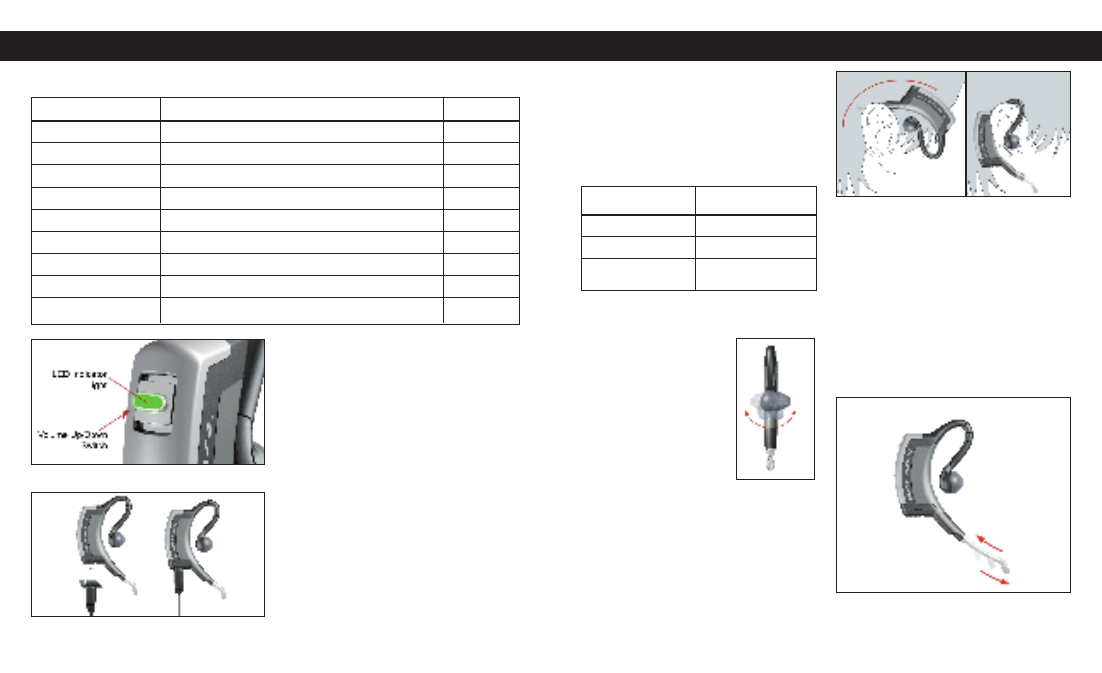
Battery Level Indication
The battery level can be checked in standby mode or
when connected by pressing and holding the
Answer/End button, then sliding and holding the Volume
switch upward simultaneously. The red LED Indicator
Light will flash as follows:
SECTION 2
:
Adjusting the Earpiece
To Adjust for
Preferred Ear
Gently grasp and rotate the
earbud 180˚ to change the
wearing orientation to fit your
right or left ear. You can also
remove the earbud from the
headset and replace it in your
desired position.
Putting on the Headset
First, place the earpiece at the top of your ear with the
retractable microphone behind your ear. Then, gently
slide the headset behind your ear using a slight
rotational motion as shown in Figure 3. Once the hook
is in place, gently position the earbud inside your ear for
a secure fit.
Adjusting the Boom
Your headset has an extendable boom microphone to
enhance sound in noisy environments. To extend the
microphone, gently hold the tip and pull it toward your
mouth. In quieter speaking environments or for storage,
retract the boom microphone by gently pushing the tip
inward (see Figure 5).
PLEASE NOTE: Microphone will work while extended
or retracted.
Connecting Headset to Charger
Your Earglove BlueVoice™ Headset features an auto-
switching power supply for voltages between 100V-240V
AC. The plug configuration of the power supply is
appropriate to the country where your headset was
purchased. If you travel to foreign countries and wish to
charge your headset, you will need to purchase the
appropriate adapter for the country you are visiting.
Your charger is also supplied with an adapter cable
approximately 23cm (9 inches) long. This adapter cable
connects your headset to the charger. To charge your
headset, connect the charger as illustrated in Figure 2.
PLEASE NOTE: The charger is ‘keyed’ to fit only ONE
WAY into your headset. Do not force the charger
cable into the connecting port of the headset incorrectly,
as this may damage the headset and void your
warranty.
3
Status
LED Indicator Light
Color
Power Off
No LED light
—
Power Up and Down
LED light is on for 1.5 seconds
Green
Standby
Quick Flash every 5 seconds
Green
Connected
Flashes every 5 seconds
Green
Talking
Flashes every 1 second
Green
Pairing
Flashes red and green alternately
Red/Green
Charging
Steady LED light
Red
Fully Charged
Steady LED light or no light at all
Green
Low Battery
Flashes Red while headset is in use
Red
Figure 3
Figure 1
Charging & LED Indicator Light Table
Figure 2
Status
LED Indicator Light
High
3 Flashes
Mid
2 Flashes
Low
1 Flash
Figure 4
Figure 5