Assembly, Unpack generator, Shipment contents – Briggs & Stratton 30348 User Manual
Page 7: Install wheel kit
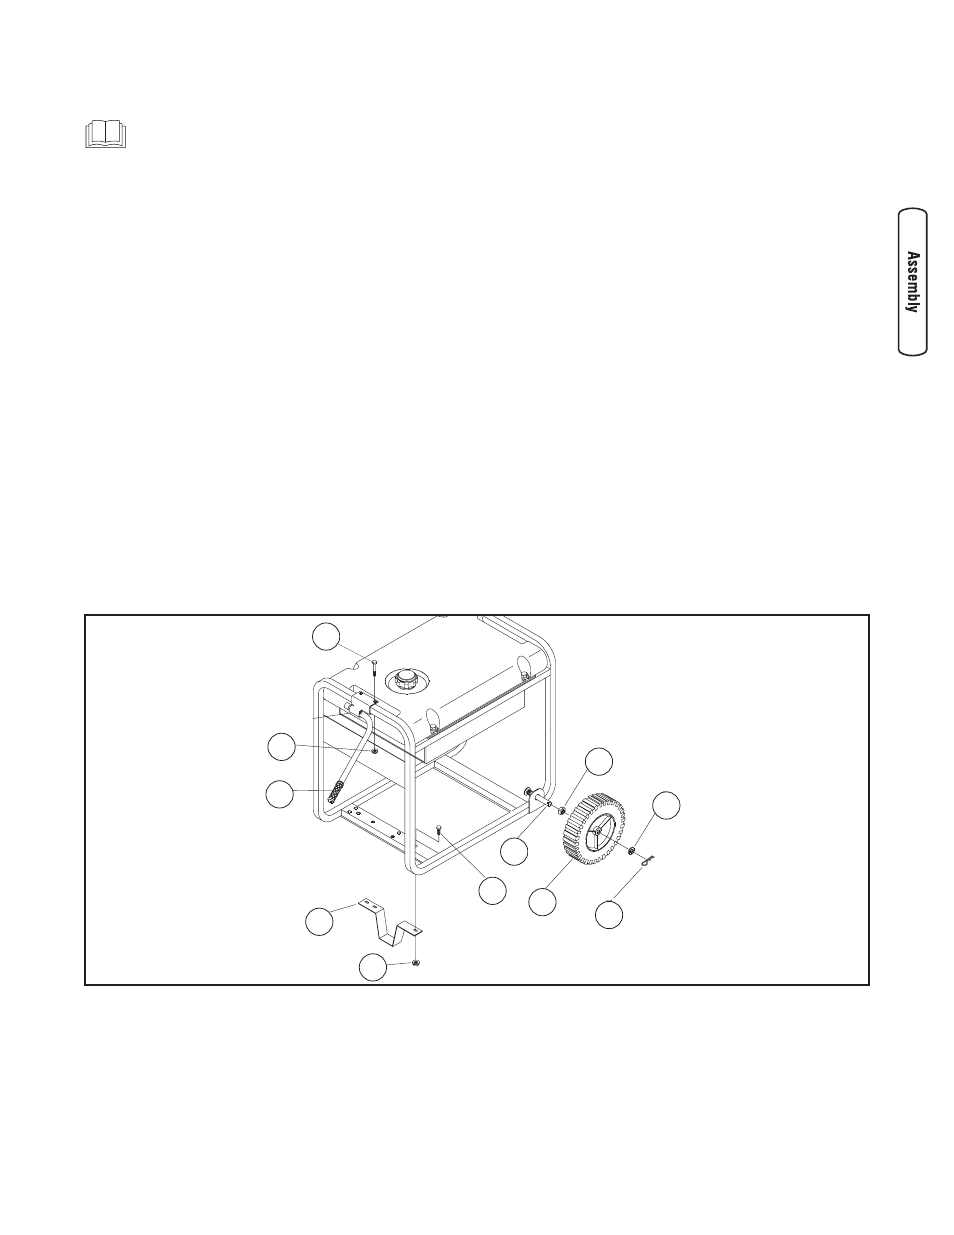
Typical Generator Shown
5
Assembly
Read entire operator’s manual before you attempt
to assemble or operate your new generator.
Your generator requires some assembly and is ready for use
after it has been properly serviced with the recommended
fuel and oil.
If you have any problems with the assembly of your generator,
please call the generator helpline at 1-800-743-4115. If calling
for assistance, please have the model, revision, and serial
number from the data tag available. See Generator Controls
and Features for data tag location.
Unpack Generator
1. Set the carton on a rigid, flat surface.
2. Remove everything from carton except generator.
3. Open carton completely by cutting each corner from
top to bottom.
4. Leave generator on carton to install wheel kit.
Shipment Contents
The generator is supplied with:
• Engine oil bottle
• Operator’s manual
• Wheel kit
Install Wheel Kit
NOTE: Wheel kit is not intended for over-the-road use.
You will need the following tools to install these
components:
• 2 - 13mm open end wrenches
• 15/16" open end wrench
Install the wheel kit as follows:
1. Place bottom of generator cradle on a flat surface.
2. Place axle stud (A) through wheel retainer on cradle
frame.
3. Use 15/16” wrench to secure axle stud to frame with
5/8-18 jam nut (B).
4. Install other axle stud in same manner.
5. Tip unit and install wheel (C). Place flat washer (D) over
axle stud.
NOTE: Be sure to install wheel with raised hub inboard.
6. Retain wheel on axle stud with retaining pin (E). Install
other wheel on remaining axle stud the same way.
7. Attach support leg (F) using two 13mm wrenches with
20mm cap screws (G) and lock nuts (H).
8. Center lifting handle (J) on generator end of cradle.
Attach handle using two 13mm wrenches with 45mm
capscrews (K) and hex nuts (L).
G
A
F
H
B
D
K
L
J
C
E