1detaching the upper door, 2detaching the lower door, 3transferring the middle bearing elements – Liebherr CTPsl 2521 Comfort User Manual
Page 6: 4transferring the lower bearing elements, 5fitting the lower door, 6fitting the upper door, Putting into operation
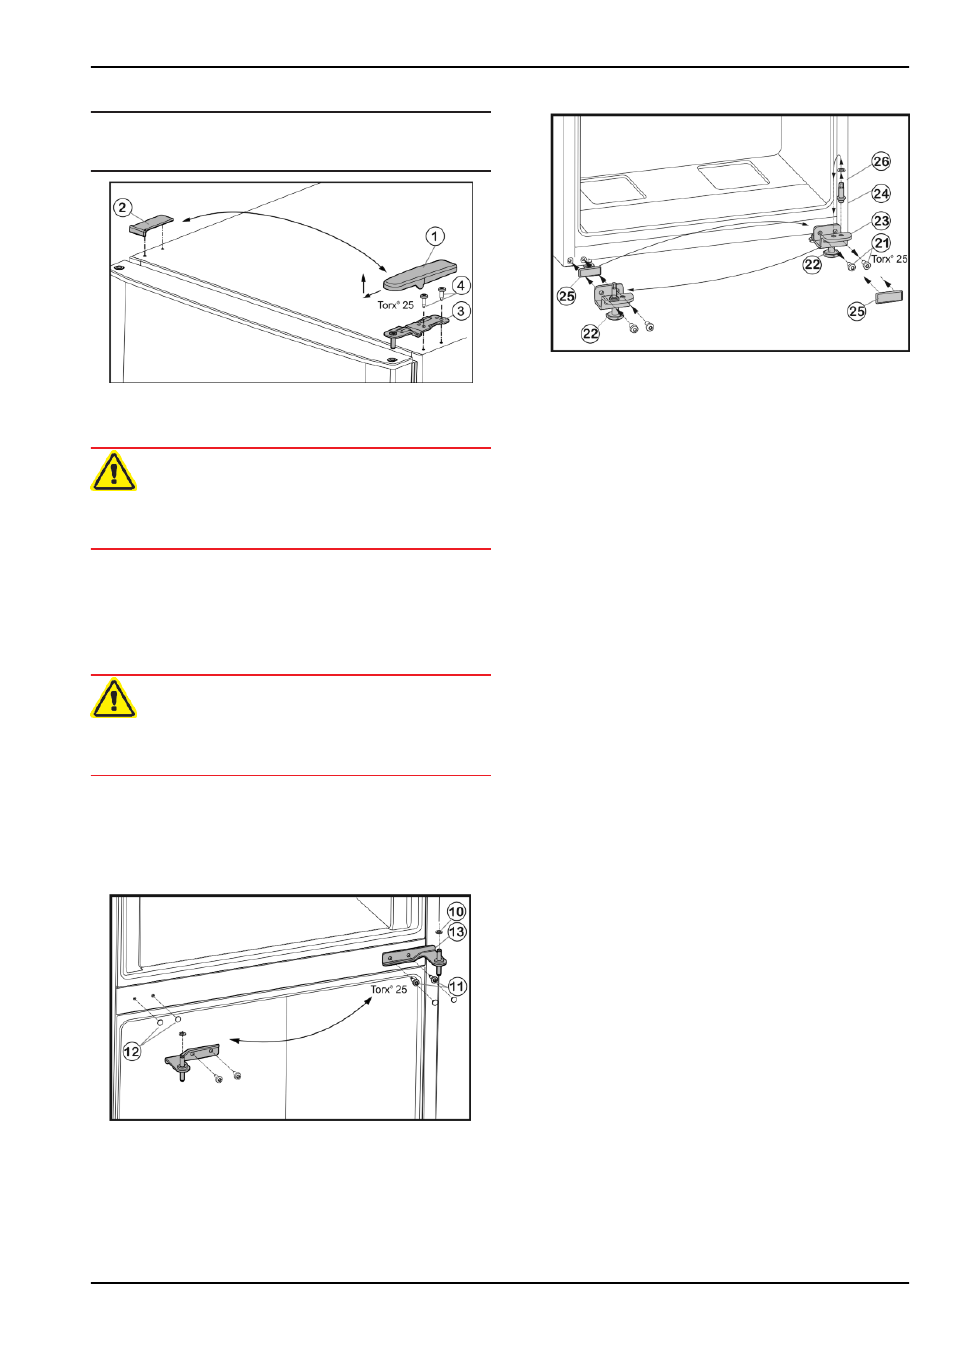
4.3.1 Detaching the upper door
Note
u
Remove any food from the door racks before removing the
door, so that no food falls out.
Fig. 4
u
Pull off the cover
Fig. 4 (1)
forwards and upwards.
u
Lift off the cover
Fig. 4 (2)
.
CAUTION
Risk of injury if the door tips!
u
Take good hold of the door.
u
Set down the door carefully.
u
Unscrew the upper turn hinge
Fig. 4 (3)
(2x Torx® 25)
Fig. 4 (4)
and lift it off.
u
Lift up the upper door and set it aside.
4.3.2 Detaching the lower door
u
Open the lower door.
CAUTION
Risk of injury if the door tips!
u
Take good hold of the door.
u
Set down the door carefully.
u
Unscrew the fastening screws
Fig. 5 (11)
(2 x Torx® 25)
and pull the centre bearing block out of the lower door.
u
Remove plastic washer
Fig. 5 (10)
.
u
Lift up the door and set it aside.
4.3.3 Transferring the middle bearing elements
Fig. 5
u
Carefully pull off the covers
Fig. 5 (12)
and fit to the opposite
side.
4.3.4 Transferring the lower bearing elements
Fig. 6
u
Unscrew fastening screws
Fig. 6 (21)
.
u
Remove lower bearing block
Fig. 6 (23)
, complete
withbearing bolt
Fig. 6 (24)
,washer
Fig. 6 (26)
and adjust-
able foot
Fig. 6 (22)
.
u
Unscrew bearing bolt
Fig. 6 (24)
complete with washer
Fig. 6 (26)
and re-locate it into the mounting hole on the
opposite side of the bearing block, tighten again.
u
Carefully remove the cover plate
Fig. 6 (25)
and transfer it to
the other side.
u
Fasten the bearing lower block
Fig. 6 (23)
complete with
bearing bolt
Fig. 6 (24)
, washer
Fig. 6 (26)
and adjustable
foot
Fig. 6 (22)
to the new hinge side, with the help of a cord-
less screwdriver if necessary, and tighten (with 4 Nm)
once again.
4.3.5 Fitting the lower door
u
Lower the bottom door onto the bearing bolt
Fig. 6 (24)
.
u
Close the door.
u
Insert the centre bearing block
Fig. 5 (13)
turned through
180° into the lower door and fasten firmly (with 4 Nm)to the
new hinge side with the fastening screws(2 x Torx® 25).
u
Refit plastic washer
Fig. 5 (10)
.
4.3.6 Fitting the upper door
u
Set the upper door down on the centre bearing block .
u
Insert the upper turn hinge
Fig. 4 (3)
in the door on the new
hinge side.
u
Screw the upper turn hinge firmly into place (with 4 Nm)
(2x Torx® 25)
Fig. 4 (4)
. Possibly make preliminary holes
with a bradawl or use a cordless screwdriver.
u
Fit the cover
Fig. 4 (1)
on the opposite side by sliding it rear-
wards and latching it into place.
u
Press the cover
Fig. 4 (2)
on the opposite side down into
place until it latches.
u
Unscrew the adjustable foot
Fig. 6 (22)
on the lower bearing
block
Fig. 6 (23)
until it reaches the floor.
Putting into operation
6
* Depending on model and options