3fan, 4shelves, 5using the sectioned shelf – Liebherr CP 4023 Comfort User Manual
Page 9: 6door racks, 7removing the bottle holder, 3freezer compartment, Control, 3 freezer compartment
Temperature setting to be recommended: 5 °C
The temperature can be changed continuously. Once the 1 °C
setting is reached, it starts again with 9 °C.
u
To access temperature adjustment: press the setting button,
refrigerator compartment
Fig. 3 (3)
once.
w
The LED of the current temperature flashes in the tempera-
ture display.
u
Press the setting button, refrigerator compartment
Fig. 3 (3)
the number of times needed until the required temperature
shines in the LED display.
Note
u
Long pressing of the setting button sets a slightly colder
value within a small temperature range (e.g.: between 5 °C
and 7 °C). The LED of the next lower temperature range
then shines in the temperature display.
5.2.3 Fan
With the fan you can rapidly cool large quantities of
fresh food or achieve a relatively even distribution of
temperature across all the storage levels.
The forced-air cooling is to be recommended:
-
at high room temperature (above33 °C )
-
at high humidity
The forced-air cooling uses slightly more energy. To save
energy, the fan switches off automatically when the door is
open.
Switching on the fan
u
Briefly press the fan button
Fig. 3 (2)
.
w
The fan button shines.
w
The fan is active. In some appliances, the fan is only acti-
vated when the compressor is running.
To switch off the fan
u
Briefly press the fan button
Fig. 3 (2)
.
w
The fan button goes out.
w
The fan is switched off.
5.2.4 Shelves
Moving or removing shelves
The shelves have stops preventing them from being uninten-
tionally pulled out.
Fig. 10
u
Lift the shelf slightly and pull forward a little.
u
Adjust the height of the shelf. To do so, push the cut-outs
along the supports.
u
In order to remove the shelf fully, place it at a slant and pull
out towards the front.
u
Insert shelf with the raised edge pointing upwards at the
back.
w
The food does not freeze onto the rear wall.
Dismantling shelves
u
The shelves can be disman-
tled for cleaning.
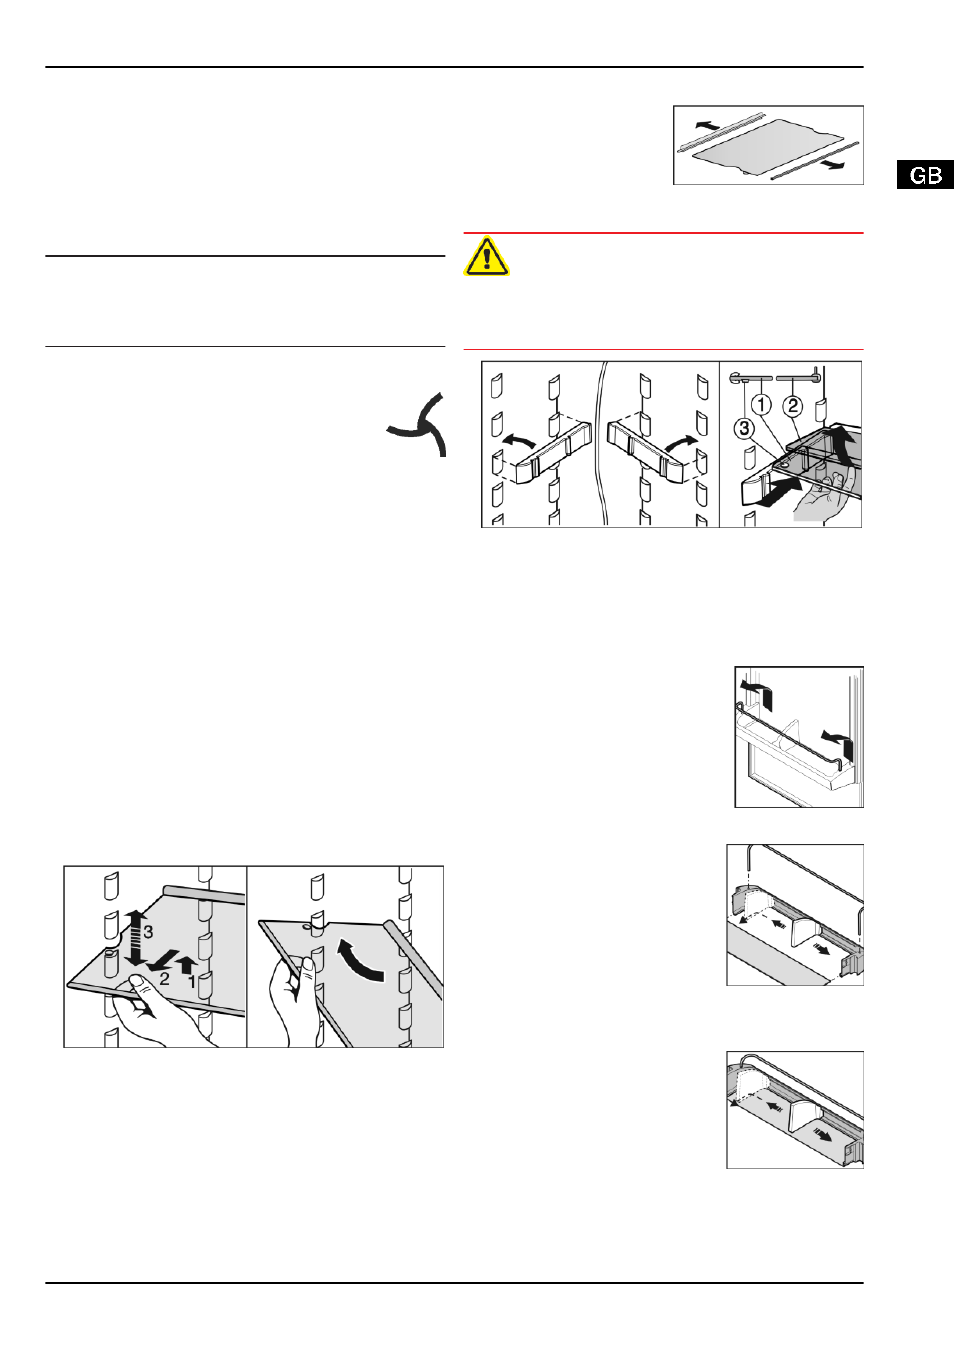
5.2.5 Using the sectioned shelf
CAUTION
Danger of laceration!
The shelf may break. The broken fragments may cause lacera-
tion.
u
Remove only empty shelves.
Fig. 11
u
The glass shelf with stop face (2) has to be at the back.
u
The glass plate (1) with pull-out stops must be at the front so
that the stops (3) face downwards.
5.2.6 Door racks
Removing the storage rack
u
Remove storage rack according to
illustration.
Dismantling door racks
u
The door racks can be dismantled for cleaning.
5.2.7 Removing the bottle holder
u
Remove the bottle holder according
to the illustration.
5.3 Freezer compartment
You can store frozen food, make ice cubes and freeze fresh
food in the freezer compartment.
Control
* Depending on model and options
9