4undercounter installation, Putting into operation, 4 undercounter installation – Liebherr TP 1714 Comfort User Manual
Page 6
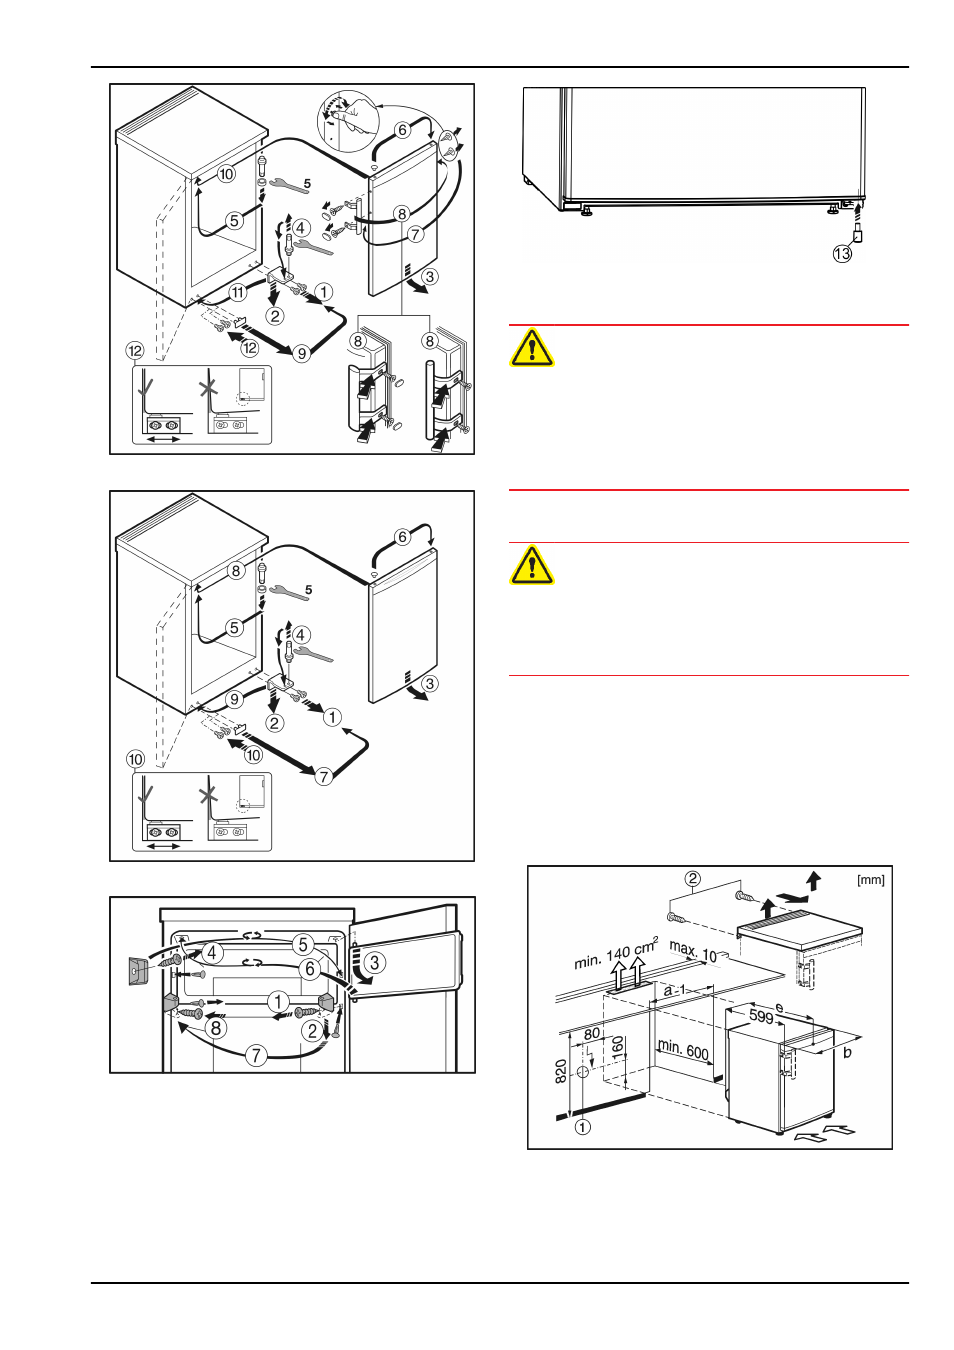
Fig. 5 On appliances with a door handle
Fig. 6 On appliances without a door handle
Fig. 7 On appliances with a freezer compartment
u
Follow the sequence of the item numbers in the diagram.
Fig. 8
u
Insert the spacer
Fig. 8 (13)
back under the right-hand side
of the door, as it is important for the stability of the appli-
ance.
WARNING
Risk of injury due to the door dropping out!
If the bearing parts are not screwed into place firmly enough,
the door may drop out. This may lead to severe injuries. What
is more, the door may not close and therefore the appliance
may fail to cool properly.
u
Screw on the bearing brackets/bearing pins tightly (4 Nm).
u
Check all of the screws and retighten if necessary.
4.4 Undercounter installation
WARNING
Fire hazard from short-circuiting!
u
When pushing the appliance into the recess, take care not
to crush, jam or damage the mains power cable.
u
Do not operate the appliance with a defective mains power
cable.
Counter height appliances up to 850 mm in height can be
installed below the worktop. In the case of continuous work-
tops, the cover on the refrigerator can be removed and the
appliance slid in under the worktop.
With such installations, the plug
Fig. 9 (1)
must not be located
behind the appliance and must be easily accessible.
For the purpose of ventilation and aeration at the rear of the
appliance, a min.140 cm
2
ventilation cavity is required. With an
installation depth of 600 mm, the wall connection profile on the
worktop must not exceed a max. 10 mmin depth.
Fig. 9
In order to take off the appliance cover:
u
Remove the screws
Fig. 9 (2)
from the rear side.
u
Raise the cover up at the back, slide forward and lift up and
off the appliance.
Putting into operation
6
* Depending on model and options