3coolplus function, 4shelves, 5using the sectioned shelf – Liebherr TPesf 1710 Comfort User Manual
Page 8: 6door racks, Control
To ensure ideal temperatures for storing frozen foods, a setting
of “4” to “7” on the temperature controller is recommended.
Selecting “7” makes it possible to achieve temperatures under
0 °C in the coldest part of the fridge compartment.
An average temperature of approx. –18 °C is then established
in the freezer compartment
u
Turn the temperature control
Fig. 3 (1)
.
The temperature depends on the following factors:
- the door opening frequency
- the room temperature at the site where the appliance is
installed
- the type, temperature and quantity of frozen food
u
Adjust the temperature as needed, using the control.
5.1.3 CoolPlus function*
At low room temperatures of 18 °C or lower:
u
Press the Cool-Plus switch
Fig. 3 (2)
.
w
The deep temperatures in the freezer compartment are
ensured.
w
The appliance's interior lighting is lit on a dim setting
even when the door is closed.
Once the room temperature is again higher than18 °C :
u
Deactivate the Cool-Plus
Fig. 3 (2)
switch manually.
Note
u
At normal room temperatures, in excess of 18 °C, the Cool-
Plus switch should be turned off, as it is not required.
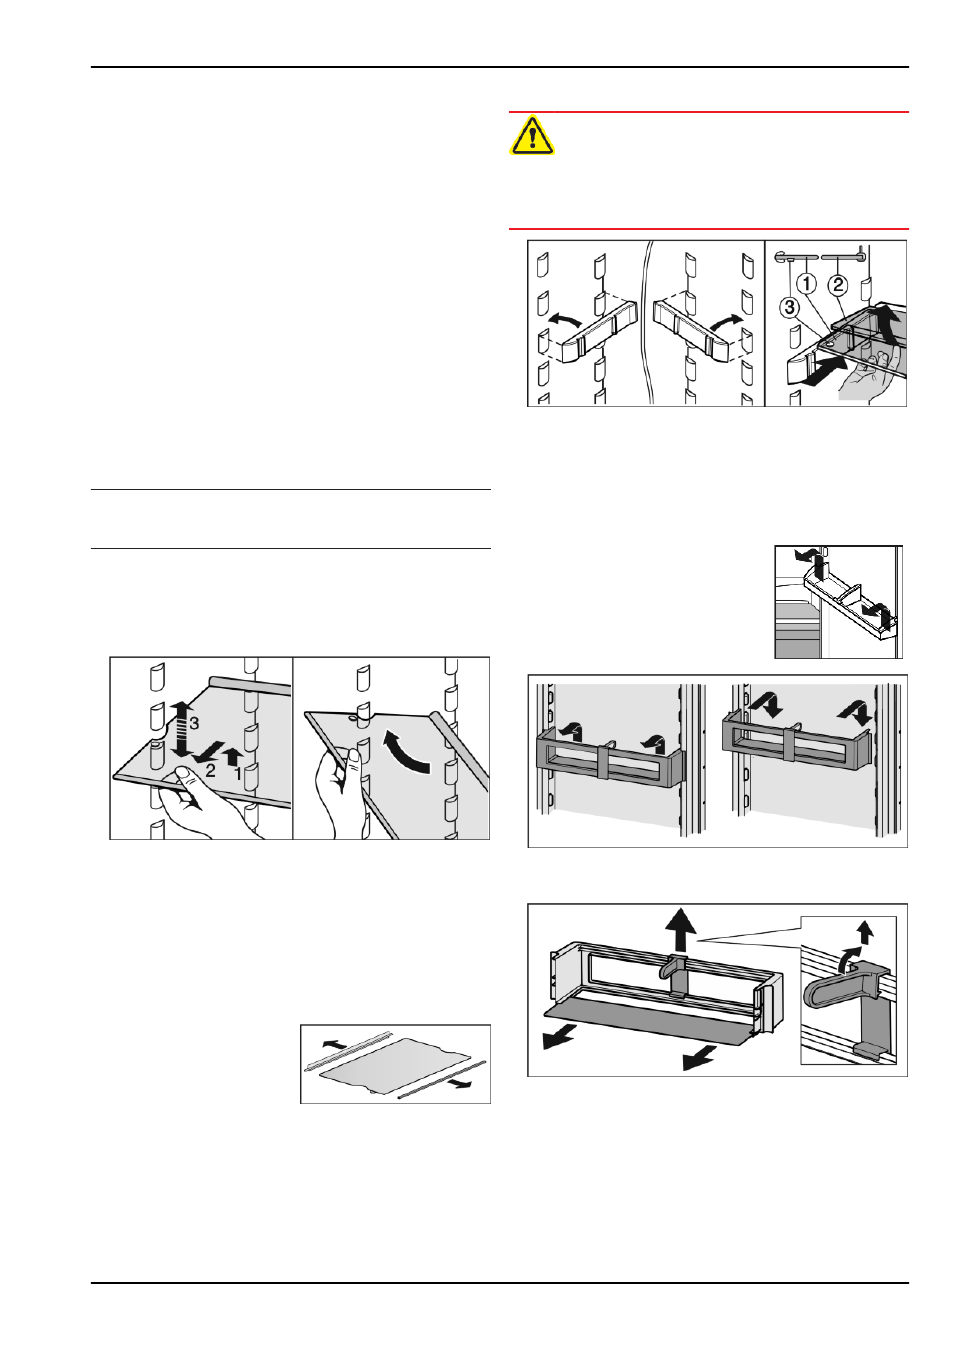
5.1.4 Shelves
Moving or removing shelves
The shelves have stops preventing them from being uninten-
tionally pulled out.
Fig. 11
u
Lift the shelf slightly and pull forward a little.
u
Adjust the height of the shelf. To do so, push the cut-outs
along the supports.
u
In order to remove the shelf fully, place it at a slant and pull
out towards the front.
u
Insert shelf with the raised edge pointing upwards at the
back.
w
The food does not freeze onto the rear wall.
Dismantling shelves
u
The shelves can be disman-
tled for cleaning.
5.1.5 Using the sectioned shelf
CAUTION
Danger of laceration!
The shelf may break. The broken fragments may cause lacera-
tion.
u
Remove only empty shelves.
Fig. 12
*
u
The glass shelf with stop face (2) has to be at the back.*
u
The glass plate (1) with pull-out stops must be at the front so
that the stops (3) face downwards.*
5.1.6 Door racks
Removing the storage rack
u
Remove storage rack according to
illustration.
*
Fig. 13
*
Dismantling door racks*
Fig. 14
u
The door racks can be dismantled for cleaning.
Control
8
* Depending on model and options