Installations, Supplied mounting hardware, Precautions – Blaupunkt BOSTON CD189 User Manual
Page 9: Mounting example
E-8
Installations
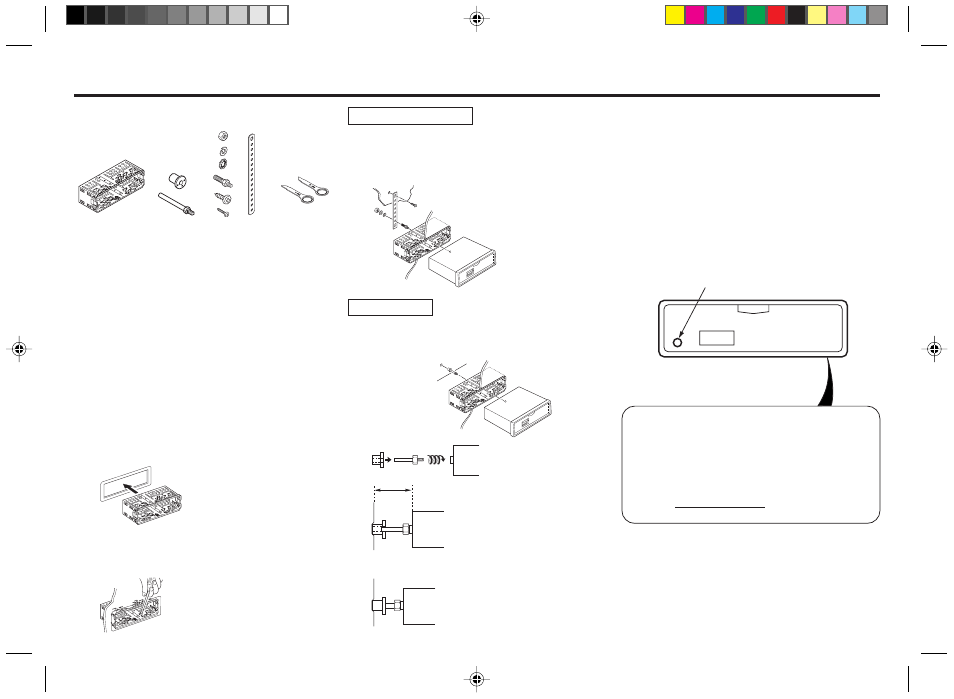
Supplied Mounting Hardware
Sleeve
Bushing
Mounting Strap
Release
& Screws
and Screw
Keys
Precautions
• Be sure to detach the front panel before you start in-
stalling the unit.
• When mounting the unit in a car, keep the unit as level as
possible. If the unit must be mounted at an angle, due to the
design of the vehicle, make sure that the unit does not lit by
more than 30˚.
• Choose the mounting location carefully so that the unit will
not interfere with the normal driving operations of the driver.
• Use only the supplied mounting hardware for a safe and
secure installation.
Mounting Example
Installation in the dashboard.
1.
Install the sleeve in the dashboard.
2.
Select and bend the appropriate tabs to hold the sleeve
firmly in place.
Mounting Strap Use
3.
Attaching the Mounting Strap to the underside of the dash
board, using screw.
Attach the back of the unit to the Mounting Strap using
the support stem bolt and hardware.
Bushing Use
3.
As shown in the figure below, securely fasten the screw,
which has been inserted into the bushing, to the rear of
the set.
Fire wall
The distance to the fire wall is
various due to the type of the car.
Be sure to secure the unit by
properly inserting the bushing.
Caution
Insufficient fastening of the
screw may cause some CD’s to
skip.
If your car has no accessory position on the
ignition key switch (POWER SELECT switch)
The illumination on the front panel is factory-set to be turned
on even when the unit is not being played. However, this set-
ting may cause some car battery wear if your car has no ac-
cessory position on the ignition key switch. To avoid this bat-
tery wear, set the POWER SELECT switch located on the
bottom of the unit to the
B
position, then press the reset
button. The illumination is reset to stay off while the unit is not
being played.
POWER SELECT SWITCH
(Located on the bottom of the unit)
Change the position with a jeweler’s screwdriver, etc.
A
: Your car has an accessory position on the ignition
switch.
B
: Your car has no accessory position on the ignition
switch.
Be sure to press the reset button after changing the switch
and connecting the lines.
Reset button
Press the reset button with the point of
a sharp object such as a ball-point pen.
HOUSTON (En)_P1-11
3/23/99, 3:06 PM
8