Lcd display, Setting the clock – Bosch BOSCH PB360S User Manual
Page 6
6
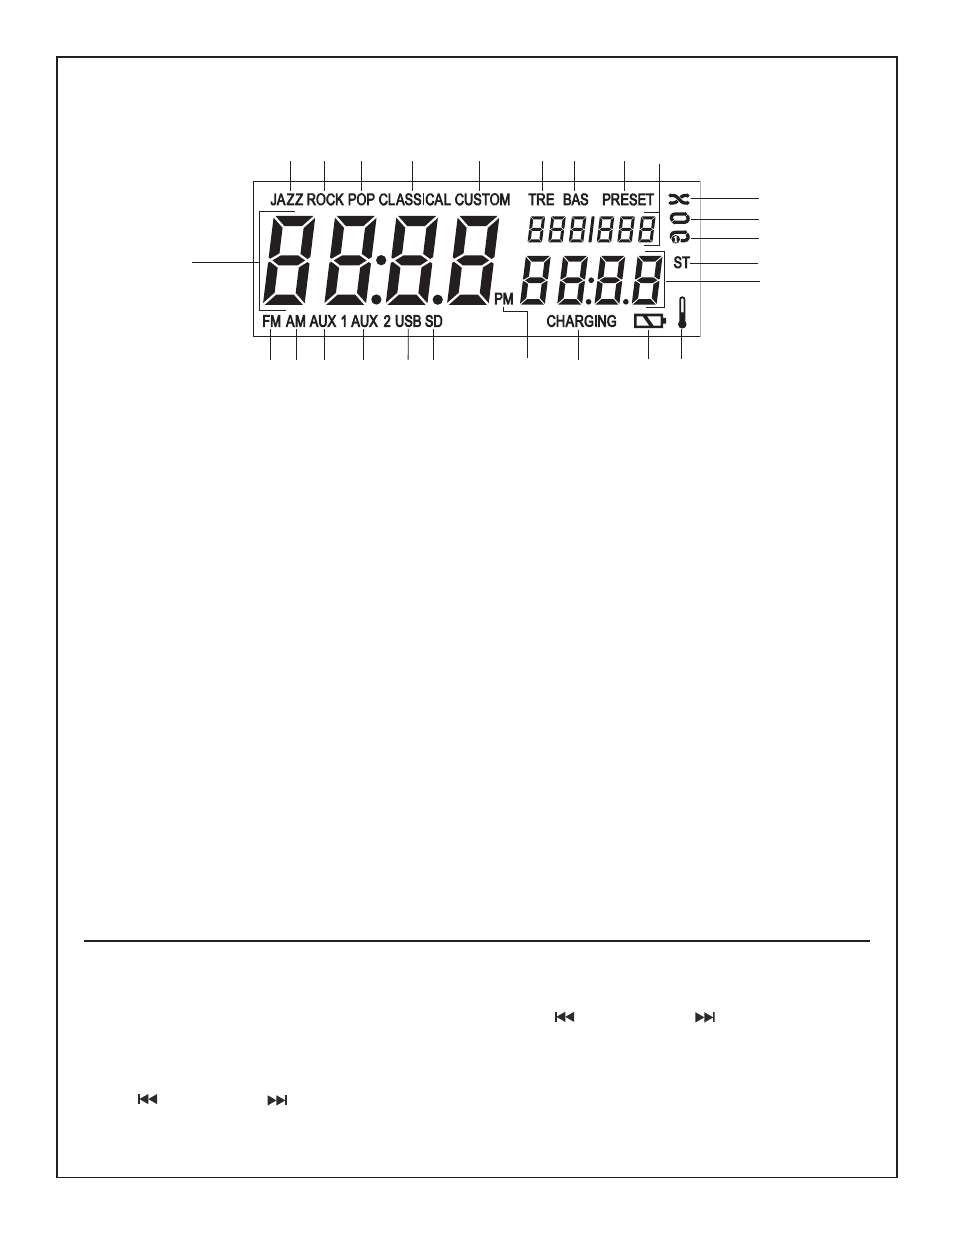
LCD Display
1. JAZZ – Illuminates when Jazz is selected in Equalizer.
2. ROCK – Illuminates when Rock is selected in Equalizer.
3. POP – Illuminates when Pop is selected in Equalizer.
4. CLASSICAL – Illuminates when Classical is selected in
Equalizer.
5. CUSTOM – Illuminates when Custom is selected in
Equalizer or when Custom button is pressed.
6. NUMERIC – Shows the clock time once it has been set
and the radio station during tuning.
7. ST (STEREO) – Illuminates when the radio station is
broadcasting in Stereo channel.
8. NUMERIC – Shows FM or AM station frequency in tuner
mode, or running time of digital music track.
9. CHARGING – Flashes when the unit is charging the
battery.
10. BATTERY icon – Indicates that a battery is in the unit. This
icon flashes when the battery is almost dead.
11. FM – Indicates FM band in tuner mode.
12. AM – Indicates AM band in tuner mode.
13. AUX 1 – Illuminates when you select AUX 1 mode for
playing external media player device.
14. AUX 2 – Illuminates when you select AUX 2 mode for
playing external media player device (inside Digital Media
Bay).
15. NUMERIC – Shows the number of a preset radio station in
tuner mode, or the track being played and number of tracks
stored on your USB or SD/MMC card device.
16. PRESET – Illuminates when preset radio station is
selected and flashes when setting station presets to
memory.
17. SD – (SD/MMC Card) Illuminates when you select
SD/MMC Card mode.
18. USB – Illuminates when you select USB mode.
19. BAS – Illuminates when you set the desired Bass level.
20. TRE – Illuminates when you set the desired Treble level.
21. RANDOM – Icon Illuminates when in Random mode (USB
and SD/MMC devices only).
22. REPEAT FOLDER – Icon illuminates when in Repeat
Folder mode (USB and SD/MMC devices only).
23. TRACK REPEAT – Icon illuminates when in Track Repeat
mode (USB and SD/MMC devices only).
24. PM – Illuminates when time setting is in PM mode.
25. TEMPERATURE icon - When the radio unit is NOT
plugged into a 120V power source, but a battery is installed
properly in the battery/charger bay, this icon will illuminate
and flash if the battery temperature is too hot
(approximately 50 celsius or more) or too cold
(approximately -10 celsius or less). If the battery
temperature exceeds 70 celsius, the radio unit will shut
down in order to protect the battery from damage. When
the battery temperature reaches the normal operating
temperature range (see Battery/Charger Rules), the radio
unit can be powered on and resume normal function. The
TEMPERATURE icon will NOT illuminate or flash when
the radio unit is plugged into a 120V power source.
Setting the Clock
When the AC plug or the battery pack is inserted, the unit
defaults to standby mode and the LCD shows “12:00”.
Follow the steps below to set the correct local time.
1. Press and hold Clock button on the unit and “hour” is
activated and flashes.
2. Turn
/-Seek or Seek+/
to choose the correct hour
number. For “PM” setting, turn TUNE DIAL until “PM”
illuminates in the LCD display.
3. Press Clock button once to set the hour and “minute” is
activated and flashes.
4. Turn
/-Seek or Seek+/
to choose the correct
minute number.
5. Press CLOCK button once to save the clock setting.
Note: 2 AA batteries are needed to keep time current when
unit is not plugged in. Replace AA batteries when unit no
longer keeps proper time. (See charging AA clock battery
section.)
1
2
3
4
5
20
19
16
15
21
22
23
7
8
10
9
11 12 13
14
18 17
6
24
25