Tools for assembly & alignment, Unpacking & checking contents, Warning – Bosch 4410L User Manual
Page 10
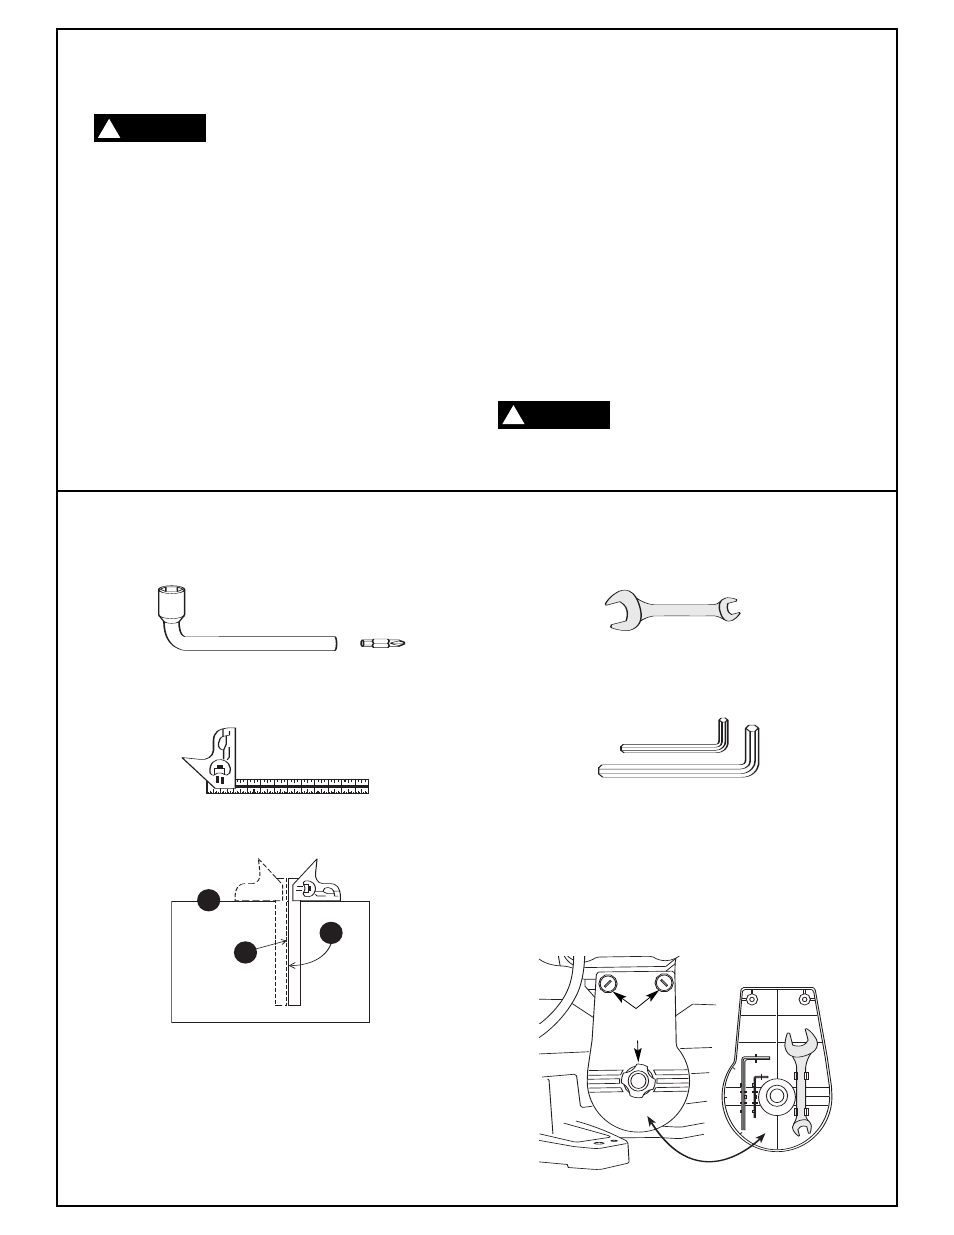
Tools for Assembly & Alignment
1
2
3
10mm/17mm Combination Open End Wrench
(supplied, see figure below)
Combination Square (not included)
1.5mm & 3mm Hex “L” Wrench
(supplied, see figure below)
Multi-Purpose Tool with Bit (4mm/Philips #2)
(supplied, stored on the right rear base)
Combination Square Must be True
1. Use the straight edge of a 3/4" thick board (this
edge must be perfectly straight).
2. Draw a line on the board along this edge.
3. There should be no gap or overlap when the
square is flipped over in dotted position.
Rear Cover Tool Storage
The Open End Wrench and Hex Wrenches are stored
on the inside rear cover of the saw. To remove the
cover, unscrew the two top and center thumb screws.
10.
Before moving the saw: Lock the
miter lock knob in 60° position. Lock
bevel lock handle. Pull the head assembly complete-
ly toward you and tighten the slide rail lock knob.
Lock head assembly in the down position.
Never carry the tool by the slide rails, this may
cause blade damage. Never carry the tool by the
cord or head assembly power switch handle.
Damage to insulation could cause an electric shock.
Damage to wire connections could cause a fire.
Your new Model 4410 Miter Saw is shipped complete
in one box, But you may need to make some adjust-
ments and alignments before cutting final work-
pieces.
Separate all parts from packing materials and check
each one with the “Check List of Loose Parts” to
make sure all items are accounted for before dis-
carding any packing material.
Check List of Loose Parts:
■
■
Quick- Action Clamp (Item #25 on page 8)
■
■
Dust Elbow/Dust Bag (Item #42 on page 9)
■
■
Multi Purpose Tool (See below)
■
■
Miter Lock Knob (Item #13 on page 8)
■
■
1.5mm Hex “L” Wrench (See below)
■
■
3mm Hex “L” Wrench (See below)
■
■
10mm/17mm Combination Open-End Wrench
(See below)
■
■
Arbor Laser / 3x Battery / Arbor Laser Manual
If any parts are missing, do not plug
in power cord or turn the switch on
until the missing parts are obtained and are installed
correctly.
WARNING
!
WARNING
!
Unpacking & Checking Contents
Thumb
Screws