Application examples, 1 using a mixing console, 2 using several b212a/b215a loudspeakers – Behringer B212A User Manual
Page 6: 3 direct connection of a stereo signal source, Installation
6
EUROLIVE B212A/B215A
3. APPLICATION EXAMPLES
Turn the LEVEL control fully to the left before you
switch on the unit with the POWER switch. Then,
raise the volume to a suitable level.
3.1 Using a mixing console
A common way to use 2 B212A/B215A loudspeakers is with a
mixing console. In this case, connect each of the main outputs
that are on the mixing console to a B212A/B215A loudspeaker.
The B212A/B215A includes XLR and 1/4" connectors. To avoid
interference, use only XLR or 1/4" jack cables.
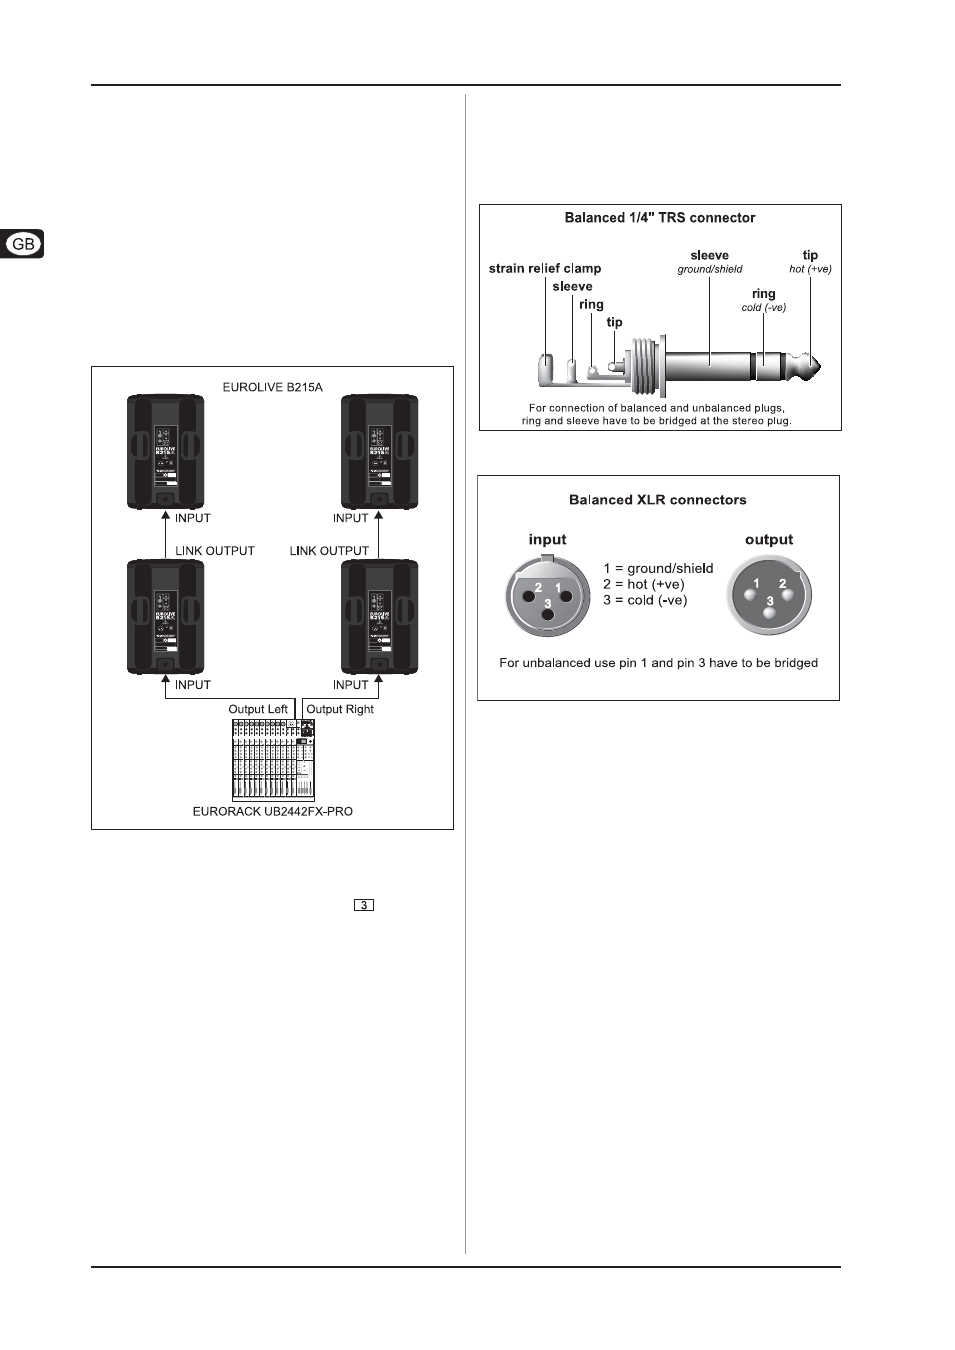
3.2 Using several B212A/B215A loudspeakers
Fig. 3.1: Wiring several B212A/B215A loudspeakers using
the LINK OUTPUT connector
For larger rooms, you can connect several B212A/B215A
speakers using the LINK OUTPUT connector
(see fig. 3.1).
3.3 Direct connection of a stereo signal source
When you use two B212A/B215A loudspeakers, you can directly
connect one stereo signal source, for example, a CD player. In
this case, each of the speakers is connected to 1 signal-source
output. (If necessary, use the appropriate adaptor.)
4. INSTALLATION
Both audio inputs of the BEHRINGER B212A/B215A and the LINK
OUTPUT connector are fully balanced. To maximize interference
compensation, try to establish balanced connections to other
equipment, whenever possible.
Fig. 4.1: 1/4" TRS connector
Fig. 4.2: XLR connector
Make sure that only competent people install your
B212A/B215A. They must be sufficiently earthed
during and after the installation process. Otherwise,
electrostatic discharges may negatively affect the
operating characteristics of your equipment.
4. INSTALLATION