Moving seedlings to your outdoor garden, Transplant seedlings – AeroGarden 507140-0000 AD User Manual
Page 16
Moving Seedlings to Your Outdoor Garden
(Continued)
15
Transplant Seedlings
Supplies needed:
A filled watering can
A narrow trowel
Your garden plan indicating seedling locations
Your Tray of hardened-off seedlings
To transplant seedlings, take entire Bowl and Tray outside.
Follow these 4 basic steps for each seedling until entire Tray is
planted:
1) Dig hole;
2) Remove seedling from Tray;
3) Place seedling in hole and fill; and
4) Water seedling.
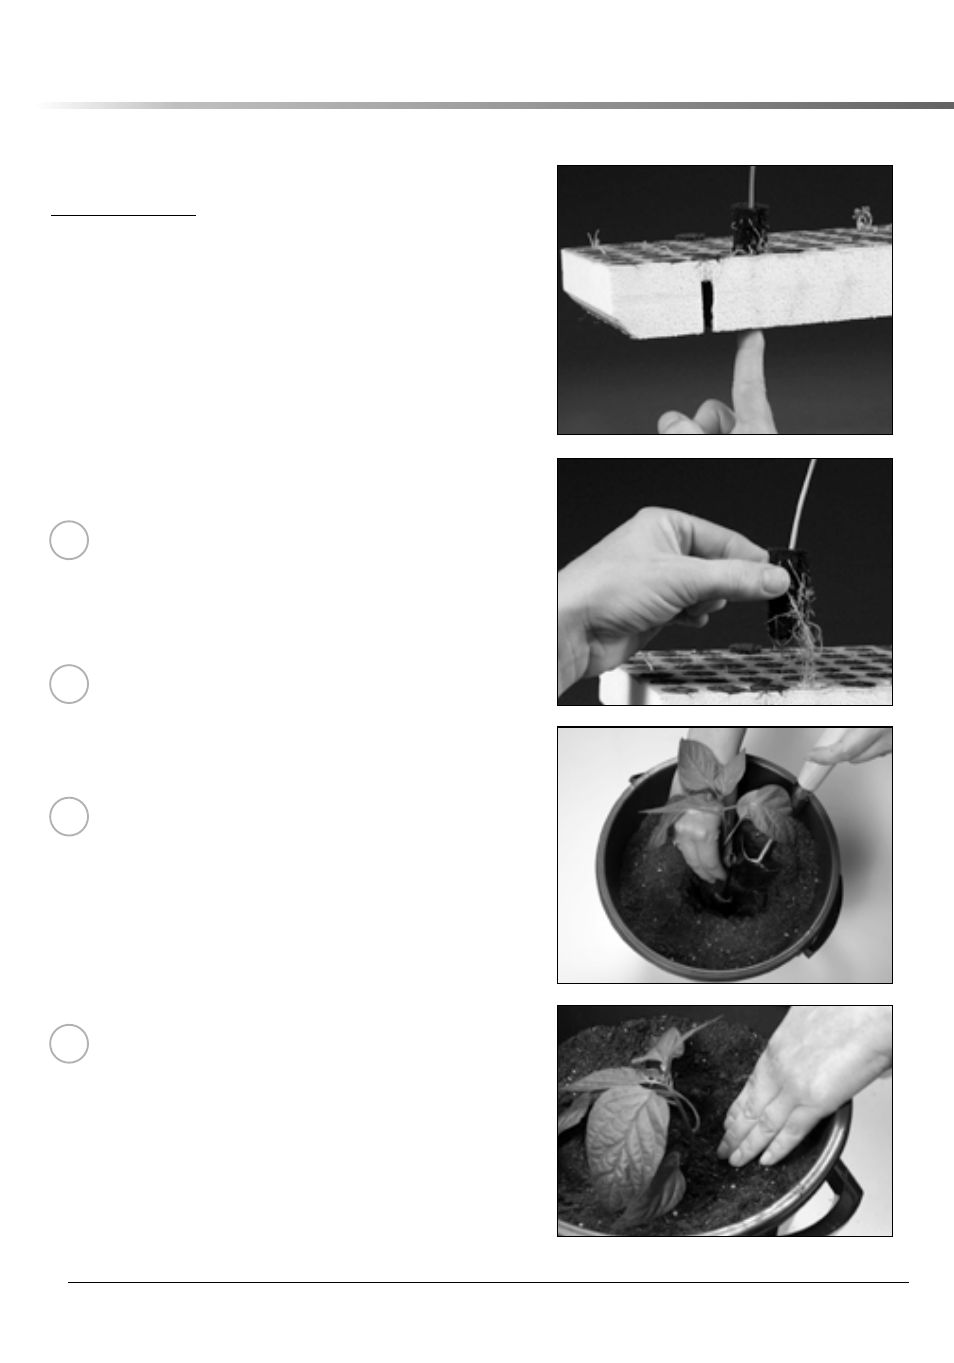
Remove Seedling from Tray
• Lift Tray from Bowl.
• With finger, gently push up on Grow Sponge bottom.
• Remove from Tray holding Grow Sponge – not plant.
• Return Tray to Bowl.
Dig Hole
• Insert trowel about 3” (7.6cm) into soil at marked
location.
• Pull trowel toward you to create an opening in soil
and leave trowel in soil…
Place Seedling in Hole and Fill
• With trowel still in soil, put Grow Sponge in hole so
its top is about ½” (1.2cm) below the surface.
• Hold Grow Sponge in place and pull out trowel.
• Fill with soil around, and to the top of Grow Sponge.
• Lightly press down soil to remove air pockets. At the
same time, make a shallow, bowl-shaped, depression
around base of seedling. This will help direct water
toward your plant.
Water Seedling
Water each seedling at its base by pouring 1 to 2 cups
(.23 to .47 liters) of water into depression immediately
after transplanting. (Do not pour water on top of delicate
seedling!).
Repeat these 4 steps until all seedlings from Tray are planted.
Once finished, go back and give each seedling another cup or
two of water.
1
2
3
4