Apple/mac configuration, Computer to av receiver or processor, Connections and configurations – Atlantic Technology WA-50 User Manual
Page 2: Av receiver or processor to subwoofer, Part 1: wa-50-t wireless transmitter
WA-50-t
Wireless Transmitter
WA-50-r
Wireless Receiver
Part 2: WA-50-r Wireless Receiver
Computer/Media Server Connections
PC Configurations
1. Connect supplied USB cables Mini-USB connector to the
WA-50-t
2. Select the “Zone” setting you wish to use when
transmitting audio to your WA-50-r wireless receiver.
3. Connect the standard USB connector to an open port on
your PC.
4. WA-50-t status light will rapidly alternate between
red and blue, finally settling on red after a 3-5 second
synchronization scan.
5. Your PC will automatically recognized the WA-50-t as
a USB Audio Device. Please allow your PC to finish the
installation process before proceeding. A message will
appear in the bottom right corner of your desktop stating
“Your new hardware is installed and ready to use.”
6. Your WA-50-t will is now configured as your computer or
media server's default audio playback device.
NOTE: It may be necessary to manually select USB Headset as the
default audio device under the audio tab of your computer's Sound
and Audio s Devices menu located in the computer's Control Panel.
Apple/Mac Configuration
1. Connect supplied USB cable's Mini-USB connector to the
WA-50-t.
2. Select the “Zone” setting you wish to use when
transmitting audio to your wireless receiver.
3. Connect the standard USB connector to an open port on
your Mac computer.
4. WA-50-t status light will rapidly alternate between red
and blue lights until it settles on red after a 3-5 second
synchronization scan.
5. Click on System Preferences and select “Sound” under the
“Hardware” menu.
6. Click “Output” and manually select “USB Headset”.
7. Your WA-50-t will now be configured as the default audio
play-back device on your Mac computer.
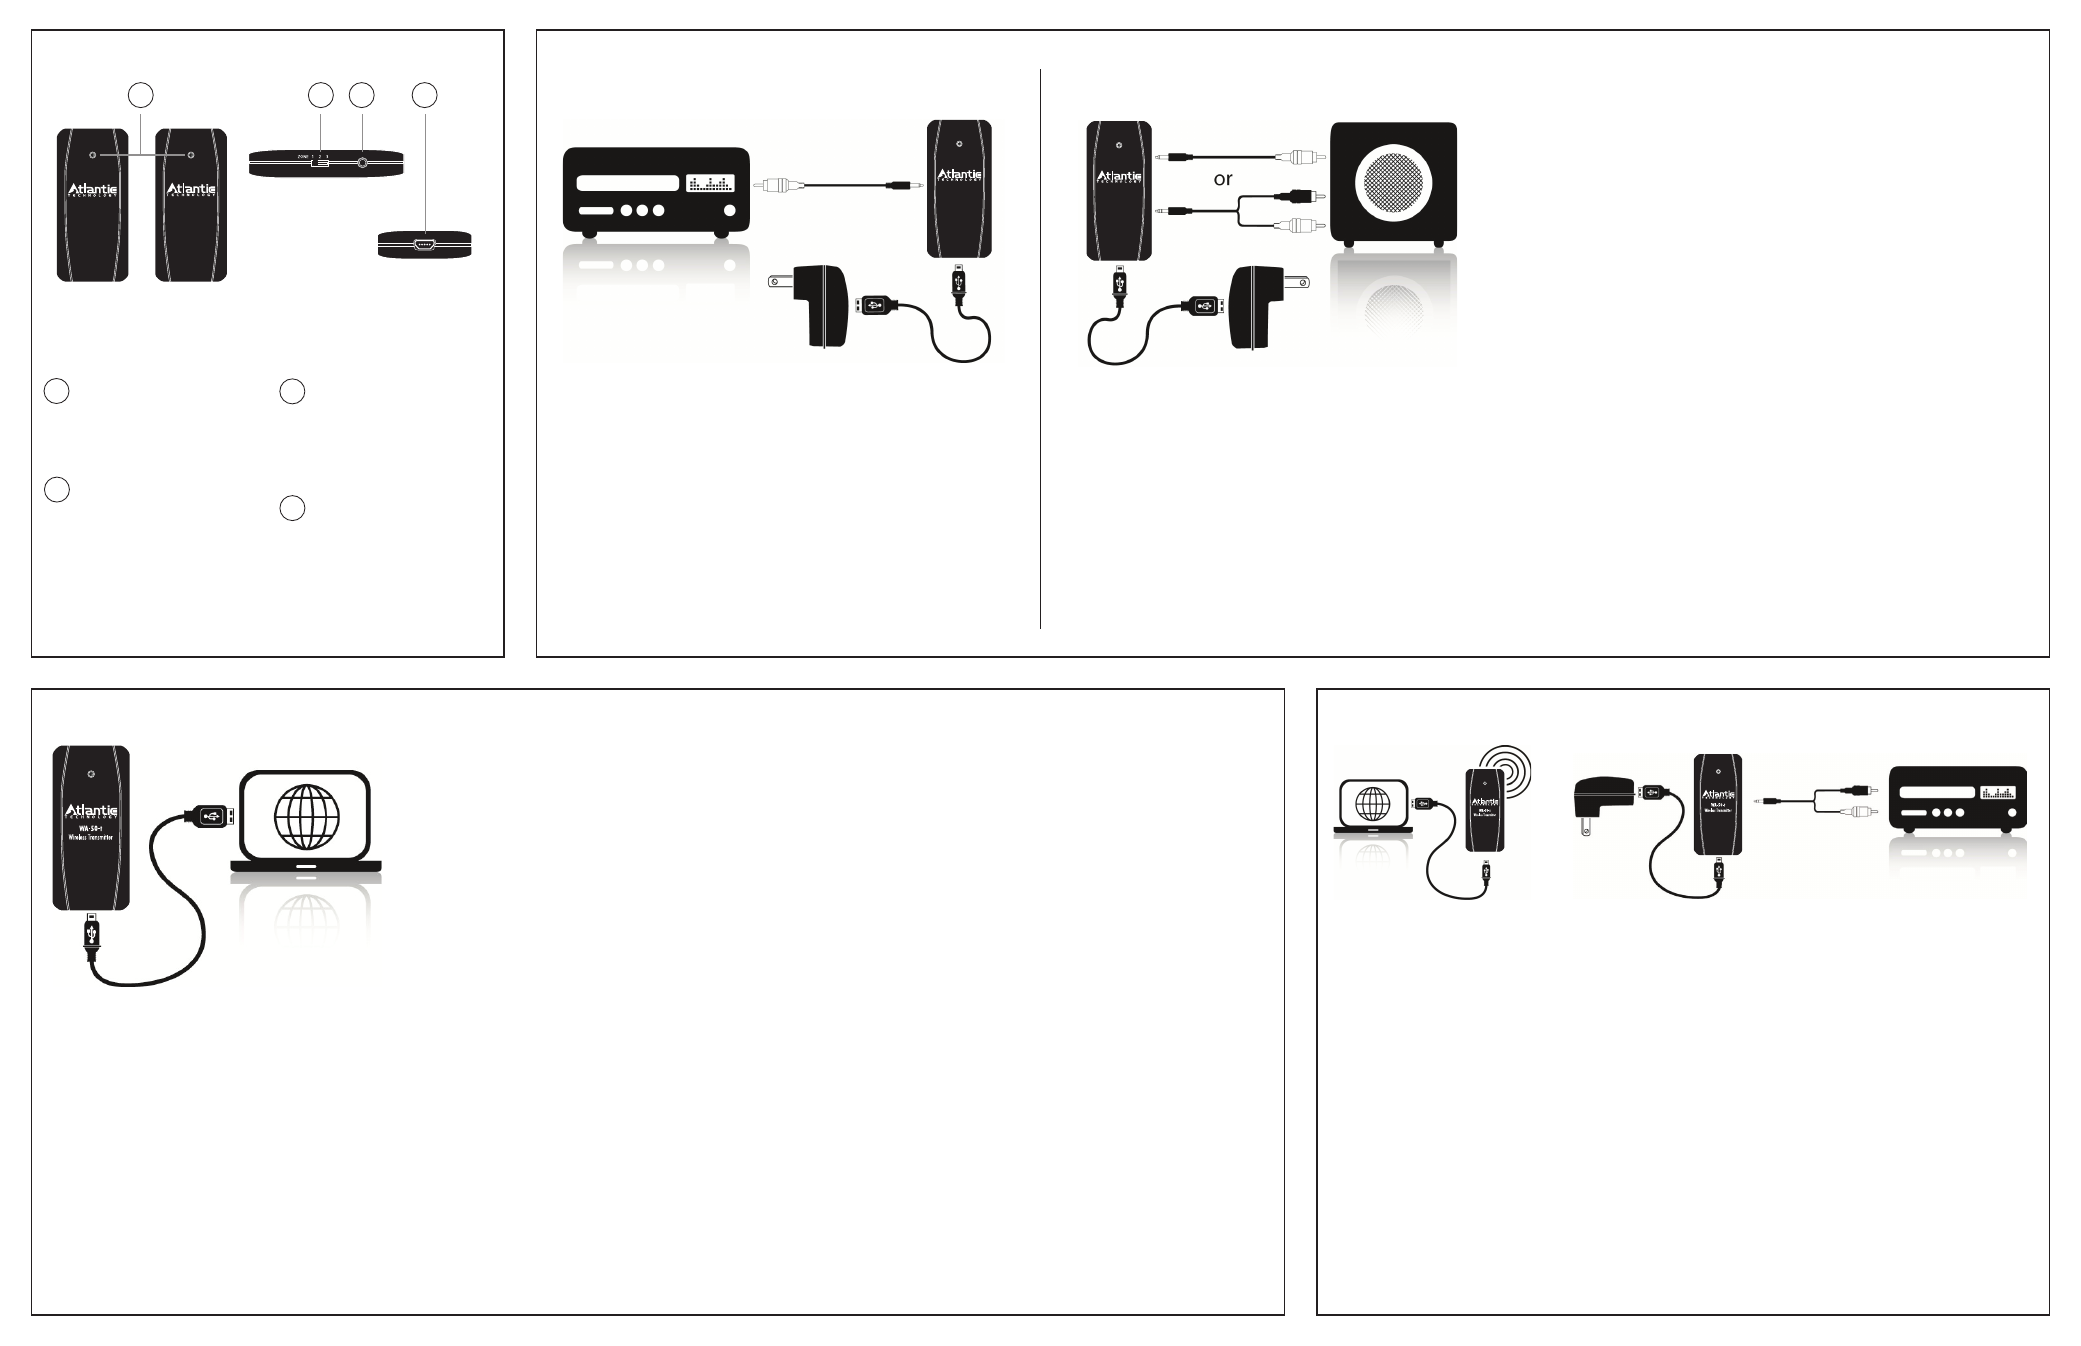
Now that your PC or Mac computer is configured to stream audio from the Atlantic Technology WA-50-t wireless transmitter,
you will now need to connect the WA-50-r to your audio system.
1. Connect supplied USB cable's Mini-USB connector to the WA-50-r.
2. Connect the standard USB connector to the supplied USB AC adapter.
3. Select the WA-50-r “Zone” setting that corresponds with the “Zone” setting used on your WA-50-t.
4. Connect the 1/8” stereo connector into the 1/8” stereo jack on the WA-50-r.
5. Connect the RCA cables to an unused input on your AV Receiver. Consult your receiver or processor
owner's manual for proper configuration of this input. (Note: Be certain that the power is turned off
on your AV Receiver prior to making audio connections.)
Connect the USB AC adapter to a power source and begin streaming audio!
Computer to AV Receiver or Processor
Status LED
Indicates power and synch
status between the WA-50-t
and WA-50-r wireless com-
ponents
Zone Switch
Three position switch the
sets the communication
channel between theWA-
50-t and WA-50-r wireless
components
1
4
3
2
Figure 1
1
2
WA-50-r
Wireless Receiver
WA-50-t
Wireless Transmitter
3
4
Connections and Configurations
Analog I/O Port
1/8” Analog Stereo I/O (input/
output) Port-Connect audio
cables here (not required when
using USB direct to a com-
puter or media server)
Mini USB Port
Connect supplied USB cable
here as well as to the supplied
power adapter or USB I/O on
your computer
WA-50-t
Wireless Transmitter
WA-50-r
Wireless Receiver
AV Receiver or Processor to Subwoofer
1. Connect supplied USB cable's Mini-USB connector to the WA-50-t.
2. Connect the standard USB connector to the supplied USB AC
adapter.
3. Select the “Zone” setting you wish to use when transmitting audio
to your wireless powered subwoofer.
4. Connect the 1/8” mono connector into the 1/8” stereo jack on the
WA-50-t.
5. Connect the Yellow RCA connector to your receiver or processor's
sub-woofer/LFE output.
Part 1: WA-50-t Wireless Transmitter
1. Connect supplied USB cable's Mini-USB
connector to the WA-50-r.
2. Connect the standard USB connector to the
supplied USB AC adapter.
3. Select the WA-50-r “Zone” setting that
corresponds with the “Zone” setting used
on your WA-50-t.
4. Connect the 1/8” mono connector into the
1/8” stereo jack on the WA-50-r for use
with an LFE/mono input on your powered
subwoofer, or the 1/8” Stereo connector
for powered subwoofers with stereo RCA
inputs.
5. Connect the Yellow RCA connector
or Red/White stereo RCA connectors
to your powered subwoofer. Consult
your receiver/processor as well as your
subwoofer owner's manuals for the proper
configuration of your subwoofer.
6. You are now ready to enjoy your “wireless”
powered subwoofer!