Lenovo Erazer X510 Desktop User Manual
Page 43
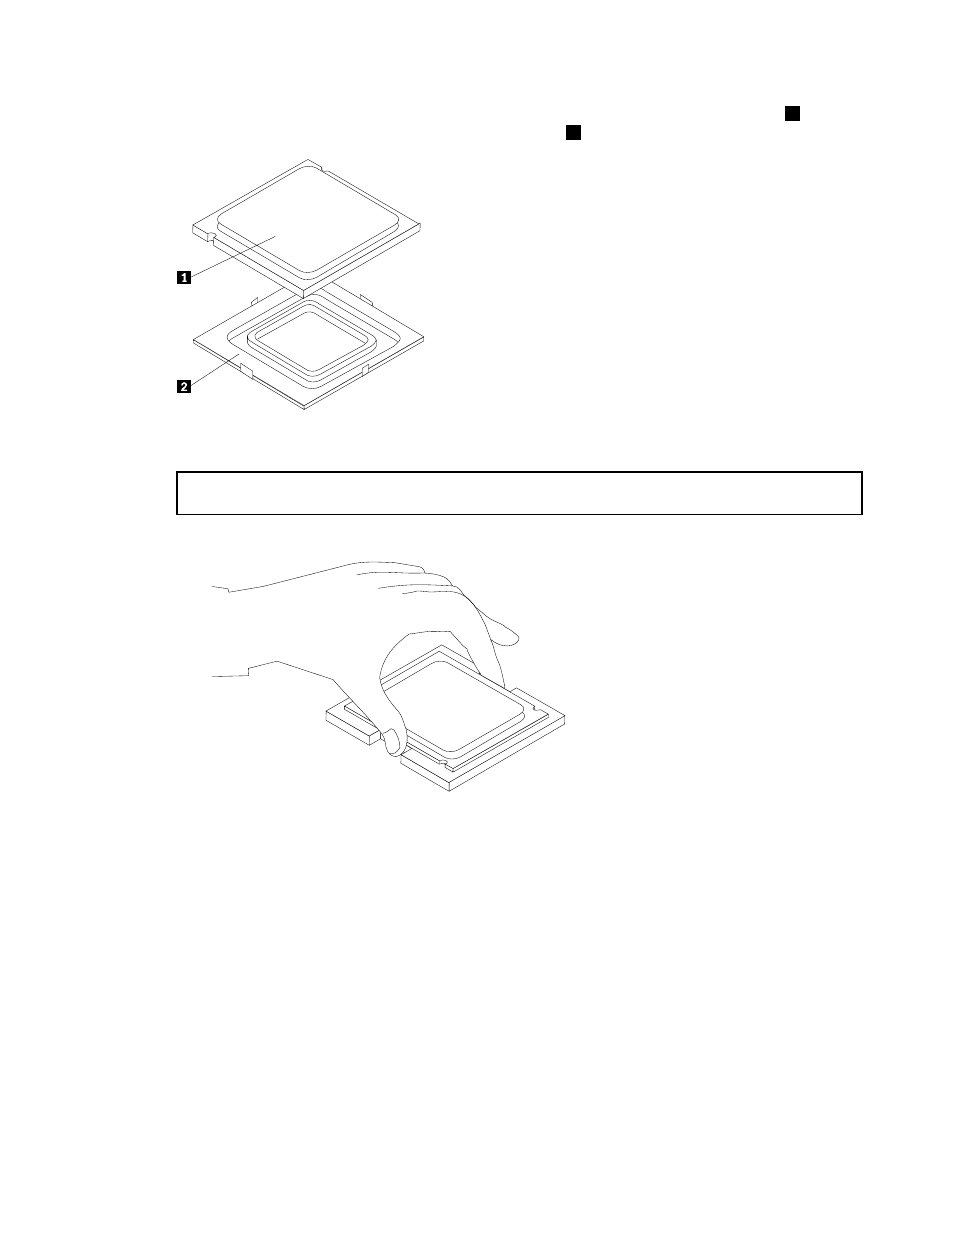
Step 7.
Holding the sides of the microprocessor with your fingers, remove the protective cover
1
that
protects the gold contacts on the new microprocessor.
2
Step 8.
Holding the sides of the microprocessor with your fingers, position the microprocessor so that the
notches on the microprocessor are aligned with the tabs in the microprocessor socket.
Important: To avoid damaging the microprocessor contacts, keep the microprocessor completely level
while installing it into the socket.
Step 9.
Lower the microprocessor straight down into its socket on the motherboard.
Step 10. To secure the microprocessor in the socket, close the microprocessor retainer and lock it into
position with the small handle.
Step 11. Use a thermal grease syringe to place 5 drops of grease on the top of the microprocessor. Each
drop of grease should be 0.03ml (3 tick marks on the grease syringe).
Chapter 8
.
Replacing hardware
37
- IdeaCentre B320 (1 page)
- IdeaCentre B310 (64 pages)
- IdeaCentre B325 (27 pages)
- IdeaCentre B325 (53 pages)
- IdeaCentre Q150 (33 pages)
- H320 Desktop (47 pages)
- C325 (47 pages)
- IdeaCentre A320 (57 pages)
- IdeaCentre K320 (43 pages)
- H330 Desktop (49 pages)
- IdeaCentre K320 (37 pages)
- 3000 H Series (41 pages)
- 6077 (80 pages)
- 1048 (130 pages)
- 5023 (94 pages)
- 5053 (78 pages)
- 6393 (68 pages)
- THINKSTATION S10 (4 pages)
- THINKSTATION D10 (58 pages)
- 3856 (154 pages)
- 3000 J (90 pages)
- THINKSTATION 4157 (66 pages)
- THINKSTATION 4158 (74 pages)
- Think 6429-16x (4 pages)
- THINKSERVER 387 (248 pages)
- 0B39663 (52 pages)
- ThinkVision E50 (62 pages)
- TD230 (3 pages)
- 3000 J Series (96 pages)
- 6522 (216 pages)
- 1045 (140 pages)
- 6436 (88 pages)
- TS200V (96 pages)
- 1040 (26 pages)
- 4013 (94 pages)
- IdeaCentre D400 (1 page)
- 6447 (112 pages)
- THINKSERVER 3823 (304 pages)
- THINKSTATION S10 (62 pages)
- Think 5500 Series (2 pages)
- 3650 (98 pages)
- 6491 (98 pages)
- 6434 (96 pages)
- 6432 (284 pages)
- H320 Desktop (35 pages)