Caring for your monitor, Preparing the monitor for wall-mounting, Preparing the monitor for wall-mounting -9 – Lenovo LI1920 Wide Monitor User Manual
Page 17
Caring for your monitor
Be sure to turn off the power before you perform any maintenance on the monitor.
Do not:
• Apply water or liquid directly to your monitor.
• Use solvents or abrasives.
• Use flammable cleaning materials to clean your monitor or any other electrical
equipment.
• Touch the screen area of your monitor with sharp or abrasive items. This type of
contact may cause permanent damage to your screen.
• Use any cleaner which contains an anti-static solution or similar additives. This
may harm the coating of the screen area.
Do:
• Lightly dampen a soft cloth with water and use this to gently wipe the covers and
the screen.
• Remove grease or finger marks with a damp cloth and a little mild detergent.
LCD wall-mounting instructions:
1.The gap between the installation holes on the back of the
LCD is
75 *75mm. There should have corresponding position of holes on
the wall-mounting plate.
2.The installation holes on the back of the LCD should be
of
regular M4 thread. Select the corresponding screws to use.
3.The effective depth of the threaded holes on the back of the
LCD is
8 mm, the length of the thread of the fixing screw is recommended
as follows: L = 8 mm + installation plate thickness - (1~2) mm.
4.Remove the base and the support. See descriptions on the above illustration.
5.Insert the screw for fixing through the round hole on the wall-mounting plate and
screw it onto the installation hole on the back of the LCD and then tighten it.
6.There are four fixing screws.
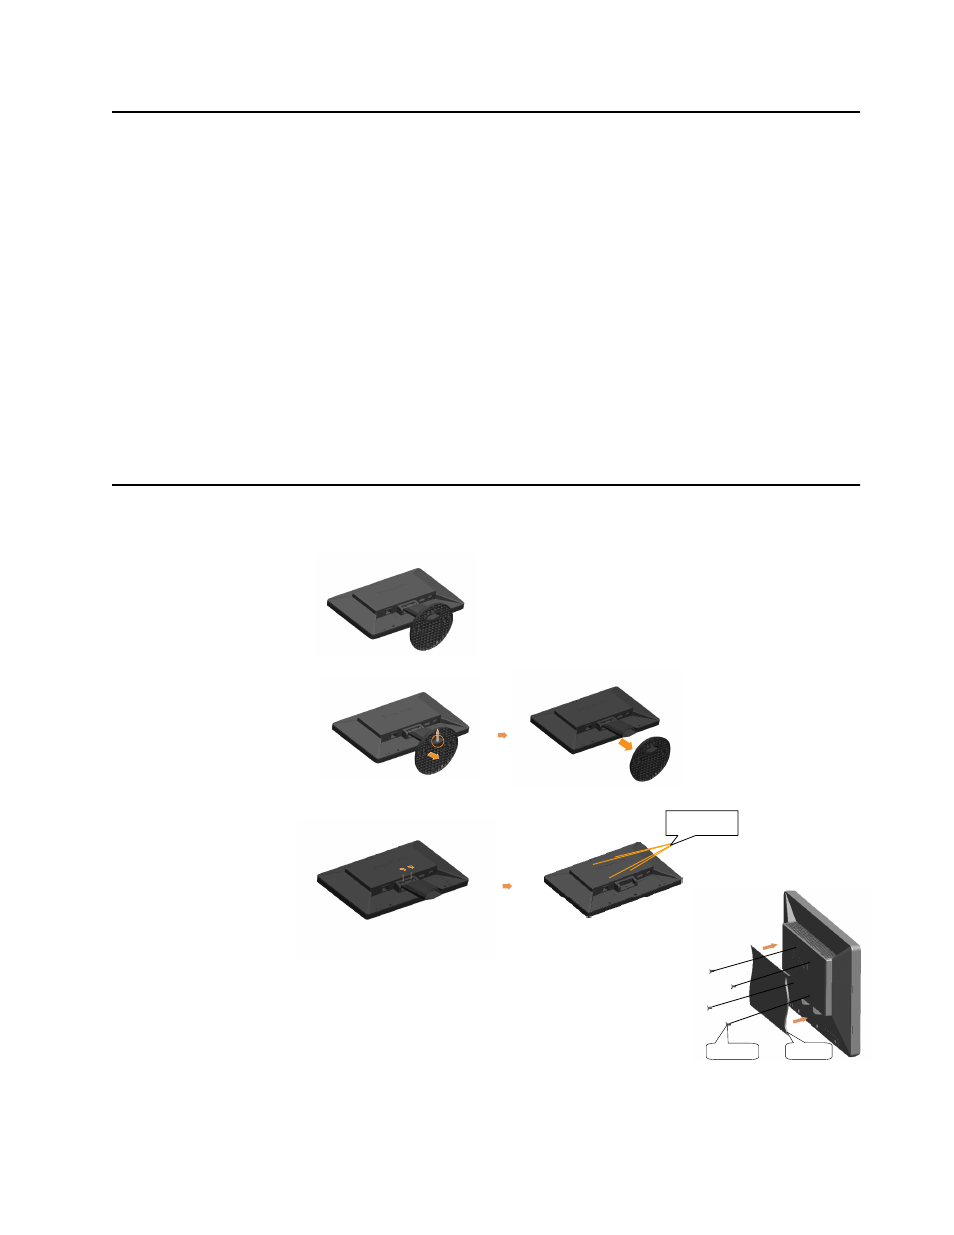
Step 1: Put the display on a flat table with the back side up.
the VESA mounting rack.
VESA holes
Preparing the monitor for wall-mounting
Chapter 2. 2-9
Detaching the monitor stand:
Step 3: Remove the two screws counterclockwise, take off the bracket, and install
Step 2: Lift up the hook shown as following figure, meanwhile pull the base away
from the stand.
Secure the screws
(4 screws)
Wall-mount the
installation plate